
Important Safety Instructions
Please read all instructions carefully before using your KRUPS Espresso Mini 963. Retain this manual for future reference. Failure to follow these instructions may result in electric shock, fire, or serious injury.
- Do not immerse the appliance, power cord, or plug in water or other liquids.
- Ensure the voltage indicated on the appliance corresponds to your main voltage.
- Close supervision is necessary when any appliance is used by or near children.
- Unplug from outlet when not in use and before cleaning. Allow to cool before putting on or taking off parts, and before cleaning the appliance.
- Do not operate any appliance with a damaged cord or plug, or after the appliance malfunctions or has been damaged in any manner.
- Do not use outdoors.
- Avoid contact with moving parts.
- Do not place on or near a hot gas or electric burner, or in a heated oven.
- Always attach plug to appliance first, then plug cord into the wall outlet. To disconnect, turn any control to "off", then remove plug from wall outlet.
- Do not use appliance for other than intended household use.
- Scalding may occur if the lid is removed during the brewing cycle.
- The appliance is not intended for use by persons (including children) with reduced physical, sensory or mental capabilities, or lack of experience and knowledge, unless they have been given supervision or instruction concerning use of the appliance by a person responsible for their safety.
Product Overview
The KRUPS Espresso Mini 963 is designed to prepare delicious espresso and cappuccino beverages. Familiarize yourself with its components before operation.

Figure 1: KRUPS Espresso Mini 963 Coffee Maker. This image shows the espresso machine in its original packaging, highlighting its compact design and the included glass carafe.

Figure 2: Front view of the KRUPS Espresso Mini 963. This image displays the front of the espresso machine, showing the steam wand on the left, the filter holder area, and the power switch at the base.
Components
- Water Reservoir: Located at the top, for filling with fresh water.
- Filter Holder: Where ground coffee is placed.
- Steam Wand: For frothing milk.
- Control Knob: To select brewing or steaming functions.
- Power Switch: On/Off control.
- Drip Tray: Collects excess liquid.
- Glass Carafe: For collecting brewed espresso.

Figure 3: KRUPS Espresso Mini 963 Accessories. This image shows various accessories including the portafilter (filter holder), measuring spoon, drip tray grid, and different filter baskets.
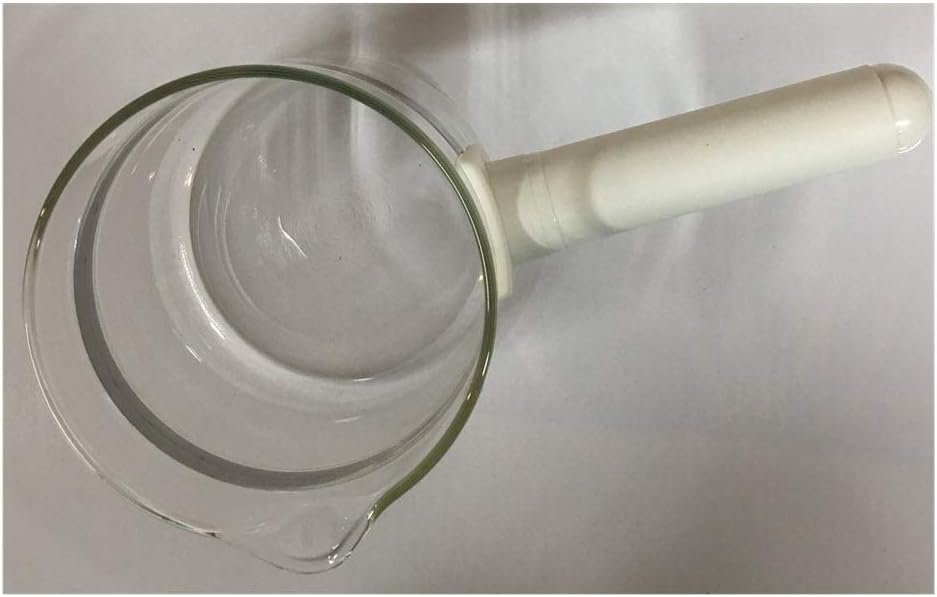
Figure 4: Glass Carafe. This image displays the glass carafe with a handle, used for collecting brewed espresso.
Setup and First Use
1. Unpacking and Initial Cleaning
- Remove all packaging materials and promotional labels from the espresso machine.
- Wash the glass carafe, filter holder, and filter basket in warm, soapy water. Rinse thoroughly and dry.
- Wipe the exterior of the machine with a damp cloth. Do not immerse the main unit in water.
2. Preparing for First Use (Priming)
Before brewing coffee, it is essential to prime the machine to remove any manufacturing residues and ensure proper water flow.
- Fill the water reservoir with fresh, cold water up to the "MAX" level.
- Place the glass carafe on the drip tray.
- Ensure the filter holder is empty and securely attached to the machine.
- Plug the machine into a suitable electrical outlet.
- Turn the power switch to the "ON" position.
- Turn the control knob to the "BREW" position and allow water to flow through the filter holder into the carafe until the reservoir is empty.
- Turn the power switch "OFF" and discard the water. Your machine is now primed and ready for use.
Operating Instructions
1. Making Espresso
- Ensure the machine is clean and primed.
- Fill the water reservoir with fresh, cold water to the desired level for the number of espresso shots.
- Place the appropriate filter basket (single or double shot) into the filter holder.
- Add finely ground espresso coffee to the filter basket. Use the measuring spoon provided (approximately one level spoon per shot). Tamp the coffee gently but firmly.
- Securely attach the filter holder to the machine by twisting it firmly to the right until it locks into place.
- Place the glass carafe or espresso cups on the drip tray beneath the filter holder.
- Turn the power switch to "ON". The machine will begin to heat up.
- Once the machine is heated (indicator light may illuminate or turn off, refer to specific model details if available), turn the control knob to the "BREW" position.
- Espresso will begin to flow into the carafe/cups. Turn the control knob back to the "OFF" position once the desired amount of espresso has been brewed.
- Turn the power switch "OFF" and carefully remove the filter holder. Discard used coffee grounds.
2. Frothing Milk for Cappuccino/Latte
The steam wand allows you to froth milk for creamy cappuccinos and lattes.
- Ensure the water reservoir has sufficient water.
- Fill a metal frothing pitcher with cold milk (dairy or non-dairy) to about one-third full.
- Turn the power switch to "ON".
- Once the machine is heated, turn the control knob to the "STEAM" position. Allow the machine to build steam pressure.
- Position the steam wand just below the surface of the milk in the pitcher.
- Slowly lower the pitcher as the milk froths, keeping the tip of the wand near the surface to incorporate air.
- Once the milk has reached the desired volume and temperature (approximately 150-160°F or 60-70°C), turn the control knob back to the "OFF" position.
- Immediately wipe the steam wand with a damp cloth to prevent milk residue from drying.
- Pour frothed milk over your freshly brewed espresso.
Maintenance and Cleaning
Regular cleaning ensures optimal performance and extends the life of your espresso machine.
1. Daily Cleaning
- Filter Holder and Filter Basket: After each use, remove the filter holder, discard coffee grounds, and rinse the filter holder and basket under warm water. Use a small brush to remove any stubborn coffee residue.
- Glass Carafe: Wash the carafe with warm, soapy water after each use.
- Drip Tray and Grid: Empty and rinse the drip tray and grid daily.
- Steam Wand: Immediately after frothing milk, wipe the steam wand with a damp cloth. If the nozzle is blocked, use a small pin to clear the opening.
- Exterior: Wipe the exterior of the machine with a soft, damp cloth.
2. Descaling
Mineral deposits from water can build up over time, affecting performance. Descale your machine every 2-3 months, or more frequently if you have hard water.
- Prepare a descaling solution according to the descaler manufacturer's instructions, or use a mixture of white vinegar and water (1:1 ratio).
- Fill the water reservoir with the descaling solution.
- Place the glass carafe on the drip tray.
- Turn the power switch to "ON" and allow the machine to heat up.
- Turn the control knob to "BREW" and allow half of the solution to flow through.
- Turn the power switch "OFF" and let the machine sit for 15-20 minutes to allow the solution to work.
- Turn the power switch "ON" again and brew the remaining solution through the machine.
- Empty and rinse the water reservoir thoroughly.
- Fill the reservoir with fresh, cold water and run two full cycles of plain water through the machine to rinse out any descaling solution residue.
Troubleshooting
If you encounter issues with your KRUPS Espresso Mini 963, refer to the following table for common problems and solutions.
| Problem | Possible Cause | Solution |
|---|---|---|
| No water flow / Slow flow |
|
|
| Espresso is weak or watery |
|
|
| Milk not frothing properly |
|
|
| Machine leaks water |
|
|
Specifications
Technical details for the KRUPS Espresso Mini 963.
- Brand: KRUPS
- Model Name: 963
- Coffee Maker Type: Espresso Machine
- Operation Mode: Manual
- Voltage: 120 Volts
- Power: 800 Watts
- Color: White
- Included Components: Carafe, Filter, Milk Frother
- Item Weight: 5.3 pounds
- Package Dimensions: 18.2 x 9.3 x 9.1 inches
- Coffee Input Type: Ground Coffee
- UPC: 010942101772
- ASIN: B004OKNGYO

Figure 5: Product Label. This image shows a label with the model number 9630-71, UPC 010942101772, and electrical specifications (120 V).
Warranty and Support
For warranty information, service, or support, please contact KRUPS customer service. Keep your proof of purchase for any warranty claims.
You can find more information and contact details on the official KRUPS website or through your retailer.
Visit the official KRUPS store on Amazon: KRUPS Store


