
1. Introduction
This manual provides essential instructions for the safe and effective use of your Canon PowerShot A3300 IS digital camera. Please read this manual thoroughly before using the camera and keep it for future reference. The Canon PowerShot A3300 IS is a 16.0 Megapixel digital camera featuring a 5x wide-angle optical zoom lens with Optical Image Stabilizer, designed for capturing high-quality still images and 720p HD videos.
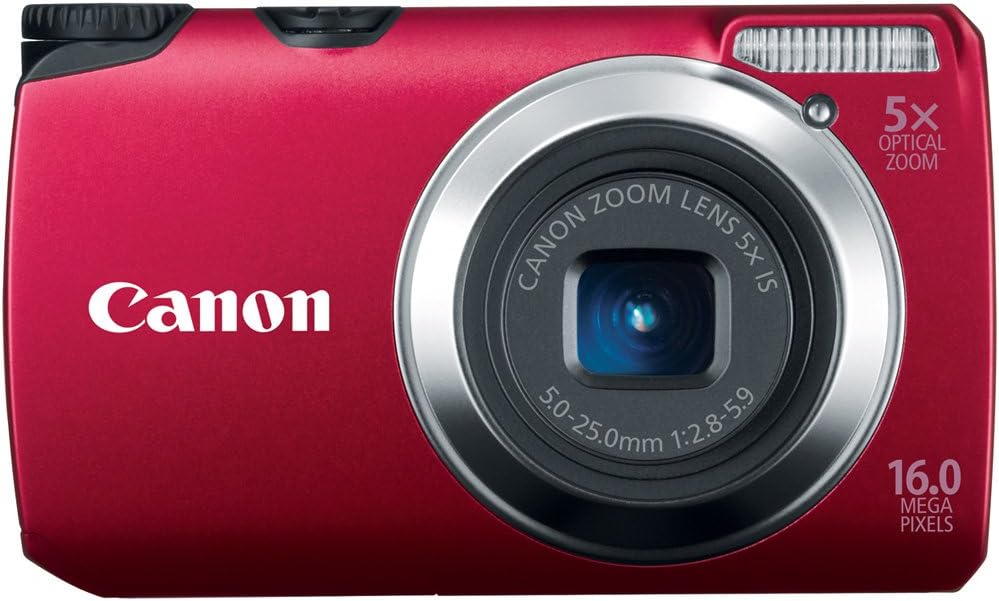
Figure 1.1: Front view of the Canon PowerShot A3300 IS digital camera, showcasing the lens and flash.
2. Safety Information
To ensure safe operation and prevent damage to your camera or injury to yourself and others, always observe the following precautions:
- Do not disassemble or modify the camera.
- Keep the camera away from water and moisture.
- Avoid exposing the camera to extreme temperatures or direct sunlight for extended periods.
- Use only Canon-approved batteries and accessories.
- Keep out of reach of children.
- Do not look at the sun or other strong light sources through the lens, as this may cause vision impairment.
3. Package Contents
Verify that all items are present in your camera package:
- Canon PowerShot A3300 IS Body
- Battery Pack NB-8L
- Battery Charger CB-2LA
- Wrist Strap WS-800
- AV Cable AVC-400
- USB Interface Cable IFC-400PCU
- Digital Camera Solution CD-ROM

Figure 3.1: Included accessories with the Canon PowerShot A3300 IS camera.
4. Initial Setup
4.1. Charging the Battery
- Insert the Battery Pack NB-8L into the Battery Charger CB-2LA.
- Plug the charger into a power outlet. The charging indicator light will illuminate.
- Once charging is complete, the indicator light will change or turn off. Remove the battery.
4.2. Inserting the Battery and Memory Card
- Open the battery/card compartment cover on the bottom of the camera.
- Insert the charged battery pack, ensuring correct orientation.
- Insert an SD/SDHC/SDXC memory card into the card slot until it clicks into place.
- Close the compartment cover securely.
4.3. Initial Power-On and Date/Time Setting
- Press the ON/OFF button to power on the camera.
- Follow the on-screen prompts to set the date, time, and time zone.
- Confirm your settings.
5. Operating the Camera
5.1. Basic Shooting
- Turn the camera on using the ON/OFF button.
- Select a shooting mode using the mode dial (e.g., Smart AUTO).
- Frame your shot using the 3.0-inch LCD screen.
- Press the shutter button halfway to focus, then press fully to take a picture.

Figure 5.1: Rear view of the camera, highlighting the LCD and control layout.
5.2. Zoom Operation
Use the zoom lever around the shutter button to adjust the optical zoom. Push the lever towards W for wide-angle and towards T for telephoto.
5.3. Shooting Modes
The mode dial allows selection of various shooting modes:
- Smart AUTO: Automatically detects the scene and applies optimal settings from 32 predefined situations.
- P (Program): Provides advanced exposure compensation features while maintaining automatic operation.
- Live View Control: Adjust brightness, color, and tone with easy-to-understand controls.
- Discreet Mode: Disables flash, AF assist beam, and all camera sounds for quiet environments.
- Creative Filters: Access special filter effects like Fisheye, Miniature, Toy Camera, Monochrome, Super Vivid, and Poster Effect.
- Movie: Records video.
5.4. Recording Videos
- Turn the mode dial to the Movie setting.
- Press the shutter button to start recording.
- Press the shutter button again to stop recording.
5.5. Image Playback
Press the Playback button (usually indicated by a triangle icon) to view your captured photos and videos on the LCD screen. Use the directional buttons to navigate through images.
6. Key Features
- 16.0 Megapixel CCD Sensor: Captures high-resolution images suitable for large prints and cropping.
- 5x Wide-Angle Optical Zoom (28-140mm equivalent): Provides versatility from wide landscapes to detailed telephoto shots.
- Optical Image Stabilizer: Reduces blur caused by camera shake, especially in low light or at telephoto settings.
- 3.0-inch LCD Screen: Large and clear display for framing shots and reviewing images, with Night Display for low-light viewing.
- DIGIC 4 Image Processor: Ensures fast processing and high image quality.
- 720p HD Video Recording: Capture high-definition video at 30 frames per second.
- Smart AUTO (32 Scenes): Automatically optimizes settings for various shooting conditions.
- Creative Filters:
- Fisheye Effect: Adds a classic barrel distortion.
- Miniature Effect: Blurs top and bottom to create a diorama-like appearance.
- Toy Camera Effect: Simulates photos from toy cameras with vignetting.
- Monochrome: Offers Black-and-White, Sepia, or Blue tones.
- Super Vivid: Intensifies colors for a vibrant look.
- Poster Effect: Reduces color gradations for a posterized appearance.
- Discreet Mode: Silences camera operations and disables flash/AF assist beam for unobtrusive shooting.
- Face Detection: Optimizes focus and exposure for faces in the frame.
- Red-eye Correction: Reduces red-eye in flash photography.
7. Maintenance
7.1. Cleaning the Camera
- Camera Body: Wipe with a soft, dry cloth. For stubborn dirt, use a cloth lightly dampened with water, then wipe dry.
- Lens: Use a lens blower to remove dust, then gently wipe with a lens cleaning cloth. Avoid touching the lens with your fingers.
- LCD Screen: Use a soft, dry cloth. Avoid pressing hard on the screen.
7.2. Storage
- When not in use for extended periods, remove the battery from the camera.
- Store the camera in a cool, dry, well-ventilated area, away from direct sunlight and high humidity.
- Use a desiccant (silica gel) in the storage container to absorb moisture.
8. Troubleshooting
If you encounter issues with your camera, refer to the following common problems and solutions:
| Problem | Possible Cause / Solution |
|---|---|
| Camera does not power on. | Battery is not charged or incorrectly inserted. Ensure battery is charged and inserted correctly. |
| Cannot take pictures. | Memory card is full, locked, or not inserted. Check card status, free space, or replace. |
| Images are blurry. | Camera shake, subject movement, or incorrect focus. Hold camera steady, use Optical Image Stabilizer, or check focus. |
| Flash does not fire. | Flash is set to OFF or Discreet Mode is active. Adjust flash settings or exit Discreet Mode. |
| Cannot connect to computer. | USB cable is not connected properly or drivers are not installed. Ensure secure connection and install drivers from the CD-ROM. |
9. Specifications
| Feature | Detail |
|---|---|
| Model Name | PowerShot A3300 IS |
| Image Sensor | 16.0 Megapixel, 1/2.3-inch CCD |
| Lens | 5x Optical Zoom (28-140mm equivalent), f/2.8-5.9 |
| Image Stabilization | Optical |
| Digital Zoom | 4x |
| LCD Monitor | 3.0-inch TFT Color LCD (approx. 230,000 dots) |
| Image Processor | DIGIC 4 with iSAPS technology |
| Video Recording | 720p HD (1280 x 720) at 30 fps |
| Storage Media | SD/SDHC/SDXC Memory Card |
| Connectivity | USB 2.0 Hi-Speed, AV Output |
| Battery | Rechargeable Lithium-ion Battery Pack NB-8L |
| Dimensions (W x H x D) | Approx. 3.74 x 2.23 x 0.98 inches (95.1 x 56.7 x 24.3 mm) |
| Weight | Approx. 5.25 oz. (149g) (CIPA standard) |
10. Warranty and Support
10.1. Warranty Information
This Canon product comes with a ONE YEAR limited warranty. For specific terms and conditions, please refer to the warranty card included in your product packaging or visit the official Canon website.
10.2. Customer Support
For technical assistance, service, or additional information, please contact Canon customer support. Contact details can be found on the Canon website or in the documentation provided with your camera.
You can also refer to the Digital Camera Solution CD-ROM for additional software and detailed electronic manuals.


