Introduction
This manual provides detailed instructions for the safe and efficient operation, maintenance, and troubleshooting of your De'Longhi BCO320T Combination Espresso and Drip Coffee Machine. Please read all instructions carefully before using the appliance and retain this manual for future reference.
Important Safety Instructions
- Read all instructions.
- Do not touch hot surfaces. Use handles or knobs.
- To protect against fire, electric shock, and personal injury, do not immerse cord, plugs, or appliance in water or other liquid.
- Close supervision is necessary when any appliance is used by or near children.
- Unplug from outlet when not in use and before cleaning. Allow to cool before putting on or taking off parts, and before cleaning the appliance.
- Do not operate any appliance with a damaged cord or plug or after the appliance malfunctions, or has been damaged in any manner. Return appliance to the nearest authorized service facility for examination, repair or adjustment.
- The use of accessory attachments not recommended by the appliance manufacturer may result in fire, electric shock, or personal injury.
- Do not use outdoors.
- Do not let cord hang over edge of table or counter, or touch hot surfaces.
- Do not place on or near a hot gas or electric burner, or in a heated oven.
- Always attach plug to appliance first, then plug cord into the wall outlet. To disconnect, turn any control to "off", then remove plug from wall outlet.
- Do not use appliance for other than intended use.
- Use extreme caution when disposing of hot steam.
- The appliance is equipped with a polarized plug.
Product Overview
Familiarize yourself with the components of your De'Longhi BCO320T machine.

- Drip Coffee Section: Includes water reservoir, filter basket, and glass carafe.
- Espresso Section: Features a portafilter, espresso carafe, and steam wand for frothing.
- Control Panel: Digital display, ON/OFF button, AROMA button, AUTO, hour, and minute buttons for programming.
- Warming Plate: Keeps drip coffee warm after brewing.
Setup and First Use
Unpacking
Carefully remove all packaging materials. Ensure all components are present and undamaged. Retain packaging for future transport if needed.
Initial Cleaning
- Wash the drip coffee carafe, espresso carafe, filter holder, and filter basket in warm, soapy water. Rinse thoroughly.
- Wipe the exterior of the machine with a damp cloth.
- Perform a rinse cycle for both the drip coffee and espresso sections without coffee to clean internal components.
Water Filling
Fill the respective water reservoirs for the drip coffee and espresso sections with fresh, cold water. Do not exceed the maximum fill line indicated on each reservoir.
Operating Instructions
Drip Coffee Preparation
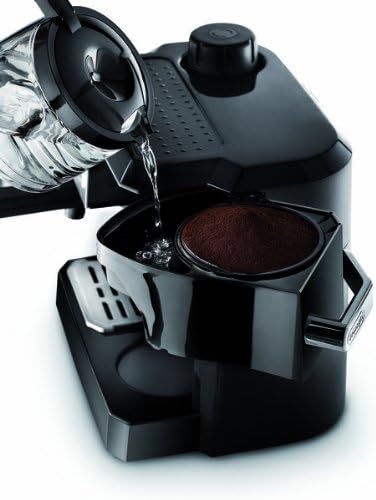
- Open the lid of the drip coffee section.
- Place a paper filter (cone type) into the filter basket.
- Add desired amount of ground coffee to the filter. Use approximately one scoop per cup.
- Fill the water reservoir with cold water to the desired number of cups.
- Close the lid and place the glass carafe on the warming plate.
- Press the ON/OFF button for the drip coffee side. The brewing process will begin.
- The machine will keep the coffee warm on the warming plate after brewing.
Espresso Preparation
- Fill the espresso water reservoir with cold water.
- Insert the filter holder into the group head and turn it to the right until it locks into place.
- Place the espresso carafe under the filter holder.
- Press the espresso ON/OFF button. Wait for the indicator light to show the machine is ready.
- Add ground espresso coffee to the filter basket. Tamp lightly.
- Re-attach the filter holder firmly.
- Turn the selector knob to the coffee icon to start brewing.
- Turn the selector knob back to the "0" position when the desired amount of espresso is brewed.
Frothing Milk
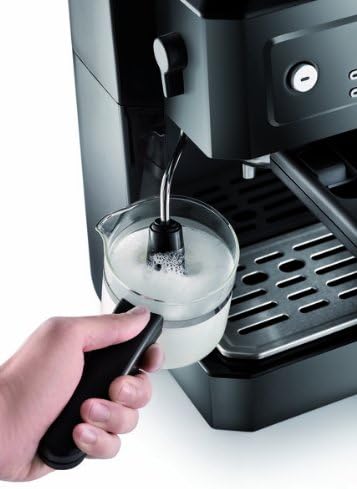
- Fill a pitcher with cold milk (dairy or non-dairy).
- Turn the selector knob to the steam icon. Wait for the steam indicator light to illuminate.
- Position the steam wand just below the surface of the milk.
- Slowly lower the pitcher as the milk froths, keeping the wand submerged.
- Once desired froth is achieved, turn the selector knob back to "0" and remove the pitcher.
- Clean the steam wand immediately after use with a damp cloth.
Care and Maintenance
Daily Cleaning
- Empty and rinse the drip tray.
- Wash the drip coffee carafe, espresso carafe, filter holder, and filter basket after each use.
- Wipe down the exterior of the machine with a soft, damp cloth.
- Clean the steam wand thoroughly after each use to prevent milk residue buildup.
Descaling
Regular descaling is essential to maintain machine performance and extend its lifespan. The frequency depends on water hardness and usage.
- Use a commercial descaling solution suitable for coffee machines, following the manufacturer's instructions.
- Fill the water reservoirs with the descaling solution and water mixture.
- Run the solution through both the drip coffee and espresso cycles.
- Rinse the machine thoroughly by running several cycles with fresh water.
Troubleshooting
| Problem | Possible Cause | Solution |
|---|---|---|
| Coffee not brewing (drip or espresso) | No water in reservoir; machine not turned on; clogged filter. | Fill water reservoir; ensure power is on; clean filter/portafilter. |
| Weak coffee | Insufficient coffee grounds; coarse grind; machine needs descaling. | Add more coffee; use finer grind; descale the machine. |
| Water leaking | Reservoir overfilled; components not properly seated. | Do not overfill water reservoirs; ensure carafes and filter holder are correctly positioned. |
| No steam from wand | Wand clogged; machine not heated to steam temperature. | Clean steam wand; wait for steam indicator light to illuminate. |
If problems persist, contact customer support.
Specifications
- Brand: De'Longhi
- Model: BCO320T
- Type: Combination Espresso and Drip Coffee Machine
- Color: Black
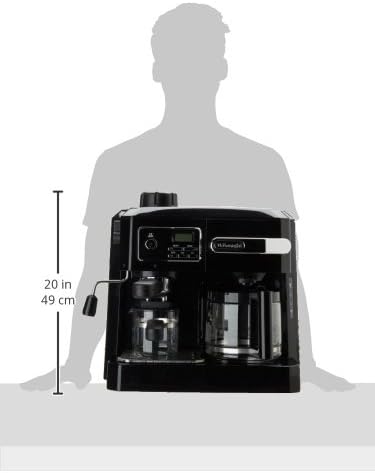
- Dimensions (L x W x H): 14.52 x 11.02 x 12.79 inches
- Item Weight: 11.3 pounds
- Operation Mode: Fully Automatic
- Special Feature: Programmable
- Included Components: Milk Frother
Warranty and Support
For warranty information and customer support, please refer to the warranty card included with your product or visit the official De'Longhi website. Keep your proof of purchase for warranty claims.
De'Longhi Official Website: www.delonghi.com


