Important Safety Instructions
When using electrical appliances, basic safety precautions should always be followed, including the following:
- Read all instructions before using the steamer.
- To reduce the risk of contact with hot water emitting from the steam vents, check appliance before each use by holding it away from body and operating steam button.
- Use appliance only for its intended use.
- To reduce the risk of electric shock, do not immerse the steamer in water or other liquids.
- Never yank cord to disconnect from outlet; instead, grasp plug and pull to disconnect.
- Do not allow cord to touch hot surfaces. Let appliance cool completely before putting away. Loop cord loosely around appliance when storing.
- Always disconnect appliance from electrical outlet when filling with water or emptying, and when not in use.
- Do not operate appliance with a damaged cord or if the appliance has been dropped or damaged. To avoid the risk of electric shock, do not disassemble the appliance. Contact Shark Customer Service for examination and repair. Incorrect reassembly can cause a risk of electric shock when the appliance is used.
- Close supervision is necessary for any appliance being used by or near children. Do not leave appliance unattended while connected.
- Burns could occur from touching hot metal parts, hot water, or steam. Use caution when you turn a steam appliance upside down – there may be hot water in the reservoir.
- To avoid a circuit overload, do not operate another high wattage appliance on the same circuit.
- Do not use an extension cord.
- This appliance is for household use only.
Product Components
The Shark Professional Portable Garment Steamer GS500 includes the following main components:
- Main Steamer Unit: The handheld device containing the water reservoir and heating element.
- Heated Wrinkle Eraser Technology: The steaming plate designed to remove wrinkles.
- Water Reservoir: For holding water to be converted into steam.
- Power Cord: For connecting to an electrical outlet.
- Vertical Press Pad: A collapsible pad designed to hang on a door, providing a surface for steaming garments.
- Fabric Brush Attachment: For use on heavier fabrics to help lift fibers and remove lint.
- Delicate Fabric Bonnet: For protecting delicate fabrics from direct steam contact.
- Crease Clip: To create crisp pleats and creases.
Setup and First Use
- Unpack: Carefully remove all components from the packaging.
- Fill Water Reservoir:
- Ensure the steamer is unplugged.
- Open the water reservoir cap.
- Fill the reservoir with distilled water up to the MAX fill line. Using distilled water helps prevent mineral buildup.
- Close the cap securely.
- Attach Accessories (Optional): If using the fabric brush or delicate fabric bonnet, attach it firmly to the steamer head.
- Prepare Steaming Area:
- For garments, hang the Vertical Press Pad over a door using the provided straps. Secure the garment to the pad using the clips.
- For other items like curtains or upholstery, ensure they are accessible and stable.
- Power On: Plug the steamer into a standard electrical outlet. The indicator light will illuminate, indicating the unit is heating up.
- Pre-heating: Allow the steamer to pre-heat for approximately 30-60 seconds until steam is consistently produced.
Operating Instructions
General Steaming Technique
- Hold the steamer upright, ensuring the water reservoir is below the steam head.
- Press the steam trigger to release steam.
- Hold the steamer head close to the fabric, moving it in a downward motion. For best results, gently pull the fabric taut with your free hand.
- The heated wrinkle eraser plate can be pressed directly against the fabric for more effective wrinkle removal, similar to ironing but without direct heat contact.
- Always test on an inconspicuous area of the fabric first, especially for delicate materials.
Steaming Garments with Vertical Press Pad
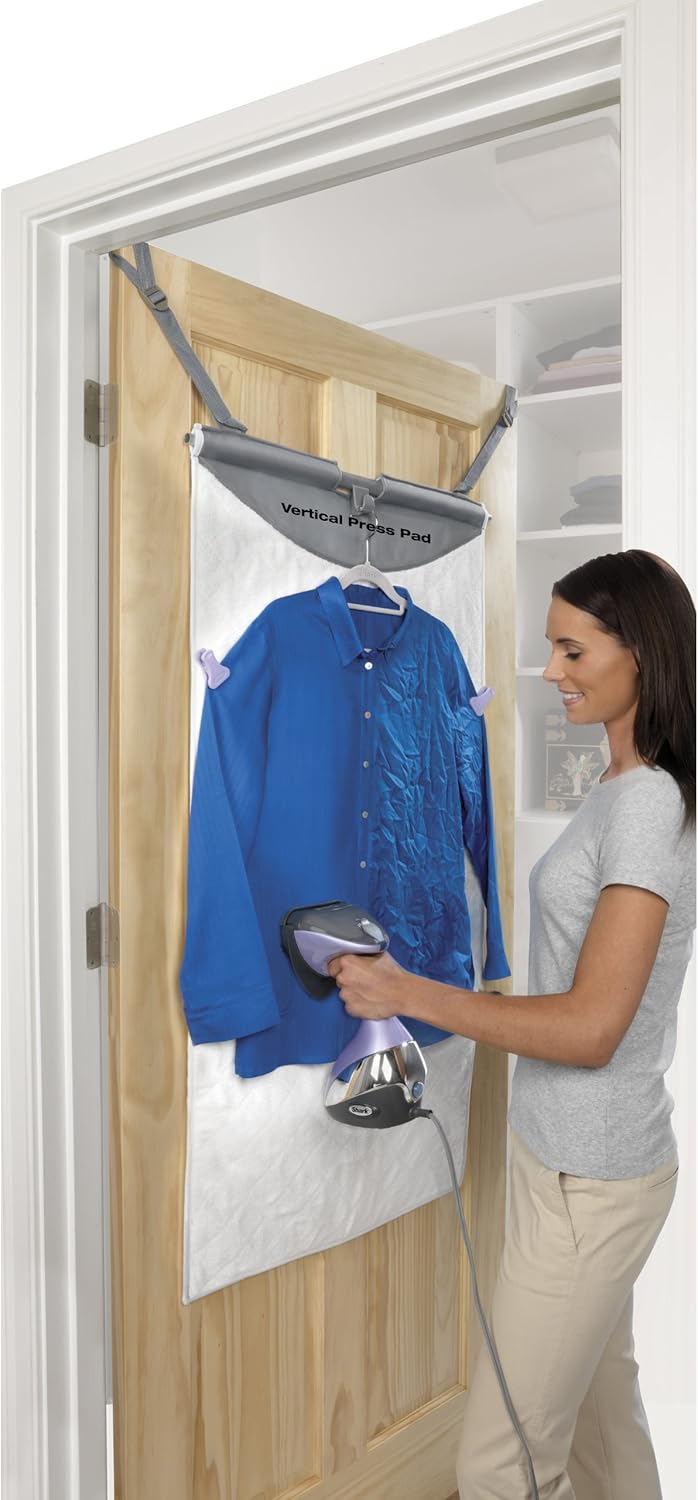
Image: A woman uses the Shark Professional Portable Garment Steamer to remove wrinkles from a blue shirt hanging on the included vertical press pad, which is suspended from a door.
- Hang the Vertical Press Pad securely over a door.
- Place the garment on a hanger and hang it on the hook of the press pad.
- Use the clips on the press pad to hold the garment taut.
- Steam the garment from top to bottom, pressing the heated plate gently against the fabric.
Steaming Curtains and Drapes

Image: A woman uses the Shark Professional Portable Garment Steamer to smooth wrinkles from a rust-colored curtain hanging in front of a window.
- Ensure curtains are hung properly.
- Hold the steamer head close to the fabric, moving it slowly from top to bottom.
- For stubborn wrinkles, apply gentle pressure with the heated plate.
Refreshing Upholstery and Bedding

Image: A woman uses the Shark Professional Portable Garment Steamer to refresh a white pillow on a bed, demonstrating its use on bedding.
- Hold the steamer a few inches away from the fabric surface.
- Move the steamer in a sweeping motion over the area to be refreshed.
- Do not saturate the fabric. Allow to air dry.
Care and Maintenance
Cleaning the Steamer
- Disconnect Power: Always unplug the steamer from the electrical outlet and allow it to cool completely before cleaning.
- Empty Water Reservoir: Open the water reservoir cap and carefully pour out any remaining water.
- Wipe Exterior: Wipe the exterior of the steamer with a soft, damp cloth. Do not use abrasive cleaners or solvents.
- Clean Steam Head: Use a cotton swab or a soft brush to gently clean around the steam vents if any mineral residue is visible.
- Descaling (if necessary): If you notice reduced steam output or mineral buildup, fill the reservoir with a mixture of 50% white vinegar and 50% distilled water. Let it sit for 30 minutes, then empty and rinse thoroughly with distilled water. Run a full reservoir of plain distilled water through the steamer to flush out any vinegar residue before steaming garments.
Storage
- Ensure the steamer is completely cool and dry before storing.
- Empty the water reservoir.
- Store the steamer in a cool, dry place, away from direct sunlight.
- Wrap the power cord loosely around the unit; do not wrap it tightly or kink it.
Troubleshooting
| Problem | Possible Cause | Solution |
|---|---|---|
| No steam or low steam output. |
|
|
| Water spitting or dripping from steam head. |
|
|
| Steamer not turning on. |
|
|
Product Specifications
| Feature | Detail |
|---|---|
| Model Number | GS500 |
| Brand | Shark |
| Type | Portable Garment Steamer |
| Wattage | 1580 watts |
| Product Dimensions | 8.8 x 12 x 13.5 inches |
| Item Weight | 6.4 pounds |
| Product Benefits | Wrinkle Removal |
| UPC | 622356529860, 622356529877, 622356537858 |
| Manufacturer | Shark |
| Assembly Required | No |
| Batteries Required | No |
| Country of Origin | Made in USA |
Warranty and Support
This product comes with a manufacturer's warranty. For detailed information regarding warranty coverage, terms, and conditions, please refer to the documentation included with your product at the time of purchase or visit the official Shark website.
For customer support, technical assistance, or to inquire about replacement parts, please contact Shark Customer Service. Contact details can typically be found on the product packaging or the official brand website.
Note: This refurbished product is tested and certified to look and work like new. The refurbishing process includes functionality testing, basic cleaning, inspection, and repackaging. The product ships with all relevant accessories, and may arrive in a generic box. Warranty terms for refurbished products may vary.