1. Introduction
Welcome to the instruction manual for your Vivitar 12.1MP Camera Kit. This manual provides essential information for setting up, operating, maintaining, and troubleshooting your new camera kit. Please read this manual thoroughly before using the product to ensure proper operation and to maximize your photographic experience.
The Vivitar 12.1MP Camera Kit is designed for ease of use, offering a 12.1-megapixel resolution for clear still images and 1080p video recording. The kit includes a durable hard-shell case, a neck strap, a 2GB SD card reader, and a tripod, providing a complete solution for your photography needs.
2. What's in the Box
Carefully unpack your Vivitar 12.1MP Camera Kit and ensure all items are present. If any items are missing or damaged, please contact customer support.
- Vivitar 12.1MP Digital Camera
- Durable Hard-shell Camera Carrying Case
- Neck Strap
- Tripod
- 2GB SD Card Reader
- USB Cable
- Rechargeable Lithium-Ion Battery
- Instruction Manual (this document)
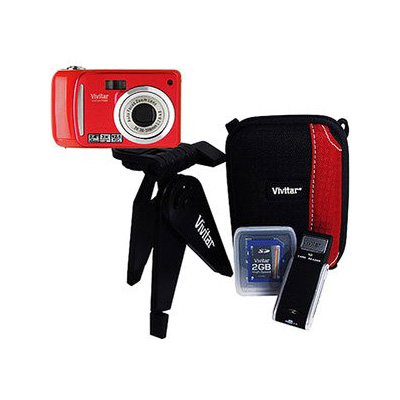
Image 1: Vivitar 12.1MP Camera Kit contents, including the camera, hard-shell case, and various accessories.
3. Setup
3.1. Battery Installation and Charging
- Locate the battery compartment on the camera, usually on the bottom or side.
- Open the compartment cover.
- Insert the provided Lithium-Ion battery, ensuring the correct orientation as indicated by the markings inside the compartment.
- Close the battery compartment cover securely.
- Connect the camera to a power source using the supplied USB cable to fully charge the battery before first use. The charging indicator light will typically turn off or change color when charging is complete.
3.2. Memory Card Insertion
The camera uses an SD (Secure Digital) memory card (not included with the kit, but a 2GB SD card reader is provided for external use). Ensure you have a compatible SD card for storing photos and videos.
- Locate the SD card slot on the camera, typically near the battery compartment.
- Insert the SD card with the metal contacts facing the correct direction, usually towards the front of the camera. Push gently until it clicks into place.
- To remove the SD card, push it in slightly until it springs out, then pull it out.
3.3. Attaching the Neck Strap
Thread the neck strap through the strap lugs on the sides of the camera. Ensure it is securely fastened to prevent accidental drops.
3.4. Tripod Setup
The included tripod provides stability for still shots and video recording.
- Extend the tripod legs to the desired height and lock them in place.
- Mount the camera onto the tripod's quick-release plate or screw mount, ensuring it is tightened securely.
- Adjust the camera's angle as needed using the tripod head.
4. Operating Your Camera
4.1. Power On/Off
Press and hold the power button (usually marked with a power symbol) to turn the camera on or off.
4.2. Taking Photos
- Turn on the camera.
- Frame your shot using the LCD screen.
- Press the shutter button halfway down to allow the camera to focus (Autofocus: Contrast Detection).
- Once focused, press the shutter button all the way down to capture the image.
4.3. Video Recording
- Switch the camera to video mode (refer to your camera's specific mode dial or menu).
- Press the record button (often a red dot or video camera icon) to start recording.
- Press the record button again to stop recording.
4.4. Mode Selection
Your camera offers various shooting modes to optimize your photos for different scenarios. These include:
- Automatic: For general point-and-shoot photography.
- Portrait: Optimizes settings for capturing people.
- Macro: For close-up shots of small subjects.
- Landscape: Enhances outdoor scenes.
- Sports: For capturing fast-moving subjects.
- Movie: For video recording.
- Underwater: Specific settings for underwater photography.
- Manual: Allows full control over exposure settings.
- Shutter Priority: Allows manual control of shutter speed.
- Panorama: For capturing wide panoramic scenes.
- Easy: Simplified settings for beginners.
- Custom: User-defined settings.
Refer to your camera's menu system to select the desired shooting mode.
4.5. Image Playback
To view your captured photos and videos, switch the camera to playback mode (usually indicated by a play icon). Use the directional buttons to navigate through your media.
4.6. Transferring Files
You can transfer files to a computer using two methods:
- USB Connection: Connect the camera to your computer using the provided USB cable. The camera should appear as a removable drive, allowing you to copy files.
- SD Card Reader: Remove the SD card from the camera and insert it into the 2GB SD Card Reader. Connect the reader to your computer's USB port to access the files.
5. Maintenance
5.1. Cleaning the Camera
- Camera Body: Wipe the camera body with a soft, dry cloth. For stubborn dirt, slightly dampen the cloth with water. Avoid harsh chemicals.
- Lens: Use a lens brush or a blower to remove dust. For smudges, use a specialized lens cleaning cloth and lens cleaning solution. Never touch the lens surface with your fingers.
- LCD Screen: Clean with a soft, lint-free cloth.
5.2. Storage
When not in use, store the camera in its durable hard-shell carrying case to protect it from dust, moisture, and physical damage. Store in a cool, dry place away from direct sunlight.
5.3. Battery Care
- Always use the original Vivitar battery and charger.
- Avoid exposing the battery to extreme temperatures.
- If storing the camera for an extended period, remove the battery.
6. Troubleshooting
If you encounter issues with your camera, refer to the following common problems and solutions:
| Problem | Possible Cause | Solution |
|---|---|---|
| Camera does not power on. | Battery is depleted or incorrectly inserted. | Charge the battery fully. Reinsert the battery correctly. |
| Cannot take photos/videos. | Memory card is full, locked, or not inserted. | Insert an SD card. Unlock the SD card. Delete unnecessary files or use a new card. |
| Photos are blurry. | Camera shake, incorrect focus, or dirty lens. | Hold the camera steady or use the tripod. Ensure the camera focuses before shooting. Clean the lens. |
| Video recording stops unexpectedly. | Memory card speed is too slow or card is full. | Use a higher-speed SD card. Ensure sufficient space on the card. |
| Camera freezes or becomes unresponsive. | Temporary software glitch. | Remove and reinsert the battery to reset the camera. |
If the problem persists after trying these solutions, please contact Vivitar customer support.
7. Specifications
Below are the key technical specifications for the Vivitar 12.1MP Camera Kit (Model: VT324-RED-KIT):
| Feature | Specification |
|---|---|
| Effective Still Resolution | 12.1 MP |
| Photo Sensor Technology | CMOS |
| Image Stabilization | Digital |
| Video Resolution | 1080p |
| Frame Rate | 24 FPS or higher |
| Supported File Format (Still) | JPEG, RAW |
| Supported File Format (Video) | AVC |
| Flash Memory Type | SD |
| External Memory Size (Reader) | 2 GB (for included reader) |
| Auto Focus Technology | Contrast Detection |
| Connectivity Technology | USB |
| Battery Cell Type | Lithium Ion |
| Enclosure Material | Hard-shell (for case) |
| Item Weight | 1.12 Pounds |
| Model Number | VT324-RED-KIT |
| UPC | 681066869703 |
8. Warranty Information
The Vivitar 12.1MP Camera Kit comes with a Lifetime Warranty. This warranty covers manufacturing defects and ensures the product's quality and durability under normal use. For specific terms and conditions, or to make a warranty claim, please refer to the official Vivitar website or contact their customer support directly.
9. Customer Support
For further assistance, technical support, or inquiries regarding your Vivitar 12.1MP Camera Kit, please visit the official Vivitar website or contact their customer service department. Contact information can typically be found on the manufacturer's website or on the product packaging.


