
1. Introduction
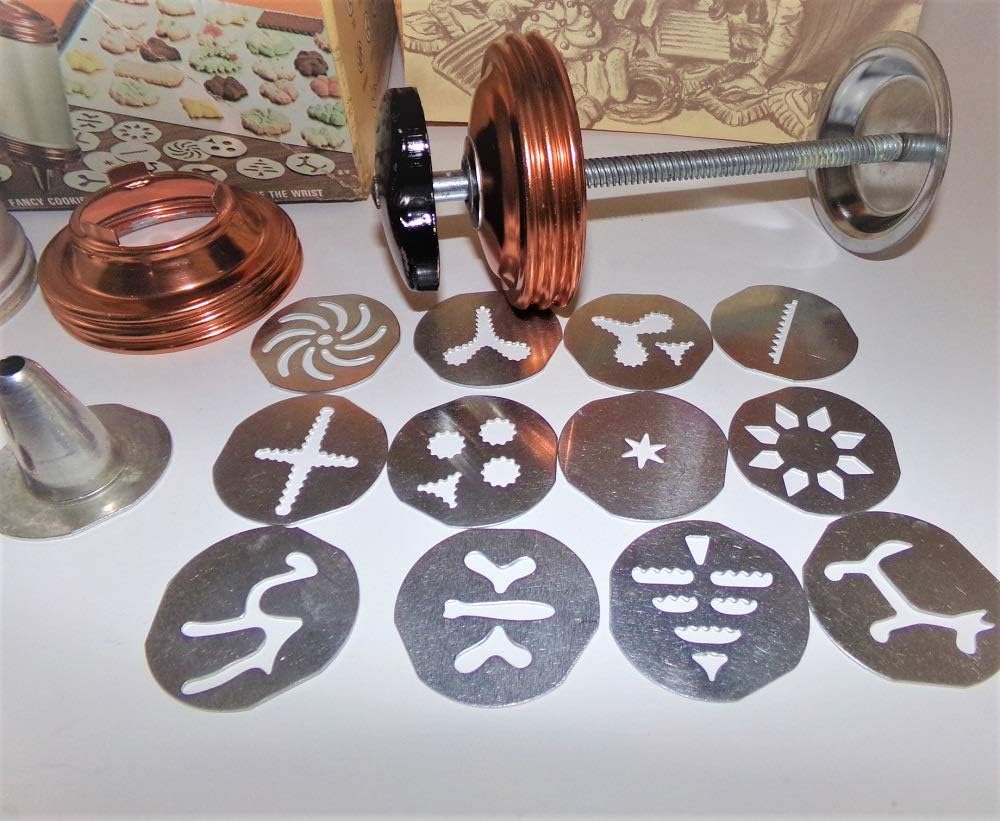
This manual provides detailed instructions for the safe and effective use of your Vintage Mirro Cookie Press Model 358-AM. Designed for creating a variety of cookies and pastries, this press comes with multiple decorative plates and pastry tips to enhance your baking experience. Please read all instructions carefully before first use.
2. Safety Information
- Always handle the cookie press and its components with care.
- Keep out of reach of children.
- Be aware that some edges of the metal components may be sharp. Handle carefully to prevent injury.
- Do not use the appliance for anything other than its intended purpose.
- Ensure all parts are securely assembled before use.
3. Package Contents
Your Mirro Cookie Press package includes the following items:
- 1x Mirro Cookie Press Unit
- 12x Assorted Cookie Plates (Discs)
- 3x Pastry Tips

4. Setup
- Disassemble: Unscrew the bottom ring and remove the plunger from the press barrel.
- Select Disc/Tip: Choose one of the 12 cookie plates or 3 pastry tips.
- Insert Disc/Tip: Place the selected cookie plate or pastry tip into the bottom ring. Ensure it fits securely.
- Attach Bottom Ring: Screw the bottom ring with the disc/tip back onto the press barrel.
- Load Dough: Fill the press barrel with cookie dough. For best results, use dough that is not too stiff or too soft.
- Insert Plunger: Reinsert the plunger into the barrel, ensuring the teeth on the metal rod align with the handle mechanism.


5. Operating Instructions
- Prepare Baking Sheet: For best results, use an ungreased aluminum cookie sheet. Do not use parchment paper or non-stick pans, as the dough needs to stick to the surface to form cookies.
- Position Press: Hold the cookie press upright with the bottom firmly against the prepared cookie sheet.
- Press Cookie: Squeeze the trigger handle firmly to form a cookie. One click typically yields one cookie.
- Repeat: Lift the press, move to a new spot on the baking sheet, and repeat the pressing action until the sheet is full or dough is depleted.
- Change Disc/Tip: To change cookie designs, remove the bottom ring, replace the disc/tip, and reassemble.

Official Product Video: Cookie Press Kit, Upgraded Cookie Maker Machine
Video Description: This video demonstrates the use of a cookie press kit, showing how to prepare cookie dough, load it into the press, attach different cookie discs, and extrude various cookie shapes onto a baking sheet. It also shows how to use the frosting nozzles for decoration and the baking process.
6. Maintenance and Cleaning
- Disassembly: After each use, disassemble the cookie press by unscrewing the bottom ring and removing the plunger.
- Hand Wash: Wash all components (barrel, plunger, discs, and tips) by hand in warm, soapy water.
- Rinse Thoroughly: Ensure all soap residue is removed.
- Dry Completely: Dry all parts thoroughly before reassembling or storing to prevent rust or damage.
7. Troubleshooting
Dough Not Extruding Properly:
- Dough Consistency: Ensure your cookie dough has the correct consistency. If it's too stiff, it may be difficult to press. If it's too soft, cookies may not hold their shape. Adjust dough by adding a small amount of flour for stiffness or liquid for softness.
- Temperature: Dough that is too cold can be hard to press. Allow dough to come to room temperature slightly before use.
- Air Pockets: Ensure there are no large air pockets in the dough inside the barrel. Fill the barrel completely and evenly.
- Alignment: Verify that the plunger rod's teeth are correctly aligned with the handle mechanism.
Cookies Not Sticking to Baking Sheet:
- Surface Type: Use an ungreased metal cookie sheet. Parchment paper or non-stick surfaces may prevent the dough from adhering properly.
- Firm Press: Apply firm, even pressure when pressing the cookie onto the sheet.
8. Specifications
| Product Dimensions: | 9.6 x 3.9 x 10.1 inches |
| Item Weight: | 12.8 ounces |
| Manufacturer: | Mirro |
| Item Model Number: | AM-358 |
| Date First Available: | July 27, 2010 |
9. Warranty and Support
For warranty information or product support, please refer to the original product packaging or contact Mirro customer service directly. Keep your proof of purchase for any warranty claims.