Introduction
This manual provides detailed instructions for the setup, operation, and maintenance of your Supersonic SC371 Digital Projection Alarm Clock with AM/FM Radio. Please read this manual thoroughly before using the device to ensure proper function and to maximize your user experience.
Safety Information
- Do not expose the unit to extreme temperatures, direct sunlight, dust, or humidity.
- Ensure the power adapter is compatible with your local power supply (AC 120V, 60Hz).
- Do not attempt to disassemble or modify the unit. Refer all servicing to qualified personnel.
- Keep the unit away from water or other liquids.
- Use only the specified battery type for backup (9V, not included).
Package Contents
Please check that all items are present in the package:
- Supersonic SC371 Digital Projection Alarm Clock with Radio
- AC Power Adapter
- User Manual (this document)
Product Overview
The Supersonic SC371 is a versatile digital alarm clock featuring a clear LED display, built-in time projection, and an integrated AM/FM radio. It includes an alarm with sleep/snooze timers and a 3.5mm audio input for external devices.
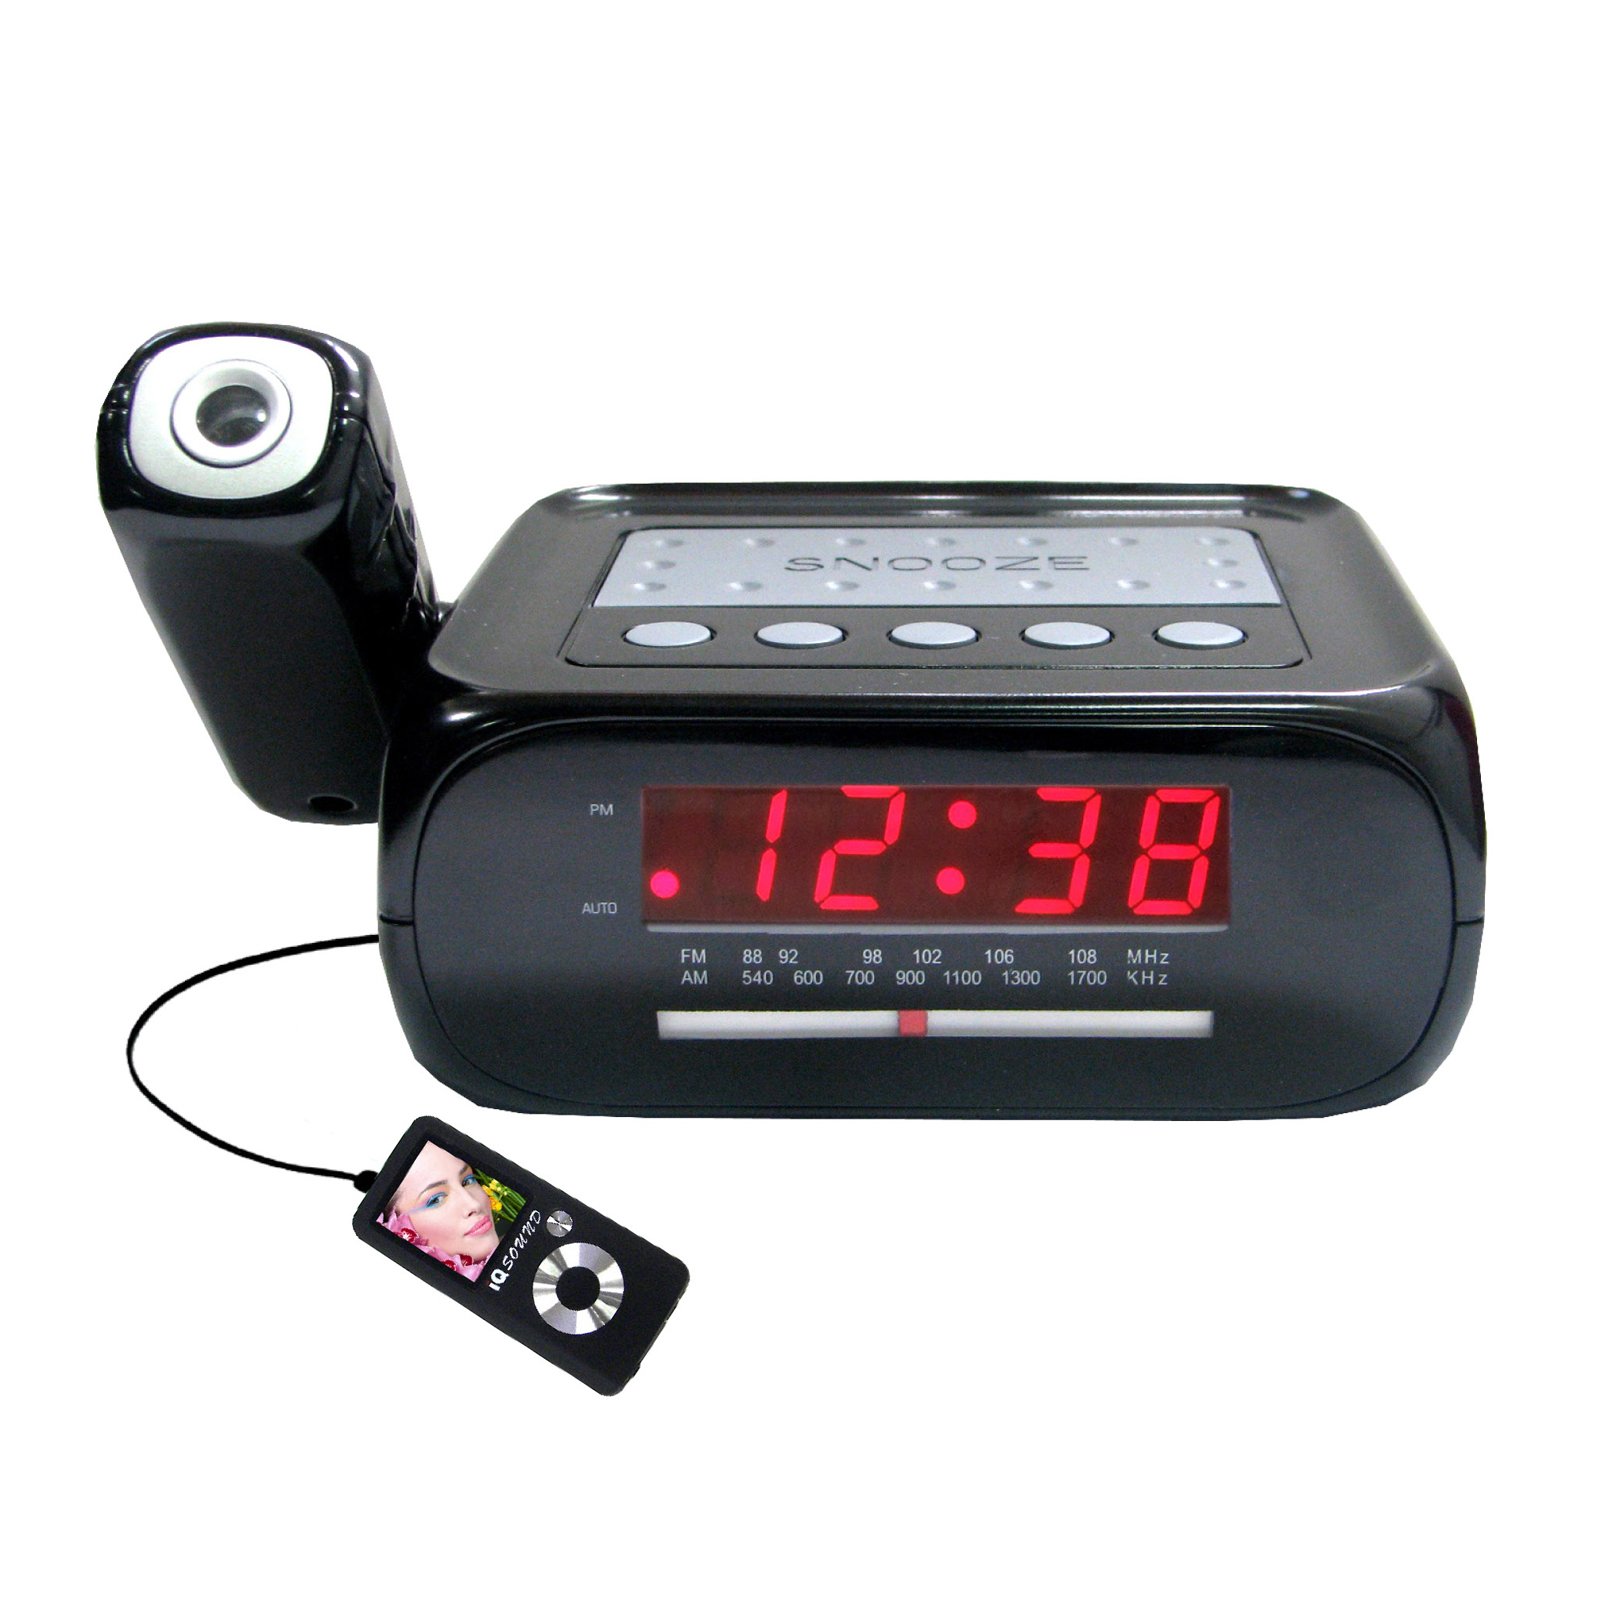
Image: Front view of the Supersonic SC371 Digital Projection Alarm Clock, showing the LED display and control buttons.
Key Features:
- Digital Clock with LED Display
- Built-in Time Projection
- AM/FM Radio Tuner
- Alarm Clock with Sleep/Snooze Timers
- Wake Up to Music or Buzzer
- 3.5mm Audio Input Jack for Portable Audio Players
Setup
1. Power Connection
Connect the AC power adapter to the DC IN jack on the back of the unit, then plug the adapter into a standard AC 120V, 60Hz wall outlet. The unit will power on and the LED display will illuminate.
2. Battery Backup (Optional)
For battery backup functionality, insert one 9V battery (not included) into the battery compartment located on the bottom of the unit. This battery will preserve time and alarm settings during a power outage, but the display and projection will not operate.
Operating Instructions
Setting the Time
- Press and hold the TIME SET button. The hour digits will begin to flash.
- Use the HOUR button to adjust the hour.
- Use the MINUTE button to adjust the minute.
- Press TIME SET again to confirm and exit time setting mode.
Setting the Alarm
- Press and hold the ALARM SET button. The alarm hour digits will flash.
- Use the HOUR button to set the desired alarm hour.
- Use the MINUTE button to set the desired alarm minute.
- Press ALARM SET again to confirm the alarm time.
- Press the ALARM ON/OFF button to activate or deactivate the alarm. An indicator will appear on the display when the alarm is active.
Snooze Function
When the alarm sounds, press the SNOOZE button to temporarily silence the alarm for approximately 9 minutes. The alarm will sound again after the snooze period.
Radio Operation (AM/FM)
- Press the RADIO ON/OFF button to turn on the radio.
- Press the BAND button to switch between AM and FM bands.
- Use the TUNING knob or buttons (if available) to select your desired station.
- Adjust the volume using the VOLUME knob.
- To turn off the radio, press the RADIO ON/OFF button again.
Time Projection
The unit features a built-in projector to display the time on a wall or ceiling. Locate the PROJECTION button or switch. Press or slide it to activate the projection. You may be able to adjust the focus and angle of the projection using dedicated controls on the unit.
Using the Aux Input
Connect an external audio device (e.g., MP3 player, smartphone) to the 3.5mm Audio Input Jack using a standard 3.5mm audio cable (not included). The unit will automatically switch to AUX mode, allowing you to play audio from your connected device through the clock's speaker.
Maintenance
Cleaning
To clean the unit, gently wipe the surfaces with a soft, dry cloth. Do not use abrasive cleaners, waxes, or solvents, as these can damage the finish. Ensure the unit is unplugged before cleaning.
Battery Replacement
If the battery backup feature is used, replace the 9V battery annually or when the unit fails to retain settings during a power interruption.
Troubleshooting
| Problem | Possible Cause | Solution |
|---|---|---|
| Unit does not power on. | Power adapter not connected or faulty. | Ensure the AC adapter is securely plugged into the unit and a working wall outlet. |
| Projection does not work or is dim. | Projection feature not activated; unit too far from surface; projector lens obstructed. | Activate the projection feature. Adjust the unit's distance from the projection surface. Clean the projector lens if necessary. |
| Radio static or poor reception. | Weak signal; antenna not extended. | Extend the FM wire antenna fully. Reposition the unit for better reception. |
| Alarm does not sound. | Alarm not set or deactivated; volume too low. | Ensure the alarm is set and activated (check display indicator). Increase the volume. |
Specifications
| Feature | Specification |
|---|---|
| Model Number | SC371 |
| Display Type | Digital LED |
| Power Source | AC 120V, 60Hz (Corded Electric) |
| Battery Backup | 1 x 9V (not included) |
| Special Features | Alarm, Audio Input, Projection Clock, Radio, Snooze |
| Dimensions (LxWxH) | 18.52 x 9.42 x 8.71 cm (7.29 x 3.71 x 3.43 inches) |
| Item Weight | 517 g (1.14 lbs) |
| Mounting Type | Tabletop |
Warranty and Support
Supersonic products are designed for reliability and performance. For warranty information or technical support, please refer to the warranty card included with your purchase or visit the official Supersonic website. Keep your purchase receipt as proof of purchase for any warranty claims.


