
Introduction
Welcome to your new RCA RS2696I CD Audio System. This manual provides instructions for setup, operation, and maintenance to ensure optimal performance and longevity of your device. Please read this manual thoroughly before use and retain it for future reference.
Important Safety Information
WARNING: To reduce the risk of electric shock, do not remove cover (or back). No user-serviceable parts inside. Refer servicing to qualified service personnel.
- Read all instructions before operating the appliance.
- Keep these instructions for future reference.
- Do not use this apparatus near water.
- Clean only with a dry cloth.
- Do not block any ventilation openings. Install in accordance with the manufacturer's instructions.
- Do not install near any heat sources such as radiators, heat registers, stoves, or other apparatus (including amplifiers) that produce heat.
- Protect the power cord from being walked on or pinched, particularly at plugs, convenience receptacles, and the point where they exit from the apparatus.
- Only use attachments/accessories specified by the manufacturer.
- Unplug this apparatus during lightning storms or when unused for long periods of time.
- Refer all servicing to qualified service personnel. Servicing is required when the apparatus has been damaged in any way, such as power-supply cord or plug is damaged, liquid has been spilled or objects have fallen into the apparatus, the apparatus has been exposed to rain or moisture, does not operate normally, or has been dropped.
Package Contents
Please check that all items listed below are included in your package:
- RCA RS2696I CD Audio System Main Unit
- Detachable Speakers (2)
- Remote Control
- AM Loop Antenna
- FM Wire Antenna
- AC Power Cord
- User Manual (this document)
Controls and Connections
Familiarize yourself with the main unit's controls and rear panel connections for proper operation.
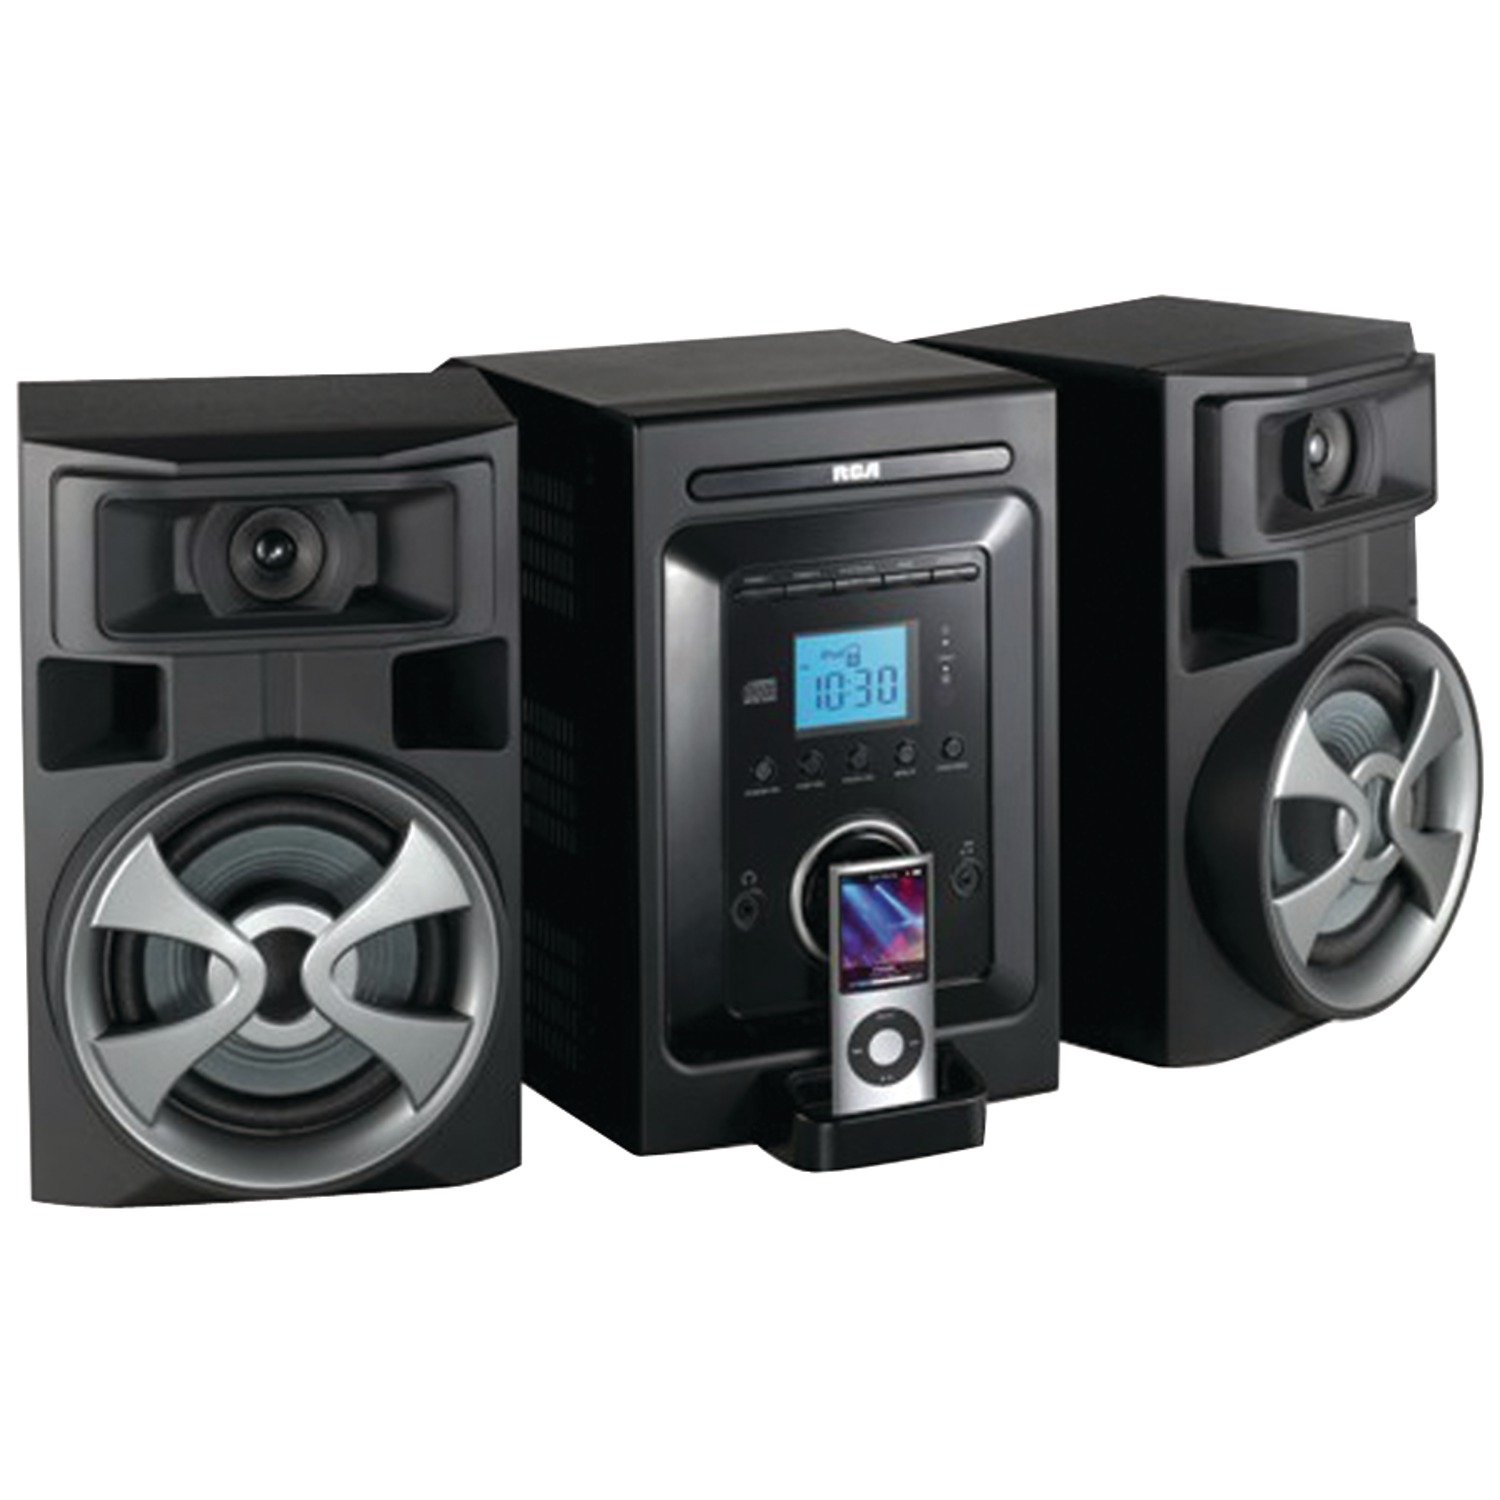
Image: Front view of the RCA RS2696I CD Audio System. This image displays the central unit with the iPod dock connector, CD tray, main display, and various control buttons for power, volume, mode selection, and playback. The two detachable speakers are shown on either side.
Front Panel Controls
- POWER/STANDBY Button: Turns the unit on or off.
- MODE Button: Selects between CD, iPod, AM, FM, and AUX input modes.
- VOLUME +/- Knobs: Adjusts the audio output level.
- PLAY/PAUSE Button: Starts or pauses playback for CD/iPod.
- STOP Button: Stops playback for CD/iPod.
- SKIP/SEARCH Buttons: Skips tracks or searches within a track/station.
- TUNING Buttons: Adjusts radio frequency manually or automatically.
- PRESET Buttons: Stores and recalls radio stations.
- CLOCK/TIMER Button: Accesses clock and timer settings.
- DISPLAY: Blue backlit LCD display shows current status and time.
- iPod Dock: Connector for compatible iPod/iPhone devices.
- HEADPHONE Jack: For private listening with 3.5mm headphones.
Rear Panel Connections
- SPEAKER Terminals: Connects the left and right speakers.
- AM ANTENNA Terminal: Connects the AM loop antenna.
- FM ANTENNA Terminal: Connects the FM wire antenna.
- AUX IN Jack (3.5mm): Connects external audio devices.
- AC POWER Input: Connects the AC power cord.
Setup
1. Speaker Connection
Connect the speaker wires from the main unit to the corresponding terminals on the back of each speaker. Ensure correct polarity (red wire to red terminal/positive, black wire to black terminal/negative) for optimal sound quality.
2. Antenna Connection
- AM Antenna: Connect the supplied AM loop antenna to the AM ANTENNA terminal. Position it for best reception, away from other electronic devices.
- FM Antenna: Connect the supplied FM wire antenna to the FM ANTENNA terminal. Extend the wire fully and position it for optimal FM reception.
3. Power Connection
Plug the AC power cord into the AC POWER input on the rear of the unit, then plug the other end into a standard wall outlet (AC 120V, 60Hz).
Operating Instructions
Power On/Off
Press the POWER/STANDBY button on the front panel or remote control to turn the unit on or off (to standby mode).
iPod/iPhone Dock Operation
This system is compatible with iPod models featuring a 30-pin connector and supports iPhone/iPhone 3G/3GS in airplane mode. Newer iPhone models may require an adapter (not included).
- Gently place your compatible iPod/iPhone onto the dock connector, ensuring it is seated firmly.
- Press the MODE button repeatedly until "iPod" mode is selected on the display.
- Use the iPod/iPhone controls or the system's PLAY/PAUSE, STOP, and SKIP/SEARCH buttons to control playback.
- The docked device will charge automatically while the system is powered on.
CD Player Operation
- Press the MODE button repeatedly until "CD" mode is selected.
- Open the CD tray, place a CD (CD-R/RW compatible) with the label side up, and gently close the tray.
- Playback will typically begin automatically. Use PLAY/PAUSE, STOP, and SKIP/SEARCH buttons for control.
AM/FM Radio Operation
- Press the MODE button repeatedly to select "AM" or "FM" mode.
- Use the TUNING buttons to manually tune to a desired station.
- To auto-scan for stations, press and hold the TUNING buttons. The tuner will stop at the next strong station.
- To store a preset station: Tune to the desired station, press a PRESET button, then use SKIP/SEARCH to select a preset number (1-20) and press PRESET again to confirm.
- To recall a preset station: Press the PRESET button and use SKIP/SEARCH to select the desired preset number.
Auxiliary Input (AUX IN)
- Connect an external audio device (e.g., MP3 player, smartphone) to the AUX IN jack on the rear of the unit using a 3.5mm audio cable (not supplied).
- Press the MODE button repeatedly until "AUX" mode is selected.
- Control playback and volume from your external device. The system's volume control will also affect the output.
Clock and Timer Function
Press the CLOCK/TIMER button to set the current time or configure the alarm function. Follow the on-screen prompts using the control buttons (e.g., TUNING, SKIP/SEARCH) to adjust values. You can set the alarm to wake to iPod, Radio, or CD.
Remote Control
The included remote control provides convenient access to most functions from a distance. Ensure the remote's battery is inserted correctly (check polarity). Point the remote towards the main unit's front panel for effective operation.
Maintenance
Cleaning
Wipe the unit with a soft, dry cloth. Do not use abrasive cleaners, waxes, or solvents as they may damage the finish. Ensure the unit is unplugged before cleaning.
CD Care
Handle CDs by their edges to avoid fingerprints. Keep them clean and free of scratches. Store them in their cases when not in use to prevent dust and damage.
Speaker Care
Ensure speaker wires are securely connected and not frayed. Avoid placing heavy objects on speakers or exposing them to extreme temperatures or moisture.
Troubleshooting
If you encounter any issues with your audio system, refer to the table below for common problems and solutions.
| Problem | Possible Cause | Solution |
|---|---|---|
| No Power | Power cord not connected; Unit in standby mode. | Ensure power cord is securely plugged into both the unit and the wall outlet. Press the POWER/STANDBY button to turn the unit on. |
| No Sound | Volume too low; Incorrect mode selected; Speaker wires loose. | Increase the volume. Press the MODE button to select the correct input source (CD, iPod, AM/FM, AUX). Check all speaker connections for security and correct polarity. |
| iPod/iPhone not playing/charging | Device not seated correctly; Incompatible device (e.g., newer iPhone without adapter). | Reseat the device firmly in the dock. Ensure your device has a 30-pin connector. iPhone 4 and newer models require a separate adapter (not included) for compatibility. Ensure the unit is powered on. |
| CD Skipping | CD dirty or scratched; Unit on unstable surface. | Clean the CD with a soft, lint-free cloth. Replace heavily scratched CDs. Place the unit on a stable, flat surface to prevent vibrations. |
| Poor Radio Reception | Antenna not properly positioned or connected; Interference. | Adjust the AM loop antenna or extend the FM wire antenna fully. Try repositioning the unit away from other electronic devices that may cause interference. |
| Remote Control Not Working | Battery depleted or incorrectly inserted; Obstruction between remote and unit. | Replace the remote control battery, ensuring correct polarity. Remove any obstructions between the remote and the unit's front panel sensor. |
| Unit turns on but no sound (intermittent glitch) | Internal reset required due to power fluctuations. | Unplug the AC power cord from the wall outlet for at least two hours. While unplugged, press the POWER/STANDBY button 10-15 times. Then plug the unit back in and try again. |
Specifications
- Model: RS2696I
- Brand: RCA
- Total Power Output: 100 Watts
- Speaker Type: Full Range, Detachable (2 speakers)
- Compatible Devices: iPod (30-pin connector), iPhone/iPhone 3G/3GS (in airplane mode)
- Media Playback: CD, CD-R/RW
- Tuner: Digital AM/FM Stereo with 20 Presets
- Display: Backlit Blue LCD
- Inputs: 3.5mm Audio Line-in Jack (AUX IN)
- Dimensions (L x W x H): Approximately 30.5 x 33 x 22.9 Centimeters (main unit with speakers)
- Weight: Approximately 4.54 kg
- Power Source: AC 120V, 60Hz
- Energy Star Certified: Yes
Warranty and Support
Warranty Information
This RCA product comes with a ONE YEAR limited warranty from the date of original purchase. This warranty covers manufacturing defects in materials and workmanship. It does not cover damage caused by misuse, accident, unauthorized modification, or normal wear and tear. Please retain your proof of purchase for any warranty claims.
Customer Support
For technical assistance, troubleshooting, or warranty service, please visit the official RCA support website or contact their customer service department using the contact information provided with your product packaging. You can also visit the RCA Store on Amazon for additional product information and resources.


