
1. Important Safety Instructions
Always observe basic safety precautions when using electrical tools to reduce the risk of fire, electric shock, and personal injury. Read all instructions carefully before operating this tool.
- Work Area Safety: Keep the work area clean and well-lit. Cluttered or dark areas invite accidents. Do not operate power tools in explosive atmospheres, such as in the presence of flammable liquids, gases, or dust.
- Electrical Safety: Power tool plugs must match the outlet. Never modify the plug in any way. Do not abuse the cord. Never use the cord for carrying, pulling, or unplugging the power tool. Keep cord away from heat, oil, sharp edges, or moving parts.
- Personal Safety: Always wear eye protection. Use dust masks, non-skid safety shoes, hard hats, or hearing protection for appropriate conditions. Dress properly. Do not wear loose clothing or jewelry. Keep hair and clothing away from moving parts.
- Tool Use and Care: Do not force the power tool. Use the correct power tool for your application. Disconnect the plug from the power source before making any adjustments, changing accessories, or storing power tools.
- Dust Collection: This tool is equipped with a dust collection system. Always use it to minimize dust exposure. Empty the dust bag regularly.
2. Product Overview
The SKIL 1215AA Belt Sander is designed for efficient sanding of various surfaces. Familiarize yourself with its components before use.
2.1 Components

- Main Handle: Ergonomic grip for control during operation.
- Auxiliary Handle: Provides additional stability and control.
- On/Off Switch: Controls power to the sander.
- Belt Release Lever ('Clic' System): For quick and easy sanding belt changes.
- Automatic Belt Centering (ABC) System: Ensures the sanding belt remains centered during operation.
- Dust Port: Connection point for the dust bag or vacuum adapter.
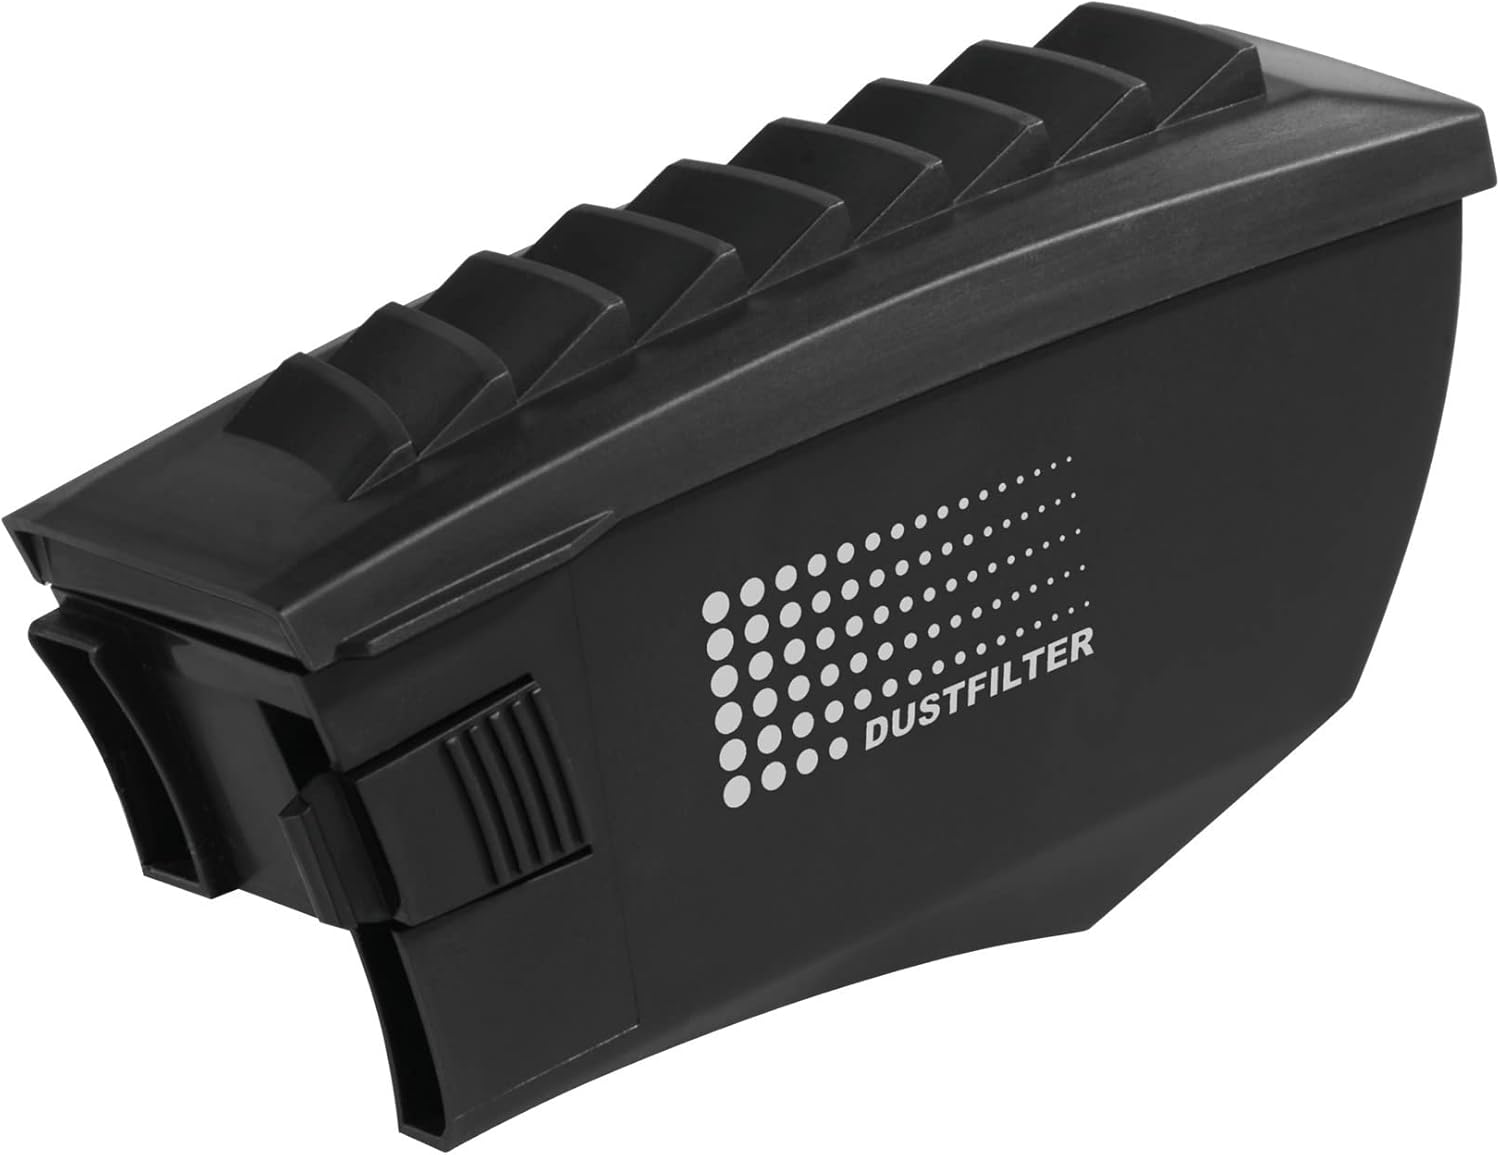
- Dust Bag/Filter: Collects sanding dust.
- Sanding Frame ('Equalizer'): Optional attachment for precise, level sanding.

2.2 Technical Specifications
| Feature | Specification |
|---|---|
| Power Input | 650 W |
| Voltage | 240 Volts |
| Belt Dimensions | 76 x 457 mm |
| No-load Belt Speed | 300 m/min |
| Sanding Surface | 76 x 130 mm |
| Weight | 2.9 kg |
| Sound Level | 87 Decibels |
| Special Features | Automatic Belt Centering (ABC), Dust Extraction, 'Clic' Belt Change System, 'Equalizer' Sanding Frame |
3. Setup
3.1 Attaching/Changing Sanding Belt
- Ensure the tool is unplugged from the power source.
- Locate the belt release lever (often marked 'Clic') on the side of the sander.
- Press or pull the lever to release tension on the sanding belt.
- Remove the old sanding belt.
- Slide the new sanding belt onto the rollers, ensuring the arrow on the inside of the belt matches the direction of rotation indicated on the sander.
- Release the lever to tension the new belt. The Automatic Belt Centering (ABC) system will adjust the belt position during initial operation.

3.2 Dust Collection System Setup
The SKIL 1215AA comes with a dust bag and can also be connected to an external vacuum cleaner for enhanced dust extraction.
- Using the Dust Bag: Attach the dust bag securely to the dust port on the sander. Ensure it clicks into place.
- Connecting to a Vacuum Cleaner: If using an external vacuum, attach the vacuum adapter to the dust port, then connect your vacuum hose to the adapter.


3.3 Attaching Sanding Frame ('Equalizer')
The 'Equalizer' sanding frame helps prevent gouging and ensures a flat sanding surface. Refer to the specific instructions included with the sanding frame for attachment details.
4. Operating Instructions
4.1 General Operation
- Ensure the correct grit sanding belt is installed for your task.
- Plug the sander into a suitable power outlet.
- Hold the sander firmly with both hands.
- Switch the tool on before making contact with the workpiece.
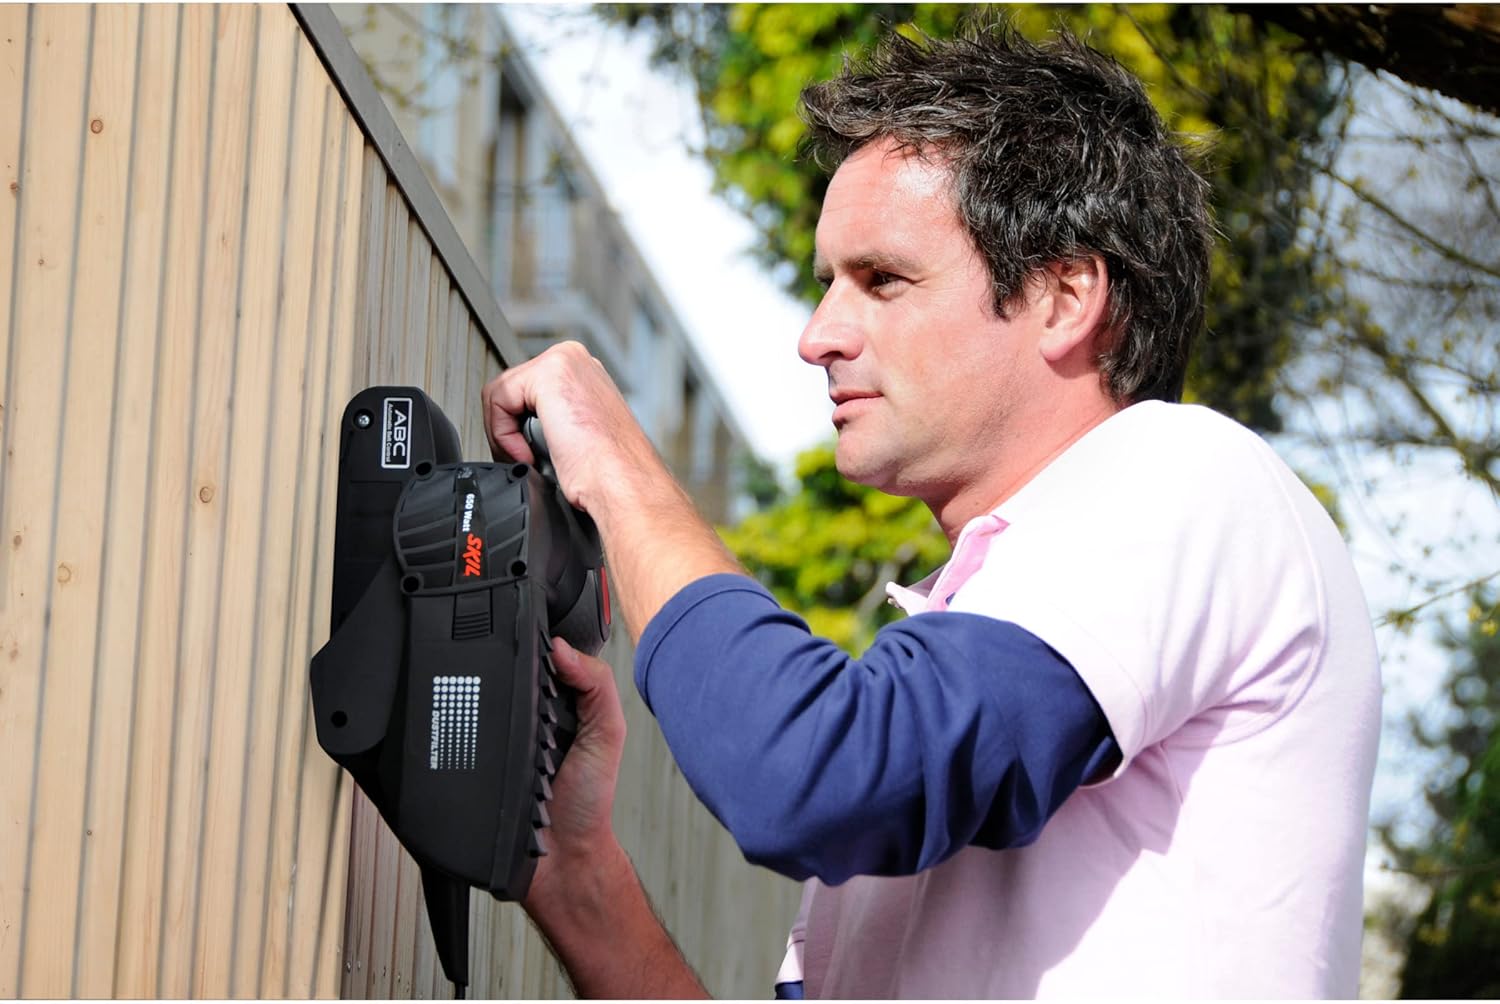
- Apply light, even pressure and move the sander smoothly across the surface in the direction of the wood grain. Avoid tilting the sander or applying excessive pressure, as this can cause uneven sanding or damage to the workpiece.
- Switch the tool off and wait for the belt to stop completely before lifting it from the workpiece.
4.2 Automatic Belt Centering (ABC)
The SKIL 1215AA features an Automatic Belt Centering (ABC) system. This system automatically adjusts the belt's position to keep it centered on the rollers, preventing it from running off the tool. No manual adjustment is typically required for belt tracking.
4.3 Sanding Techniques
- Rough Sanding: Use coarse-grit belts (e.g., 60-80 grit) for rapid material removal.
- Fine Sanding: Progress to finer-grit belts (e.g., 120-180 grit) for a smoother finish.
- Edge Sanding: When sanding edges, ensure the sander is stable and supported to avoid rounding the edge.
- Surface Preparation: Always clean the surface of any debris or old finishes before sanding.
5. Maintenance
Regular maintenance ensures the longevity and optimal performance of your SKIL 1215AA Belt Sander.
5.1 Cleaning
- Always unplug the tool before cleaning.
- Use a soft brush or compressed air to clean dust from the ventilation openings and around the belt area.
- Do not use water or chemical cleaners, as these can damage the tool.
5.2 Dust Filter Maintenance
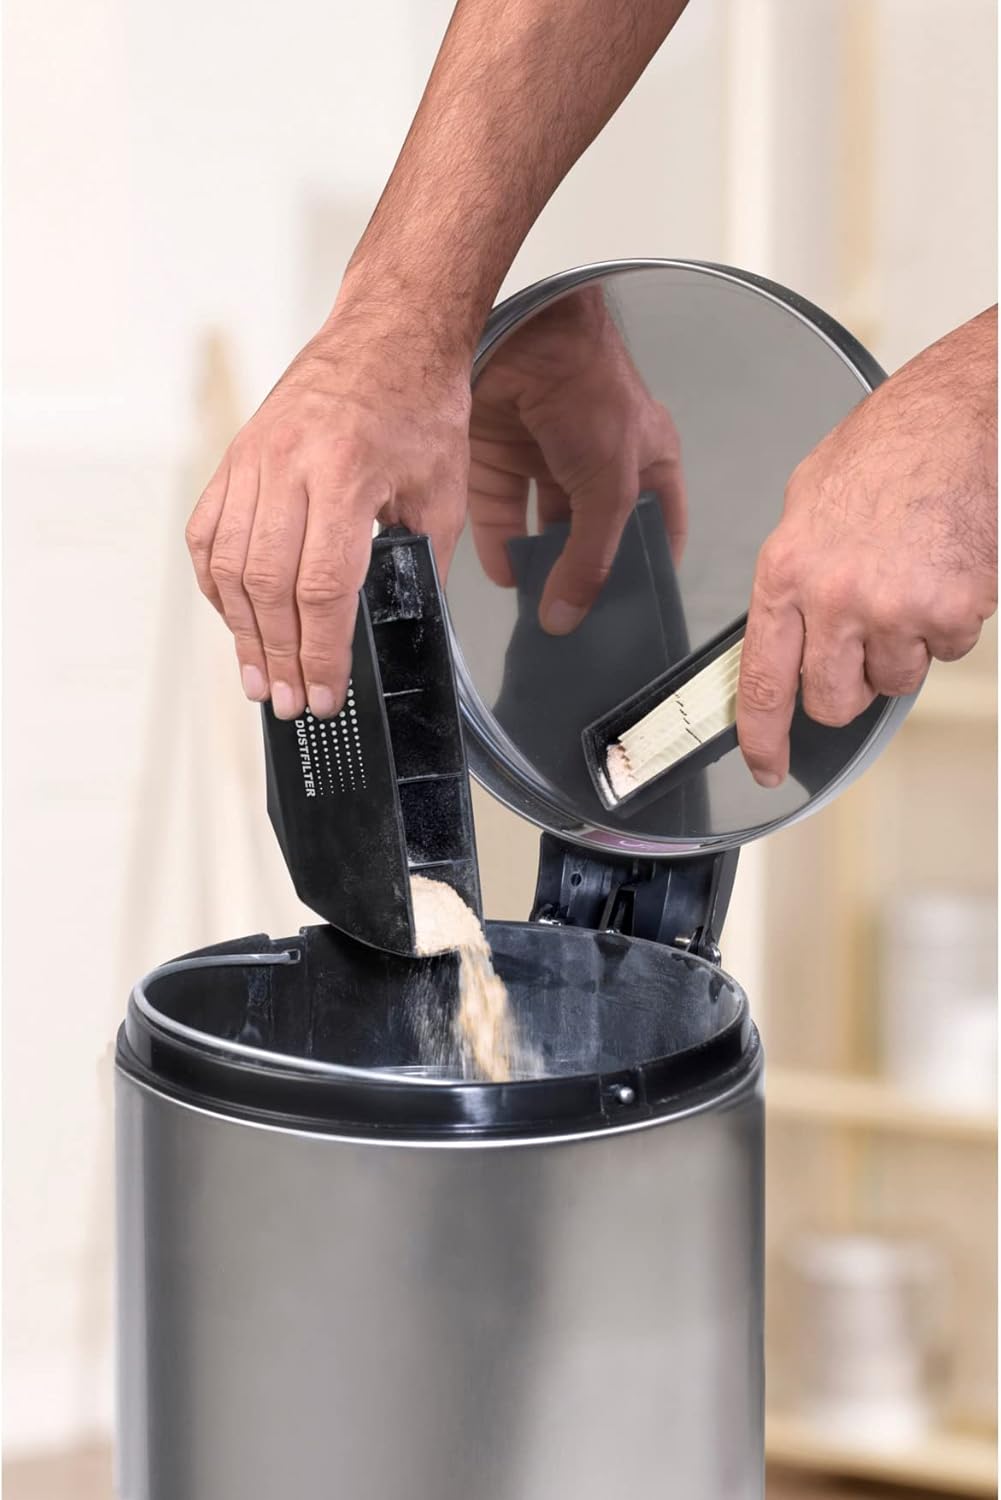
The dust filter should be emptied regularly to maintain effective dust collection and prevent clogging.
- Disconnect the dust bag from the sander.
- Open the dust bag/filter housing and empty the collected dust into a waste receptacle.
- Clean the filter element if necessary by tapping it gently or using compressed air.
- Reattach the dust bag securely.
5.3 Belt Replacement
Replace sanding belts when they become worn or lose their abrasive quality. Refer to section 3.1 for detailed instructions on changing the sanding belt.
6. Troubleshooting
If you encounter issues with your SKIL 1215AA Belt Sander, consult the following common troubleshooting tips:
| Problem | Possible Cause | Solution |
|---|---|---|
| Sander does not start | No power supply; faulty switch; damaged cord. | Check power connection and outlet. Inspect cord for damage. If issues persist, seek professional service. |
| Poor sanding performance | Worn sanding belt; incorrect grit; excessive pressure. | Replace sanding belt. Use appropriate grit for the task. Apply light, even pressure. |
| Excessive dust | Dust bag full or improperly attached; clogged dust port. | Empty and reattach dust bag. Clear any blockages in the dust port or hose. |
| Belt runs off track | Belt not properly installed; ABC system malfunction (rare). | Ensure belt is installed correctly and tensioned. If problem persists, contact customer support. |
7. Warranty and Support
For warranty information, service, or technical support, please refer to the warranty card included with your product or visit the official SKIL website. Keep your purchase receipt as proof of purchase.
Manufacturer: SKIL
Model Number: F0151215AA
ASIN: B0032TL9DI


