1. Product Overview
The Dell UltraSharp U2410 Monitor is a 24-inch widescreen LCD display designed for high performance. It features PremierColor technology, delivering vibrant, consistent, and true-to-life colors, minimizing the need for extensive calibration. This monitor is suitable for graphics-intensive applications, offering detailed visuals and responsive performance.

Figure 1.1: Front view of the Dell UltraSharp U2410 Monitor.
2. Setup Instructions
2.1 Unpacking the Monitor
Carefully remove all components from the packaging. Ensure all parts are present:
- Dell UltraSharp U2410 Monitor
- Monitor Stand
- Power Cable
- Video Cables (DVI, DisplayPort, HDMI, USB Upstream)
- Documentation
2.2 Assembling the Stand
Attach the monitor panel to the stand base. Ensure it clicks securely into place. The stand allows for height, tilt, swivel, and pivot adjustments.
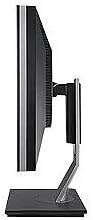
Figure 2.1: Side view of the monitor showing stand assembly.
2.3 Connecting Cables
Connect the necessary cables to the rear of the monitor and your computer. The U2410 supports multiple input types:
- Power Cable: Connect to the monitor's power input and a wall outlet.
- Video Cable: Choose one of the following:
- HDMI: For high-definition digital video and audio.
- DVI: For digital video.
- DisplayPort: For high-resolution digital video and audio.
- VGA: For analog video (if applicable, check specific model for VGA).
- USB Upstream Cable: Connect this cable from your computer to the monitor's upstream USB port to enable the monitor's built-in USB hub.
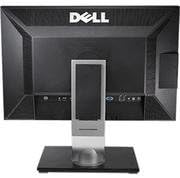
Figure 2.2: Rear view of the monitor showing various input ports.
2.4 Initial Power On
After connecting all cables, press the power button on the monitor. The monitor should display the Dell logo and then your computer's desktop. If no image appears, ensure all cables are securely connected and the correct input source is selected.
3. Operating the Monitor
3.1 Power On/Off
Press the power button located on the front bezel of the monitor to turn it on or off.
3.2 On-Screen Display (OSD) Menu
The OSD menu allows you to adjust various display settings. Use the control buttons on the front bezel to navigate the menu.
- Input Source: Select between HDMI, DVI, DisplayPort, or VGA inputs.
- Brightness/Contrast: Adjust the display's luminance and contrast levels.
- Color Settings: Access PremierColor settings, including preset modes (e.g., Adobe RGB, sRGB) and custom color adjustments.
- Picture-in-Picture (PIP)/Picture-by-Picture (PBP): If supported, configure multiple input sources to display simultaneously.
3.3 USB Hub Functionality
The monitor includes a built-in USB hub with multiple downstream ports. Connect the USB upstream cable from your computer to the monitor to enable these ports for connecting peripherals like keyboards, mice, or USB drives.
4. Maintenance
4.1 Cleaning the Monitor
To clean the monitor screen and bezel:
- Turn off the monitor and unplug the power cord.
- Use a soft, clean, lint-free cloth lightly dampened with water or a non-abrasive screen cleaner.
- Wipe the screen gently. Avoid applying excessive pressure.
- Do not spray cleaner directly onto the screen.
Caution: Do not use benzene, thinner, ammonia-based cleaners, or abrasive cleaners, as these can damage the monitor's surface.
5. Troubleshooting
5.1 No Image on Screen
- Ensure the power cable is securely connected to both the monitor and the power outlet.
- Verify the video cable (HDMI, DVI, DisplayPort) is firmly connected to both the monitor and your computer.
- Press the monitor's power button to ensure it is turned on.
- Use the OSD menu to select the correct input source.
- Test the monitor with another computer or a different video cable if possible.
5.2 Incorrect Colors or Display Issues
- Access the OSD menu and reset color settings to factory defaults.
- Ensure the correct color profile is selected in your computer's display settings.
- For Mac users, ensure you are using a Dual Link DVI connector and an appropriate Mini DisplayPort to DVI adapter for optimal color output, as some DisplayPort cables may result in YPbPr signals instead of RGB.
- Consider performing a hardware calibration if precise color accuracy is critical.
5.3 USB Ports Not Functioning
- Confirm the USB upstream cable is connected from your computer to the monitor.
- Ensure your computer's USB drivers are up to date.
- Try connecting the USB upstream cable to a different USB port on your computer.
5.4 Monitor Not Entering Power Saving Mode (Mac Specific)
- When using a DVI connection with certain Mac models (e.g., late 2011 MacBook Pros with Thunderbolt/MDP), the monitor may not automatically enter power-saving mode.
- To force power-saving mode, manually put your Mac to sleep (Apple menu > Sleep).
- This issue is often related to specific Mac firmware and not the monitor itself.
6. Specifications
| Model | Dell UltraSharp U2410 |
| Screen Size | 24 Inches |
| Panel Type | IPS |
| Resolution | 1920 x 1200 (WUXGA) |
| Aspect Ratio | 16:10 |
| Connectivity | HDMI, DVI, DisplayPort, VGA, 4x USB 3.0 (downstream), 1x USB (upstream) |
| Color Support | PremierColor Technology (Adobe RGB, sRGB) |
| Dimensions (LxWxH) | 25.4 x 18.2 x 9.3 inches |
| Weight | 9.55 pounds |
| Manufacturer | Dell Marketing USA, LP |
7. Warranty and Support
7.1 Warranty Information
This Dell UltraSharp U2410 monitor typically comes with a 3-year Dell warranty. Please refer to your purchase documentation for specific terms and conditions. For warranty claims or service, contact Dell directly.
7.2 Technical Support
For technical assistance, driver downloads, or further support, please visit the official Dell support website or contact Dell customer service. Have your monitor's service tag or express service code ready when contacting support.
Dell Support Website: www.dell.com/support


