
1. Introduction
This manual provides essential information for the setup, operation, and maintenance of your InFocus IN102 Portable DLP Projector. The IN102 is designed for various presentation environments, including conference rooms and classrooms, offering a balance of performance and portability.
Key features include:
- SVGA (800 x 600) native resolution, supporting up to UXGA (1600 x 1200).
- 2700 ANSI Lumens brightness (2200 lumens in Eco Mode) for clear images in various lighting conditions.
- 1500:1 contrast ratio for distinct visuals.
- DLP® technology with InFocus BrilliantColor™ for accurate color reproduction.
- 3D-ready capability for displaying 3D content.
- Lightweight design (approximately 5 pounds / 2.3 kg) for portability.
- Long-lasting lamp and filter-free design for reduced maintenance.
2. What's in the Box
Upon unpacking, please verify that all the following items are included with your InFocus IN102 projector:
- InFocus IN102 Projector
- Power Cord
- VGA Cable
- Carrying Case
- Remote Control
- Safety Instructions
- CD Quick Start/User Guide
3. Product Overview
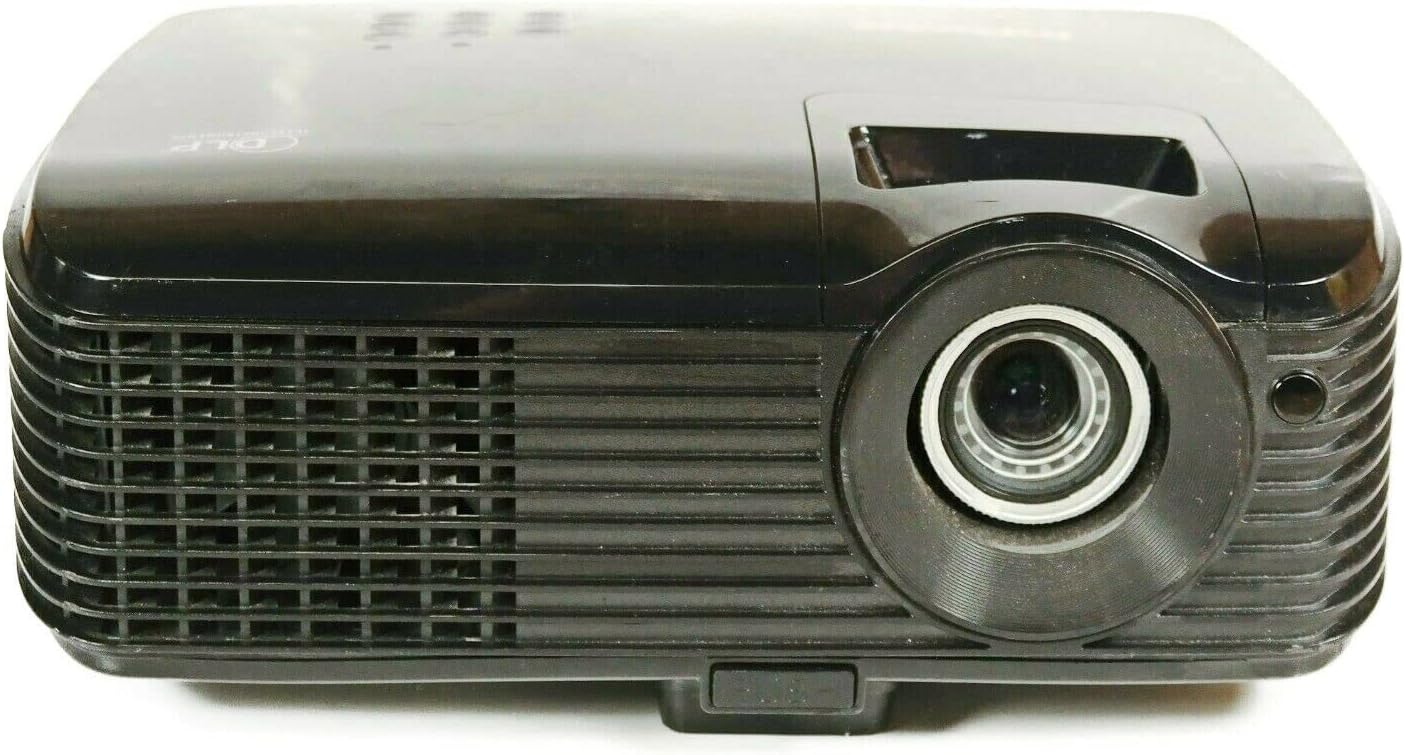
Figure 3.1: Front View of the IN102 Projector. This image displays the projector's front, highlighting the projection lens and the primary ventilation grille.

Figure 3.2: Rear View of the IN102 Projector. This image illustrates the back panel, featuring the power input, two VGA ports, S-Video, and Composite video inputs.

Figure 3.3: Top View of the IN102 Projector. This image shows the top surface, including the integrated control panel buttons and the manual focus/zoom adjustment rings.

Figure 3.4: Bottom View of the IN102 Projector. This image displays the underside, revealing the mounting points for ceiling installation and the adjustable feet for leveling.
4. Setup
4.1 Placement
Position the projector on a stable, flat surface or mount it securely. Ensure adequate ventilation around the projector, keeping clear of any obstructions to the air intake and exhaust vents. The distance from the screen will determine the image size. Adjust the projector's angle to minimize keystone distortion.
4.2 Connecting Power
- Connect the power cord to the AC inlet on the rear of the projector.
- Plug the other end of the power cord into a grounded electrical outlet.
4.3 Connecting Video Sources
The IN102 offers multiple input options:
- VGA (Computer): Use the supplied VGA cable to connect your computer's VGA output to one of the VGA input ports (VGA1 or VGA2) on the projector.
- S-Video: Connect devices with S-Video output (e.g., DVD players) to the S-Video port.
- Composite Video: Connect devices with Composite video output (e.g., VCRs, older game consoles) to the Composite video port.
Ensure all cables are securely connected before powering on the projector.
5. Operating Instructions
5.1 Power On/Off
- To power on, press the Power button on the projector's control panel or the remote control. The power indicator light will illuminate.
- To power off, press the Power button twice. The projector will enter a cooling cycle before shutting down completely. Do not unplug the projector during the cooling cycle.
5.2 Input Source Selection
Press the Source button on the projector or remote control to cycle through available input sources (VGA1, VGA2, S-Video, Composite) until your desired source is displayed.
5.3 Image Adjustment
- Focus and Zoom: Rotate the focus and zoom rings on the projector lens until the image is sharp and fills the screen as desired.
- Keystone Correction: If the projected image appears trapezoidal, use the keystone correction function (usually via buttons on the control panel or remote) to adjust the image geometry to a rectangular shape.
- Brightness and Contrast: Access the on-screen display (OSD) menu to fine-tune brightness, contrast, and other image settings.
5.4 Eco Mode
Activate Eco Mode to extend lamp life and reduce power consumption. This mode is ideal for presentations in dimly lit environments. Refer to the OSD menu for Eco Mode activation.
5.5 3D Functionality
The IN102 is 3D-ready. To project 3D content, ensure your source device is compatible and configured for 3D output, and use appropriate 3D glasses (sold separately). Consult your 3D source device's manual for specific setup instructions.
6. Maintenance
6.1 Lamp Replacement
The projector lamp has a finite lifespan. When the lamp life indicator illuminates or the image brightness significantly decreases, the lamp needs replacement. The lamp door is conveniently located on the top of the projector for easy access, even when the unit is installed.
- Power off the projector and allow it to cool completely for at least 30 minutes.
- Unplug the power cord.
- Locate and open the lamp cover on the top of the projector.
- Carefully remove the old lamp module and replace it with a new InFocus-approved lamp (SP-LAMP-060).
- Secure the lamp cover and plug in the power cord.
- Reset the lamp timer in the projector's OSD menu.
6.2 Cleaning
The IN102 features a filter-free design, eliminating the need for filter cleaning or replacement. Periodically clean the projector's exterior with a soft, dry cloth. For the lens, use a lens cleaning cloth and solution specifically designed for optical surfaces.
6.3 Storage
When not in use for extended periods, store the projector in its carrying case in a cool, dry environment, away from direct sunlight and extreme temperatures.
7. Troubleshooting
This section addresses common issues you might encounter with your InFocus IN102 projector.
7.1 No Image or Blank Screen
- Check Connections: Ensure all video cables (VGA, S-Video, Composite) are securely connected to both the projector and the source device.
- Select Correct Input: Use the Source button on the projector or remote to select the correct input channel corresponding to your connected device.
- Computer Display Settings: If connecting a laptop, ensure its display output is enabled. On many Windows laptops, pressing the Fn key simultaneously with a function key (often F4, F5, F7, or F8, indicated by a monitor icon) toggles between display modes (laptop only, projector only, or both).
- Projector Lamp: Verify the lamp indicator light. If it's red or blinking, the lamp may need replacement.
7.2 Projector Shuts Off Unexpectedly
- Overheating: Ensure the projector's ventilation vents are not blocked. Excessive heat can cause the projector to shut down automatically to prevent damage. Allow the unit to cool down in a well-ventilated area.
- Lamp Issues: An aging or faulty lamp can cause intermittent shutdowns. Consider replacing the lamp if it's nearing the end of its lifespan.
- Power Supply: Check the power cord connection and ensure the power outlet is functioning correctly.
7.3 Image Quality Issues
- Blurry Image: Adjust the focus ring on the projector lens.
- Distorted Image (Trapezoid): Use the keystone correction function to square the image.
- Poor Color/Brightness: Adjust brightness, contrast, and color settings via the OSD menu. Ensure the room lighting is appropriate for the selected display mode (e.g., Eco Mode for darker rooms).
- Resolution Mismatch: Ensure your source device's output resolution is compatible with the projector's native or supported resolutions.
7.4 Remote Control Not Working
- Batteries: Replace the batteries in the remote control.
- Line of Sight: Ensure there is a clear line of sight between the remote control and the projector's IR receiver.
8. Specifications
| Feature | Specification |
|---|---|
| Model Number | IN102 |
| Display Technology | DLP |
| Native Resolution | SVGA (800 x 600) |
| Maximum Resolution | UXGA (1600 x 1200) |
| Brightness | 2700 ANSI Lumens (2200 lumens Eco Mode) |
| Contrast Ratio | 1500:1 |
| Lamp Life (Average) | 4,000 hours (Eco Mode), 3,000 hours (Normal Mode) |
| Connectivity Technology | Wired (VGA, S-Video, Composite), Wireless (with optional LiteShow™ adapter) |
| Special Features | 3D-Ready, Filter-free design |
| Product Dimensions | 8.8 x 10.4 x 3.7 inches |
| Item Weight | 5.07 pounds (2.3 kg) |
| Manufacturer | Infocus |
| Date First Available | March 1, 2010 |
9. Warranty and Support
9.1 Limited Warranty
All new DLP® projectors from InFocus, including the IN102, are backed by a comprehensive limited warranty:
- Projector: 5-year limited warranty
- Parts & Labor: 2-year coverage
- Lamp: 6-month limited warranty
Please retain your proof of purchase for warranty claims.
9.2 Customer Support
For further assistance, technical support, or warranty inquiries, please refer to the contact information provided in your product's quick start guide or visit the official InFocus support website.


