
1. Introduction
The Westek TMDW10 In-Wall Programmable Digital Timer is designed to add programming functionality to various devices such as lights, heaters, and fans. This timer features an LCD display for straightforward programming and a design that integrates with most decor. It allows users to set up to 7 weekly programs to suit specific needs, enhancing safety, security, and convenience by controlling devices even when away from home. A rechargeable battery backup preserves settings during power interruptions.
2. Safety Information
- WARNING: Risk of electric shock. Installation requires working with electrical wiring. If you are not qualified, consult a licensed electrician.
- Turn off power at the circuit breaker or fuse box before installing or servicing the timer.
- This device is intended for INDOOR USE ONLY.
- Do not exceed the electrical ratings of the timer.
- Ensure all wire connections are secure and properly insulated.
3. Package Contents
- Westek TMDW10 Hardwire Indoor Digital Wall Switch Timer (1 unit)
4. Product Overview
The Westek TMDW10 timer features an integrated LCD display for time and program viewing, along with an ON-OFF button for manual control. Wiring leads are provided for connection to your home's electrical system.

Image 4.1: Front view of the Westek TMDW10 Digital Wall Switch Timer, showing the LCD display and the ON-OFF button.

Image 4.2: Side view of the timer, indicating wiring connections for Black (Hot), Red (Load), White (Neutral), and Green (Ground).
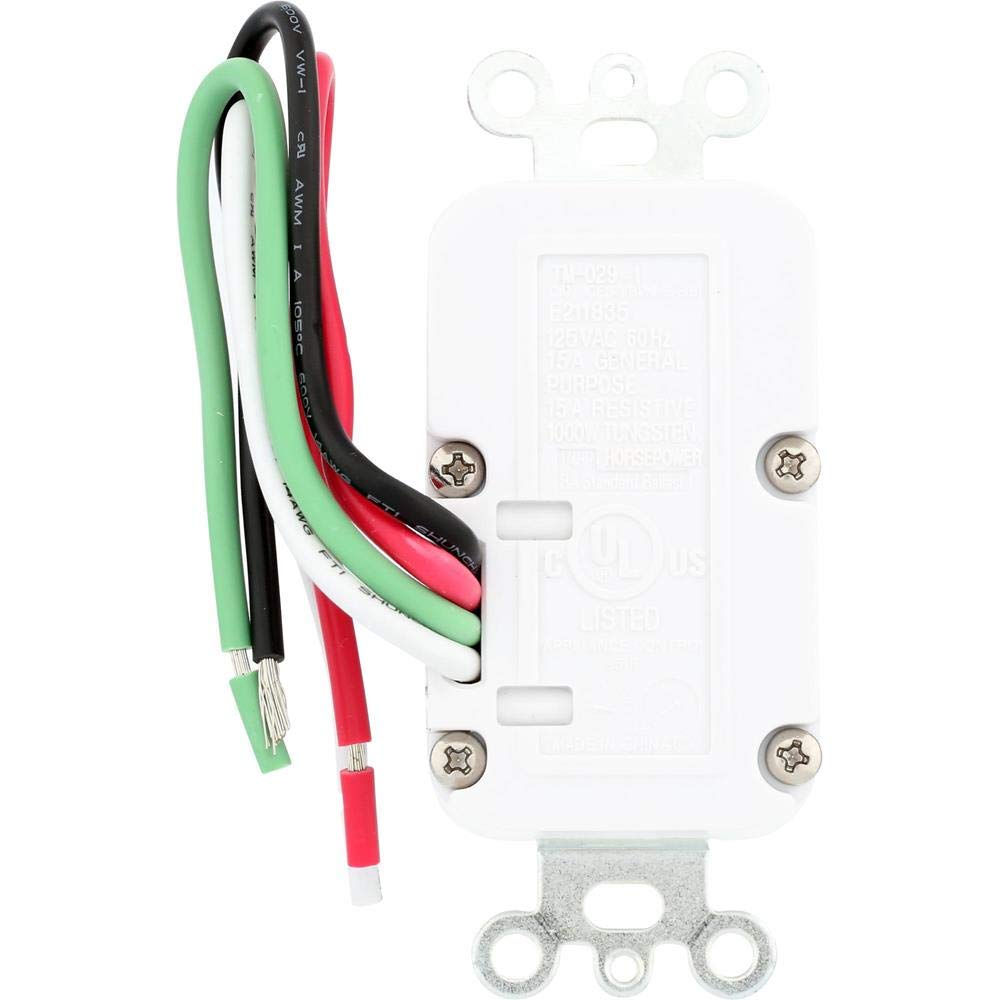
Image 4.3: Back view of the timer, displaying electrical specifications including voltage, amperage, and UL listing.
5. Installation
Before You Begin: Ensure power is turned off at the circuit breaker or fuse box to avoid electrical shock. Verify power is off using a voltage tester.
- Prepare Wiring: Carefully remove the existing wall switch from the electrical box. Identify the existing wires: typically a hot wire (power in), a load wire (to the light/device), a neutral wire, and a ground wire.
- Connect Wires: Connect the Westek TMDW10 timer's wires to your home's electrical wires according to the following scheme:
- Black Wire (Timer) to Hot Wire (from power source)
- Red Wire (Timer) to Load Wire (to light/device)
- White Wire (Timer) to Neutral Wire
- Green Wire (Timer) to Ground Wire
Use appropriate wire connectors (not included) to secure all connections. Ensure no bare wire is exposed.
- Mount Timer: Carefully fold the wires into the electrical box and secure the timer to the box using the provided screws.
- Install Wall Plate: Attach a standard wall plate (not included) over the timer.
- Restore Power: Turn the power back on at the circuit breaker.
6. Initial Setup
Upon first power-up or after a prolonged power outage, the display may be blank or show incorrect time. The internal rechargeable battery will maintain settings during short power failures.
- Set Current Time: Refer to the timer's display and buttons (typically located under a cover or on the face). Press the 'CLOCK' button (if available) or a combination of 'SET' and arrow buttons to adjust the hour and minute.
- Set Current Day: Use the 'DAY' button or similar function to select the correct day of the week.
- Confirm Settings: Ensure the AM/PM indicator is correct.
7. Operating Instructions
The TMDW10 timer allows for up to 7 custom programs, offering flexibility for various scheduling needs.
7.1 Programming Schedules
- Enter Program Mode: Press the 'PROG' button (or similar, consult on-device labels). The display will typically show '1 ON' or 'P1 ON'.
- Set ON Time: Use the hour and minute adjustment buttons to set the desired ON time for the first program.
- Select Days: Use the 'DAY' button to select the days of the week for this program. Options may include individual days, weekdays, weekends, or all days.
- Set OFF Time: Press 'PROG' again to advance to '1 OFF' (or 'P1 OFF'). Set the desired OFF time and select the corresponding days.
- Repeat for Additional Programs: Continue this process for up to 7 ON/OFF programs.
- Exit Program Mode: Press the 'CLOCK' button or wait for the timer to automatically exit program mode.
7.2 Manual Override
The large 'ON-OFF' button on the front of the timer allows for immediate manual control, overriding the current program without deleting it. Pressing this button will toggle the connected device between ON and OFF states. The timer will resume its programmed schedule at the next scheduled event.
7.3 Random Function
Some models include a 'RANDOM' feature, designed to deter intruders by turning lights ON and OFF at irregular intervals. To activate this feature, locate and press the 'RANDOM' button (if available). Pressing it again will deactivate the function.
8. Maintenance
- Cleaning: Disconnect power before cleaning. Wipe the timer with a soft, damp cloth. Do not use abrasive cleaners or solvents.
- Battery Backup: The timer features a rechargeable battery backup. This battery is not user-replaceable. If the timer consistently loses settings during short power outages, the unit may need replacement.
9. Troubleshooting
| Problem | Possible Cause | Solution |
|---|---|---|
| Timer display is blank or unresponsive. | No power to the timer; internal battery depleted; unit malfunction. | Check circuit breaker. Ensure proper wiring. Allow time for internal battery to charge (if recently installed). If problem persists, unit may be defective. |
| Timer does not turn device ON/OFF at programmed times. | Incorrect programming; manual override engaged; wiring issue. | Review programming steps. Ensure the timer is in 'AUTO' mode (if applicable). Check load wire connection. |
| Settings are lost after a power outage. | Internal rechargeable battery is not holding charge. | The rechargeable battery may be at the end of its life. The unit may need replacement. |
| Buttons are stuck or unresponsive. | Physical damage; internal mechanism failure. | Attempt a soft reset by pressing the small reset button (often a pinhole). If buttons remain stuck, the unit may be defective. |
10. Specifications
| Feature | Specification |
|---|---|
| Model Number | TMDW10 |
| Brand | Westek |
| Voltage | 125 VAC, 60Hz |
| General Purpose Amperage | 15A |
| Tungsten Amperage (Incandescent) | 10A |
| Product Dimensions (Approx.) | 5"D x 5"W x 5"H |
| Item Weight (Approx.) | 0.31 Pounds |
| Color | White |
| Material | Solid |
| Certifications | UL Listed |
11. Warranty and Support
For specific warranty information and customer support, please refer to the documentation included with your product at the time of purchase or visit the official Westek website. Contact information for technical assistance is typically provided by the manufacturer.
Manufacturer: Westek
Website: Visit the Westek Store on Amazon


