
1. Introduction
Thank you for choosing the General Tools Model 230 5-Inch Feeler Gauge. This manual provides essential information for the safe and effective use, maintenance, and storage of your new tool. Please read these instructions thoroughly before operation and retain them for future reference.
The General Tools Model 230 Feeler Gauge is designed for precise measurement of small gaps and clearances, commonly used in automotive, engine, and machinery applications. Its durable construction ensures reliable performance.
2. Product Overview
The General Tools Model 230 Feeler Gauge consists of 26 tempered steel blades, each precisely ground to a specific thickness. These blades are housed within a nickel-plated case and secured by a knurled locking nut, allowing individual blades to be selected and locked into position for measurement.
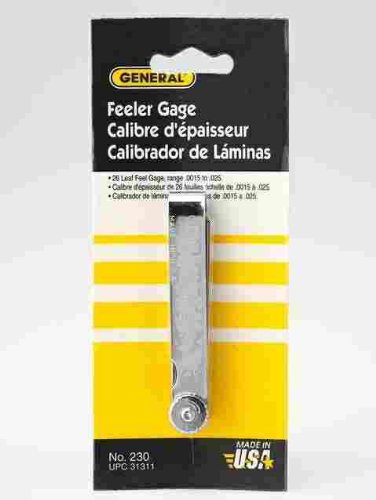
Figure 1: General Tools Model 230 5-Inch Feeler Gauge. This image shows the gauge with its multiple blades fanned out, attached to a central pivot with a knurled locking nut.
Key Components:
- Tempered Steel Blades: 26 individual blades, each marked with its thickness.
- Nickel-Plated Case: Provides protection and a secure housing for the blades.
- Knurled Locking Nut: Allows for easy selection and locking of individual or multiple blades.
3. Setup
- Unpacking: Carefully remove the feeler gauge from its packaging. Inspect the tool for any signs of damage that may have occurred during shipping.
- Initial Inspection: Ensure all 26 blades are present and move freely. Check that the knurled locking nut operates smoothly.
- Familiarization: Fan out the blades to identify the various thicknesses. Note the markings on each blade.
4. Operating Instructions
Follow these steps for accurate gap measurement:
- Clean Surfaces: Ensure the surfaces of the gap to be measured are clean and free of dirt, oil, or debris. Any foreign material can lead to inaccurate readings.
- Select Blade(s): Loosen the knurled locking nut slightly. Identify the blade or combination of blades that matches the approximate size of the gap you wish to measure. You may need to try several blades to find the correct fit.
- Insert Blade: Gently insert the selected blade(s) into the gap. The blade should slide in with a slight, consistent drag. If it slides in too easily, the blade is too thin. If it cannot be inserted without force, the blade is too thick.
- Confirm Measurement: Once a blade or combination of blades slides into the gap with a slight drag, the thickness of that blade (or the sum of the thicknesses of multiple blades) represents the measurement of the gap.
- Withdraw Blade: Carefully withdraw the blade(s) from the gap.
- Secure Blades: After use, fold all blades back into the case and tighten the knurled locking nut to keep them secure.
Important: Never force a blade into a gap, as this can bend or damage the blade, leading to inaccurate measurements and potential tool damage.
5. Maintenance
- Cleaning: After each use, wipe the blades clean with a soft, dry cloth to remove any oil, grease, or debris. For stubborn residue, a cloth lightly dampened with a mild solvent (e.g., isopropyl alcohol) can be used, ensuring the blades are thoroughly dried afterward.
- Lubrication: Periodically apply a very light coat of machine oil to the blades and pivot point to prevent rust and ensure smooth operation. Wipe off any excess oil.
- Storage: Store the feeler gauge in a clean, dry environment, away from excessive humidity or corrosive materials. Keep the blades folded into the case and the locking nut tightened to protect them from damage.
- Inspection: Regularly inspect the blades for any signs of bending, nicks, or wear. Damaged blades should not be used for critical measurements.
6. Troubleshooting
- Inaccurate Readings:
- Ensure surfaces being measured are clean.
- Verify the feeler gauge blades are clean and free of debris.
- Check blades for bends or damage.
- Ensure the correct technique (slight drag) is used.
- Blades Sticking/Difficult to Fan Out:
- Loosen the knurled locking nut.
- Clean blades and pivot point.
- Apply a light lubricant to the pivot and between blades.
- Knurled Locking Nut Loose/Tight:
- Tighten or loosen as needed for comfortable operation. It should be firm enough to hold blades in place but loose enough to allow movement.
7. Specifications
- Model: General Tools 230
- Blade Length: 5 inches
- Number of Blades: 26
- Blade Material: Tempered Steel
- Case Material: Nickel-Plated
- Blade Thicknesses (inches):
- 0.0015, 0.002, 0.0025, 0.003, 0.004, 0.005, 0.006, 0.007, 0.008, 0.009, 0.010, 0.011, 0.012, 0.013, 0.014, 0.015, 0.016, 0.017, 0.018, 0.019, 0.020, 0.021, 0.022, 0.023, 0.024, 0.025
- Product Dimensions: Approximately 3 x 2.8 x 7.7 inches (packaged)
- Weight: Approximately 9.6 ounces
8. Warranty & Support
General Tools stands behind the quality of its products. For information regarding warranty coverage, technical support, or replacement parts, please refer to the official General Tools website or contact their customer service department directly. Keep your purchase receipt as proof of purchase.
General Tools Contact Information:
- Website: www.generaltools.com (Please check the official website for the most current contact details.)
- Customer Service: Refer to the website for phone numbers or email contact forms.


