
1. Introduction
Thank you for choosing the Varo POWXQ5302 900W Jigsaw. This professional-grade pendulum jigsaw is designed for precise cutting of wood, plastic, and metal. Featuring a powerful 900W motor, integrated laser guide, and ergonomic design, it offers high performance and ease of use. Please read this manual carefully before operating the tool to ensure safe and efficient use.
2. General Safety Instructions
Always follow basic safety precautions when using electric tools to reduce the risk of fire, electric shock, and personal injury.
- Work Area Safety: Keep your work area clean and well-lit. Cluttered or dark areas invite accidents. Do not operate power tools in explosive atmospheres, such as in the presence of flammable liquids, gases, or dust.
- Electrical Safety: Power tool plugs must match the outlet. Never modify the plug in any way. Avoid body contact with earthed or grounded surfaces. Do not expose power tools to rain or wet conditions.
- Personal Safety: Always wear eye protection. Use hearing protection when operating for extended periods. Dress properly; avoid loose clothing or jewelry. Secure workpiece with clamps or a vise.
- Tool Use and Care: Do not force the power tool. Use the correct power tool for your application. Disconnect the plug from the power source before making any adjustments, changing accessories, or storing power tools.
- Laser Safety: This tool is equipped with a Class 2 laser. Do not stare directly into the laser beam. Avoid directing the laser beam at people or reflective surfaces.
3. Product Components
Familiarize yourself with the parts of your Varo POWXQ5302 Jigsaw.
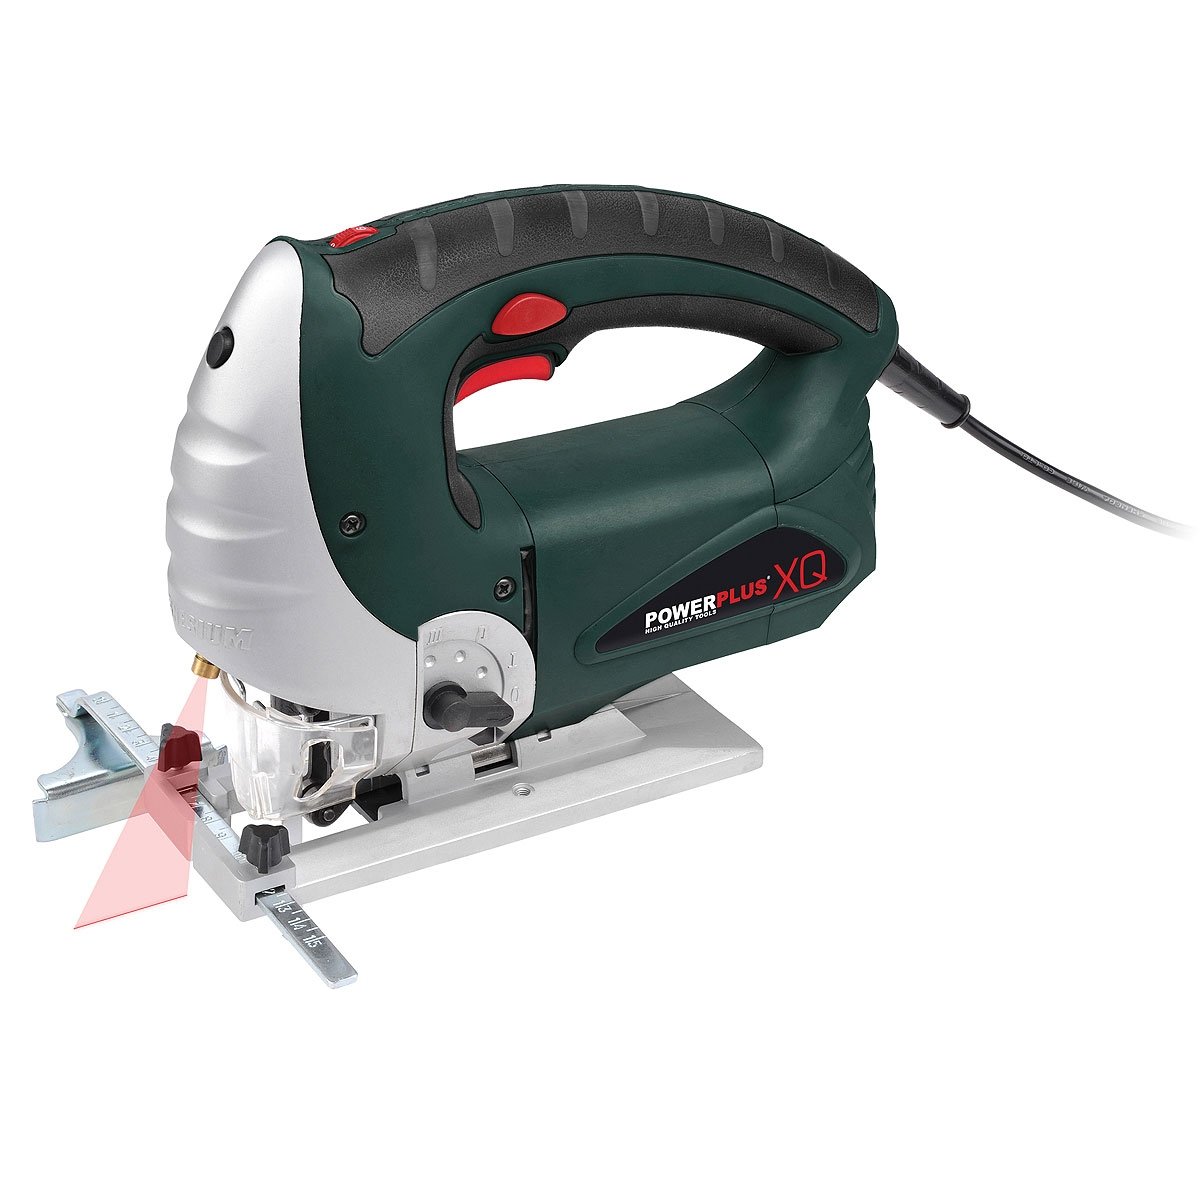
Figure 3.1: Main view of the Varo POWXQ5302 900W Jigsaw, showing its ergonomic design and key features.

Figure 3.2: Close-up view of the integrated laser guide, which assists in achieving precise cuts.

Figure 3.3: Detail of the ergonomic soft grip handle, designed for comfortable and secure operation.

Figure 3.4: Illustration of the flexible ball joint cable connection, designed for durability and wear-free movement at the cable exit.
Key components include the blade clamp, pendulum action selector, speed control, laser activation button, ergonomic soft grip handle, and adjustable base plate.
4. Setup
4.1 Blade Installation and Removal
- Ensure the jigsaw is unplugged from the power source.
- Locate the quick-release blade clamp mechanism.
- Insert the saw blade into the clamp until it clicks securely into place. Ensure the teeth are facing forward.
- To remove, activate the quick-release mechanism and pull the blade out.
4.2 Adjusting the Base Plate for Bevel Cuts
The saw's base plate can be tilted up to 45° in both directions for bevel cuts.
- Unplug the tool.
- Loosen the screws securing the base plate.
- Tilt the base plate to the desired angle (up to 45°). Use the angle scale for reference.
- Tighten the screws firmly to secure the base plate in position.
4.3 Attaching the Parallel Guide
The adjustable parallel guide assists in making straight cuts parallel to an edge.
- Unplug the tool.
- Slide the parallel guide into the slots on the base plate.
- Adjust the guide to the desired cutting width.
- Secure the guide by tightening its locking screw.
5. Operating Instructions
5.1 Powering On/Off
Connect the jigsaw to a 230V / 50Hz power supply. Press the trigger switch to turn the tool on. Release the trigger to turn it off. For continuous operation, press the lock-on button while the trigger is depressed.
5.2 Adjusting Speed
The jigsaw features variable speed control, ranging from 500 to 3000 strokes per minute. Adjust the speed dial according to the material being cut. Lower speeds are suitable for metal and plastics, while higher speeds are for wood.
5.3 Using the Pendulum Action
The 4-level adjustable pendulum action allows for faster cutting in various materials.
- Position 0: No pendulum action, for fine cuts and metal.
- Positions 1-3: Increasing pendulum action for faster cutting in wood and softer materials.
Select the appropriate pendulum setting using the lever on the side of the tool.
5.4 Activating the Laser Guide
The integrated laser guide projects a line onto the workpiece, aiding in precise cutting. Activate the laser by pressing the dedicated laser button. Ensure the laser is aligned with your cutting line before starting the cut.
5.5 Cutting Techniques
- Always secure the workpiece to prevent movement during cutting.
- Start the cut with the base plate resting flat on the workpiece.
- Apply steady, even pressure. Do not force the tool, let the blade do the work.
- For plunge cuts, consult advanced guides or seek professional instruction.
6. Maintenance
Regular maintenance ensures the longevity and performance of your jigsaw.
- Cleaning: After each use, unplug the tool and clean the ventilation slots and housing with a soft brush or compressed air. Do not use water or chemical cleaners.
- Blade Care: Regularly inspect saw blades for sharpness and damage. Replace dull or damaged blades immediately.
- Cord Inspection: Check the 4m rubber connection cable for any signs of damage. The ball joint cable design helps prevent wear, but regular inspection is still recommended.
- Carbon Brushes: This model uses a motor with carbon brushes. If the tool experiences reduced power or excessive sparking, the carbon brushes may need inspection or replacement by a qualified technician.
7. Troubleshooting
Refer to this section for common issues and their solutions.
| Problem | Possible Cause | Solution |
|---|---|---|
| Tool does not start | No power supply; faulty switch | Check power connection; contact service center |
| Blade not cutting efficiently | Dull or incorrect blade; incorrect speed/pendulum setting | Replace blade; select appropriate settings for material |
| Excessive vibration | Loose blade; damaged blade; worn components | Ensure blade is securely clamped; replace blade; seek professional inspection |
| Laser not visible | Laser off; dirty lens; bright ambient light | Activate laser; clean laser lens; work in appropriate lighting conditions |
8. Technical Specifications
Detailed specifications for the Varo POWXQ5302 Jigsaw.
| Specification | Value |
|---|---|
| Power | 900 W |
| Power Supply | 230 V / 50 Hz |
| No-load Speed | 500 - 3000 strokes/min |
| Stroke Length | 26 mm |
| Cutting Depth (Wood) | 80 mm |
| Cutting Depth (Metal) | 6 mm |
| Bevel Cut Angle | Up to 45° (both sides) |
| Cable Length | Approx. 4 m (rubber cable) |
| Laser Class | Class 2 |
| Laser Wavelength | 650 nm |
| Protection Class | II |
| Protection Category | IP 20 |
| Weight | Approx. 3.5 kg (7.7 lbs) |
| Sound Power Level (LwA) | 103 dB (A) |
| Sound Pressure Level (LPA) | 92 dB (A) |
| Vibration | 4.9 m/s² K = 1.5 m/s² |
9. Warranty and Support
The Varo POWXQ5302 Jigsaw comes with a 5-year warranty, reflecting its high quality and durability. This warranty covers defects in materials and workmanship under normal use. For warranty claims or technical support, please contact your retailer or the manufacturer's authorized service center.

Figure 9.1: Warranty information, highlighting the 5-year warranty and quality testing.
Please retain your proof of purchase for warranty validation.