1. Introduction and Overview
The Sealey MIGHTYMIG150 is a professional-grade compact MIG welder designed for both gas and gasless operation, offering excellent performance for a variety of welding tasks. This unit is versatile and can be easily switched between gasless and gas modes by a simple change of polarity and the addition of a Gas Conversion Kit (Model No. 120.802032, sold separately).
This manual provides essential information for the safe and efficient use of your MIGHTYMIG150 welder. Please read it thoroughly before operation.
2. Safety Information
WARNING: Welding can be dangerous. Always follow safety precautions to prevent injury or damage.
- Personal Protective Equipment (PPE): Always wear appropriate PPE, including a welding helmet with proper shade, flame-resistant clothing, welding gloves, and safety shoes. Protect bystanders with welding screens.
- Ventilation: Ensure adequate ventilation to remove welding fumes, which can be hazardous. Work in a well-ventilated area or use fume extraction equipment.
- Electrical Safety: Ensure the power supply is correctly rated for the welder (230V). Do not operate in damp conditions. Inspect cables and connections for damage before each use.
- Fire Prevention: Keep flammable materials away from the welding area. Have a fire extinguisher readily available. Hot metal and sparks can cause fires.
- Arc Rays: Arc rays can cause eye and skin burns. Never look at the welding arc without proper eye protection.
- Fumes and Gases: Avoid breathing welding fumes and gases. They can be harmful to your health.
- Work Area: Keep the work area clean and free of clutter. Ensure stable footing.
3. Package Contents
Upon unpacking, please verify that all the following items are included:
- Sealey MIGHTYMIG150 Welder Unit
- Comfort Grip Non-Live Torch (2.1 mtr)
- Earth Cable (1.8 mtr)
- Gas Hose (1 mtr)
- Flux Cored Wire (0.45 kg)
- 1mm Contact Tip
Note: A power plug is not supplied and must be fitted by a qualified person according to local regulations.
4. Setup Instructions
4.1. Initial Setup
- Unpack the welder and place it on a stable, level surface.
- Ensure the power switch is in the 'OFF' position.
- Connect the earth clamp to the designated terminal on the front panel.
- Connect the welding torch cable to the 'TORCH' connection point.
- Install the wire spool (0.9kg gasless or 0.7kg mild steel wire reels only) into the wire feed mechanism, ensuring it feeds smoothly through the guide tube and into the torch liner.
- Fit the appropriate contact tip to the torch.
4.2. Gasless Mode Setup
The unit is set up ready for gasless mode. For gasless welding, ensure the polarity is set correctly. The flux-cored wire typically requires DC electrode negative (DCEN) polarity. Refer to the polarity diagram inside the wire feed compartment if unsure.

Figure 1: Front view of the Sealey MIGHTYMIG150 Welder, showing controls and connections. The power switch, wire speed dial, and torch connection are visible.
4.3. Gas Mode Setup (Optional)
To switch to gas mode, a Gas Conversion Kit (Model No. 120.802032) is required. Follow these steps:
- Change the polarity to DC electrode positive (DCEP) for solid wire and shielding gas. Consult the polarity diagram.
- Connect the supplied gas hose to the welder's gas inlet and to your gas regulator (not supplied) on the gas cylinder (CO2, Argon, or CO2/Argon Mix).
- Ensure all gas connections are secure and leak-free.
- Use appropriate solid welding wire for gas welding.

Figure 2: Side view of the Sealey MIGHTYMIG150 Welder, highlighting its compact design and integrated wheels for portability.
5. Operating Instructions
5.1. Powering On
- Ensure all connections are secure and the work area is safe.
- Connect the welder to a suitable 230V power supply.
- Turn the 'POWER' switch to the 'ON' position. The 'POWER ON' indicator light should illuminate.
5.2. Setting Welding Parameters
- Power Settings: The MIGHTYMIG150 has multiple power settings (MIN/MAX, 1/2). Select the appropriate setting based on the thickness of the material being welded. Start with lower settings for thinner materials and increase for thicker materials.
- Wire Speed: Adjust the 'WIRE SPEED' dial (1-10) to control the rate at which the welding wire feeds. A good starting point is to match the wire speed to the power setting to achieve a smooth, consistent arc.
5.3. Welding Procedure
- Securely attach the earth clamp to the workpiece, ensuring good electrical contact.
- Position the torch nozzle approximately 10-15mm from the workpiece.
- Press the torch trigger to initiate the arc and wire feed.
- Maintain a consistent travel speed and torch angle for a uniform weld bead.
- Release the trigger to stop welding.
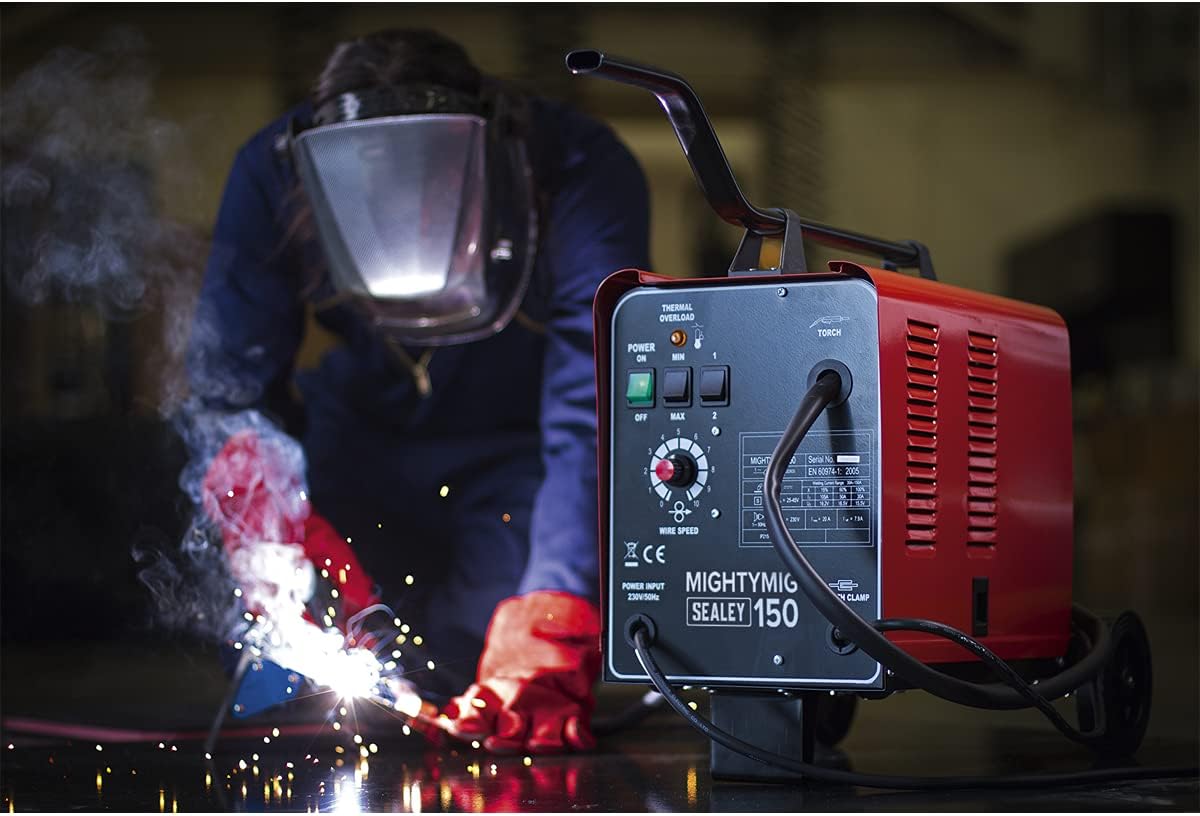
Figure 3: The Sealey MIGHTYMIG150 Welder in operation, demonstrating the welding process with sparks and a user wearing appropriate safety gear.

Figure 4: A closer view of the Sealey MIGHTYMIG150 Welder during use, showing the intense light of the welding arc and the material being joined.
6. Maintenance
Regular maintenance ensures the longevity and safe operation of your welder.
- Cleaning: Regularly clean the welder, especially the wire feed mechanism, to remove dust and debris. Use compressed air to clear ventilation slots.
- Contact Tip: Inspect and replace the contact tip regularly as it wears out. A worn tip can lead to poor arc stability and wire feeding issues.
- Torch Liner: Periodically check the torch liner for blockages or wear. A damaged liner can cause wire feeding problems.
- Earth Clamp: Ensure the earth clamp is clean and makes good contact with the workpiece.
- Cables: Inspect all cables for cuts, abrasions, or damage. Replace damaged cables immediately.
- Storage: Store the welder in a dry, clean environment when not in use.
7. Troubleshooting
If you encounter issues with your MIGHTYMIG150 welder, refer to the following common troubleshooting tips:
| Problem | Possible Cause | Solution |
|---|---|---|
| No power to the unit | Power cable disconnected, circuit breaker tripped, faulty power switch. | Check power cable connection, reset circuit breaker, contact qualified technician if switch is faulty. |
| Wire not feeding | Wire spool tangled, contact tip blocked, torch liner clogged, wire feed motor issue. | Untangle wire, clean/replace contact tip, clear/replace torch liner, check wire feed motor connection. |
| Poor weld quality / Inconsistent arc | Incorrect power/wire speed settings, poor earth connection, wrong polarity, contaminated workpiece. | Adjust settings, clean earth clamp contact, verify polarity, clean workpiece thoroughly. |
| Thermal overload light on | Exceeded duty cycle, insufficient cooling. | Allow the unit to cool down. Ensure ventilation is not obstructed. |
If problems persist after attempting these solutions, please contact Sealey customer support or a qualified service technician.
8. Specifications
| Specification | Value |
|---|---|
| Model No. | MIGHTYMIG150 |
| Welding Current | 30-150A |
| Wire Capacity | 0.9kg (Gasless), 0.7kg (Mild Steel) |
| Duty Cycle | 100% @ 30A, 15% @ 105A |
| Cooling System | Forced Air |
| Gas Type | CO2, Argon, CO2/Argon Mix |
| Torch | 2.1mtr Non-Live |
| Supply Voltage | 230V |
| Absorbed Power | 4.5kW |
| Case Size | Compact |
| Weight | 26kg (approx. 57.3 lbs) |
| Product Dimensions (L x W x H) | 325 x 645 x 425 mm (approx. 12.8 x 25.4 x 16.7 inches) |
| Color | Red |
9. Warranty and Support
For information regarding warranty coverage, terms, and conditions, please refer to the warranty card included with your product or visit the official Sealey website. Keep your proof of purchase for warranty claims.
For technical support, spare parts, or service inquiries, please contact Sealey customer service through their official website or the contact details provided in your product packaging. When contacting support, please have your model number (MIGHTYMIG150) and serial number ready.
Official Sealey Website: www.sealey.co.uk


