1. Introduction
This manual provides essential information for the safe and correct installation, operation, and maintenance of the Hormann EL101 436294 Light Barrier. This device is designed as a safety component for automatic gate and garage door systems, detecting obstructions in the path of the door or gate to prevent accidents. Please read this manual thoroughly before installation and keep it for future reference.
2. Safety Instructions
- Installation must be performed by qualified personnel in accordance with local electrical codes and regulations.
- Disconnect power to the gate or garage door opener before beginning any installation or maintenance work.
- Ensure all wiring connections are secure and properly insulated to prevent short circuits or electrical hazards.
- Do not modify the light barrier components. Use only original Hormann replacement parts.
- Regularly test the functionality of the light barrier after installation and during routine maintenance.
3. Package Contents
Verify that all components listed below are present in your package:
- 2 x Light Barrier Units (Transmitter and Receiver)
- 2 x Connecting Cables (10m each, 2-wired)
- 2 x Mounting Brackets
- Assorted Screws and Fasteners
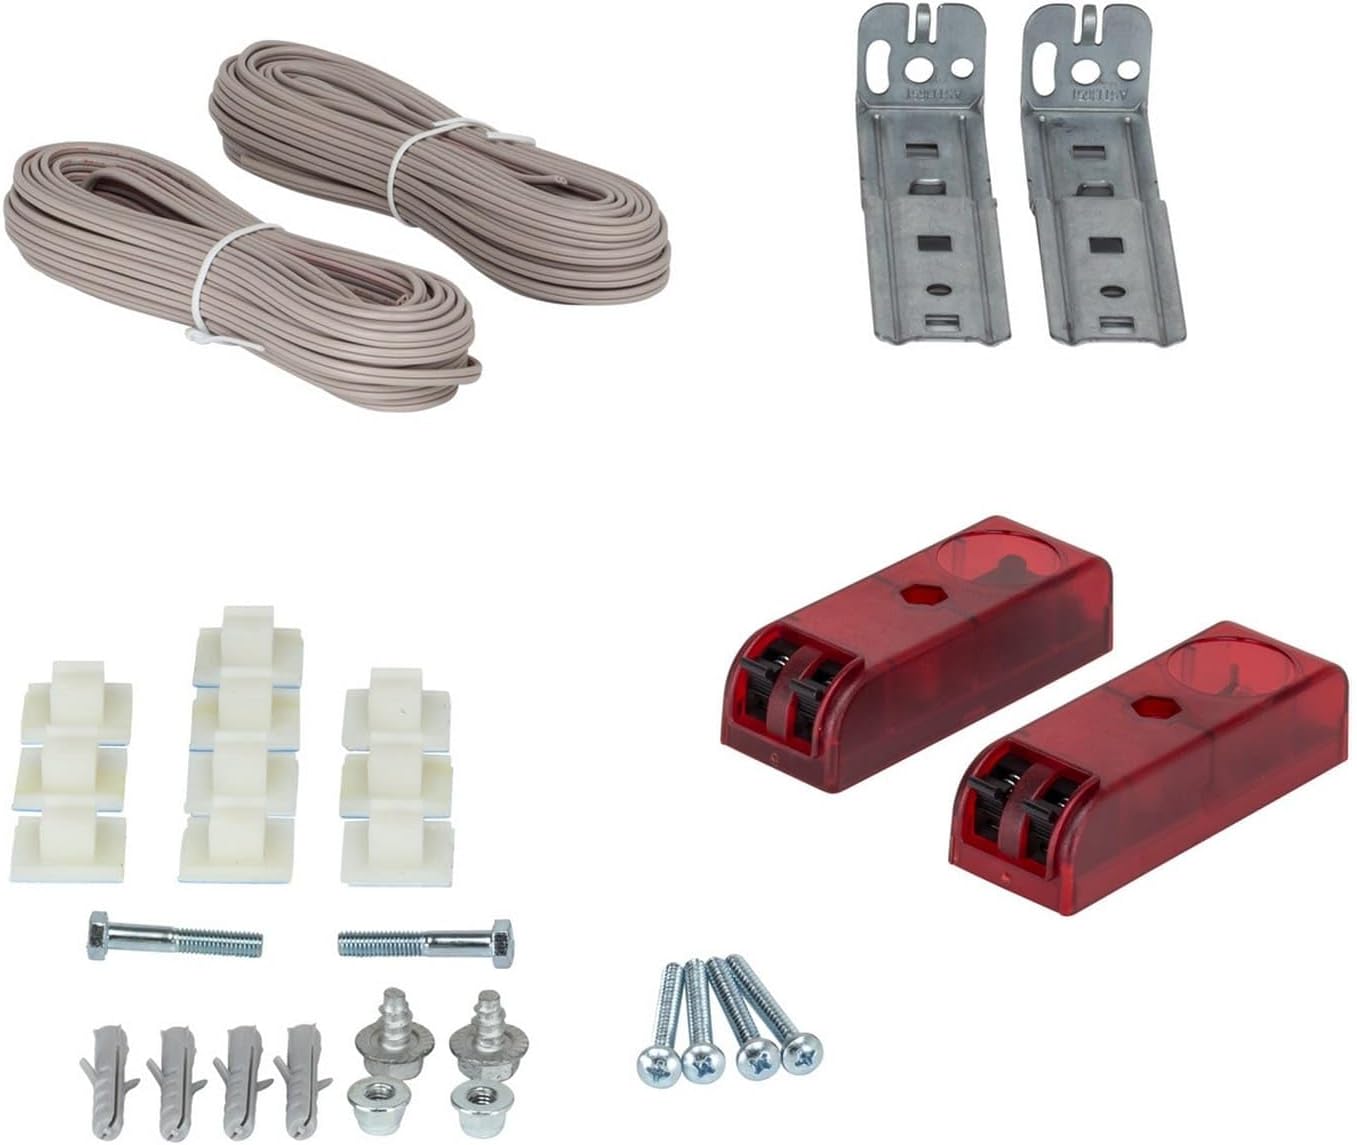
Image 1: Overview of the Hormann EL101 Light Barrier kit, showing two light barrier units, two rolls of connecting cable, two mounting brackets, and various screws and fasteners for installation.
4. Specifications
| Feature | Specification |
|---|---|
| Model | EL101 |
| Part Number | 436294 |
| Dimensions (W x H x D) | 30 x 90 x 25 mm (approx. 1.18 x 3.54 x 0.98 inches) |
| Connecting Cable | 2 x 10 m Round Cable, 2-wired |
| Type of Protection | IP21 |
| Material | Kunststoff (Plastic) |
| Item Weight | Approx. 1.1 pounds (0.5 kg) |

Image 2: Detailed view of the Hormann EL101 Light Barrier unit, illustrating its dimensions: 86.5 mm in length and 30 mm in width.
5. Setup and Installation
Follow these steps for proper installation of the light barrier:
- Mounting: Install the transmitter and receiver units on opposite sides of the garage door or gate opening. Ensure they are securely fastened using the provided mounting brackets and hardware. The units should be mounted at a height that allows for detection of obstructions, typically 6-8 inches (15-20 cm) from the ground.
- Wiring: Connect the 2-wired cables from each light barrier unit to the corresponding terminals on your garage door or gate opener control board. Refer to your opener's manual for specific wiring diagrams. Ensure correct polarity if specified.
- Alignment: Align the transmitter and receiver units so that the infrared beam is unobstructed and directly hits the receiver. Many units have an indicator light that illuminates when proper alignment is achieved. Adjust the position of the units until the indicator light is steady.
- Testing: After installation and alignment, test the light barrier by activating the garage door or gate. While the door/gate is closing, interrupt the beam with an object (e.g., a box). The door/gate should immediately stop and reverse direction.
- Important Note for Existing Openers: If you are retrofitting this light barrier to an existing garage door opener, it may be necessary to retrain the opener's safety system. For many Hormann openers, this involves accessing a specific menu (e.g., menu 10) and allowing the door to complete several open/close cycles (typically 3). This process ensures the opener recognizes and integrates the new safety sensor. Failure to retrain may result in the opener ignoring the sensor, even if it is electrically functional.
6. Operation
Once properly installed and aligned, the Hormann EL101 Light Barrier operates automatically. When the garage door or gate is closing, the transmitter emits an infrared beam towards the receiver. If an object or person breaks this beam, the receiver signals the opener to immediately stop and reverse the door/gate movement, preventing potential injury or damage.
7. Maintenance
To ensure continued reliable operation of your light barrier, perform the following maintenance tasks:
- Cleaning: Periodically clean the lenses of both the transmitter and receiver units with a soft, damp cloth. Dust, dirt, or spiderwebs can obstruct the beam and cause false detections.
- Inspection: Regularly check the mounting brackets and wiring for any signs of damage, corrosion, or loose connections. Ensure the units remain securely mounted and properly aligned.
- Function Test: Perform a function test at least once a month by interrupting the beam while the door/gate is closing. The door/gate must stop and reverse. If it does not, refer to the troubleshooting section.
8. Troubleshooting
If your light barrier is not functioning correctly, consider the following common issues and solutions:
- Door/Gate does not close or reverses immediately:
- Check for obstructions in the beam path.
- Ensure the transmitter and receiver are properly aligned. Clean the lenses if dirty.
- Verify wiring connections are secure and correct.
- Check if the opener needs retraining (refer to Section 5, point 5).
- Indicator light is off or flashing:
- No power to the unit: Check power supply and wiring.
- Misalignment: Re-align the units until the light is steady.
- Damaged cable: Inspect cables for cuts or breaks.
If problems persist after troubleshooting, contact Hormann customer support or a qualified technician.
9. Warranty and Support
The Hormann EL101 436294 Light Barrier is covered by the manufacturer's standard warranty. Please refer to the warranty documentation provided with your product or visit the official Hormann website for detailed warranty terms and conditions.
For technical assistance, spare parts, or further inquiries, please contact Hormann customer support:
- Manufacturer: Hormann
- Website: www.hoermann.com (Please check for regional websites for specific contact information)


