
1. Introduction
This manual provides detailed instructions for the Kaito KA001 Portable Hand-crank AM/FM NOAA Weather Radio. Please read this manual thoroughly before using the device to ensure proper operation and to maximize its lifespan. This radio is designed for emergency preparedness and general use, offering multiple power options and essential communication features.
2. Product Features
The Kaito KA001 radio is equipped with several features for reliable performance:
- AM/FM Radio Reception: Tune into standard AM and FM broadcast bands.
- NOAA Weather Radio: Access NOAA weather alerts and broadcasts for critical weather information.
- 3-LED Super Bright Flashlight: Integrated flashlight for illumination in low-light conditions.
- Built-in Speaker: For audio output.
- Earphone Jack: For private listening (earphones not included).
- Built-in High Capacity Ni-MH Rechargeable Battery: Internal power source for sustained operation.
- Hand-crank Dynamo Power: Manual power generation for charging the internal battery or operating the radio.
- Multiple Power Options: Can be powered via hand-crank, internal rechargeable battery, or external DC adapter (not included).
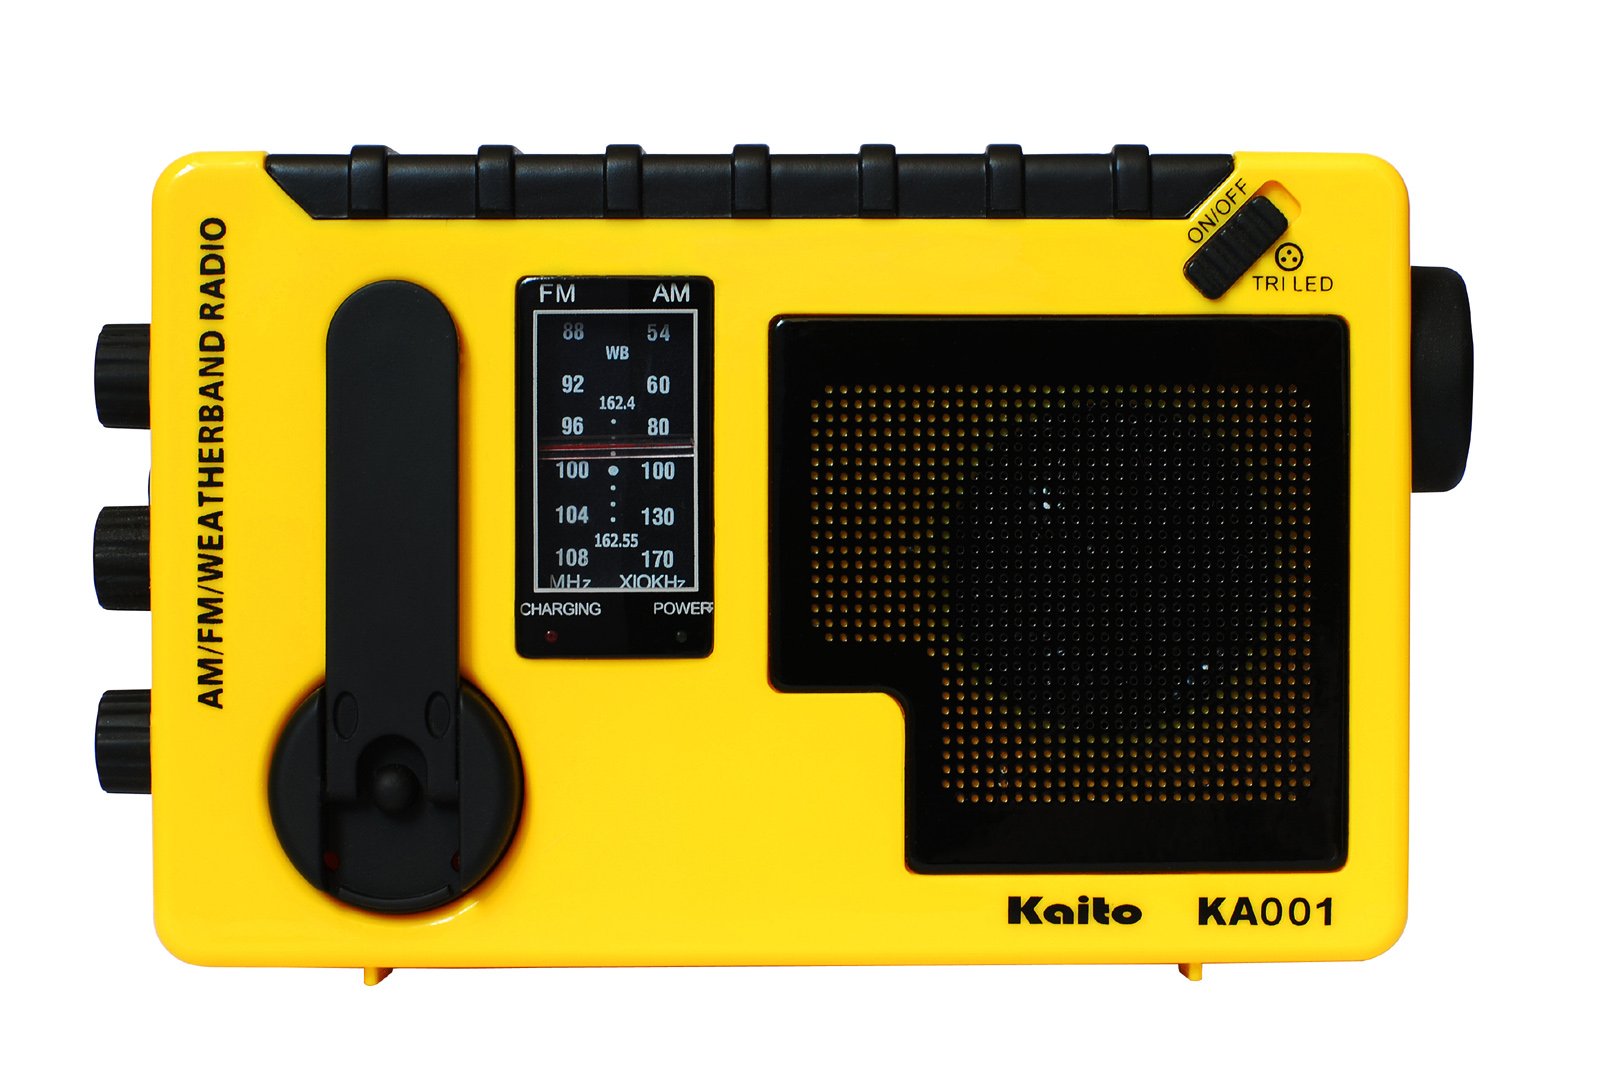
Figure 2.1: The Kaito KA001 Portable Hand-crank AM/FM NOAA Weather Radio, shown in yellow. This image displays the front and side profile of the radio, highlighting its compact design and the hand-crank mechanism.
3. Setup
3.1 Initial Charging
Before first use, it is recommended to fully charge the internal Ni-MH rechargeable battery. This can be done via the hand-crank or an external DC adapter (if available).
- Hand-crank Charging: Extend the hand-crank handle. Rotate the crank clockwise or counter-clockwise at a steady pace for approximately 3-5 minutes to provide initial power. A minute of cranking typically provides several minutes of radio operation or flashlight use.
- DC Adapter Charging (Optional): If using an external DC adapter (not included), connect it to the radio's DC input port. The radio will charge automatically.
3.2 Antenna Extension
For optimal reception, fully extend the telescopic antenna when operating the radio.
4. Operating Instructions
4.1 Powering On/Off and Volume Control
- Locate the Power/Volume knob, typically on the side or front panel.
- Rotate the knob clockwise to turn the radio on. Continue rotating to increase the volume.
- Rotate the knob counter-clockwise to decrease the volume and turn the radio off.
- Note: The volume range may be limited, with some users experiencing a minimum volume that is still relatively loud. For quieter listening, use the earphone jack.
4.2 Tuning Radio Bands (AM/FM/NOAA)
- Select the desired band (AM, FM, or NOAA) using the Band Selector switch.
- Rotate the Tuning knob to scan for stations. The tuning dial provides an approximate frequency indication.
- Extend the telescopic antenna for improved reception, especially for FM and NOAA bands.
- Note: Reception quality can vary based on location and environmental factors. NOAA reception may be weaker compared to dedicated weather radios.
4.3 Using the Flashlight
The Kaito KA001 includes a 3-LED flashlight.
- Locate the Flashlight switch, usually on the side of the unit.
- Slide the switch to the "ON" position to activate the flashlight.
- Slide the switch to the "OFF" position to turn off the flashlight.
4.4 Earphone Jack
For private listening, plug standard 3.5mm earphones (not included) into the earphone jack. Audio will automatically switch from the internal speaker to the earphones.
5. Maintenance
5.1 Cleaning
Wipe the radio's exterior with a soft, damp cloth. Do not use abrasive cleaners or solvents. Ensure no moisture enters the device openings.
5.2 Battery Care
To maintain the longevity of the internal Ni-MH battery, it is recommended to fully discharge and recharge the battery periodically, especially if the radio is stored for extended periods. Avoid extreme temperatures.
5.3 Storage
Store the radio in a cool, dry place away from direct sunlight and extreme temperatures. Retract the antenna before storage.
6. Troubleshooting
| Problem | Possible Cause | Solution |
|---|---|---|
| Radio does not power on. | Internal battery is depleted. | Crank the hand-dynamo for 3-5 minutes or connect an external DC adapter to charge the battery. |
| Poor radio reception (AM/FM/NOAA). | Antenna not extended, weak signal, or environmental interference. | Fully extend the telescopic antenna. Try repositioning the radio. Note that reception quality can vary and may be weaker than wall-powered radios. |
| Volume is too loud, even at lowest setting. | Limited volume adjustment range. | This is a characteristic of the unit. For quieter listening, use earphones plugged into the earphone jack. |
| Flashlight does not work. | Battery depleted or flashlight switch is off. | Ensure the flashlight switch is in the "ON" position. Charge the internal battery via hand-crank. |
7. Specifications
- Brand: Kaito
- Model: KA001
- Radio Bands: AM, FM, NOAA Weather Band
- FM Frequency Range: Up to 108 MHz (specific range not detailed, but 108 MHz is mentioned in data)
- Power Source: Built-in Ni-MH rechargeable battery, Hand-crank dynamo, External DC adapter (not included)
- Flashlight: 3-LED
- Audio Output: Built-in speaker, 3.5mm earphone jack
- Color: Yellow
8. Warranty and Support
8.1 Manufacturer's Warranty
The Kaito KA001 Portable Hand-crank AM/FM NOAA Weather Radio comes with a 90-day manufacturer's warranty from the date of purchase. This warranty covers defects in materials and workmanship under normal use. It does not cover damage caused by misuse, accidents, unauthorized modifications, or natural disasters.
8.2 Customer Support
For warranty claims, technical assistance, or product inquiries, please contact Kaito customer support. Refer to the product packaging or the official Kaito website for the most current contact information.


