
Introduction
The Audio-Technica ATR-1500 is a handheld dynamic microphone designed for clear vocal and instrument reproduction. Its cardioid polar pattern helps to isolate the desired sound source by reducing sound pickup from the sides and rear, which also assists in preventing feedback.
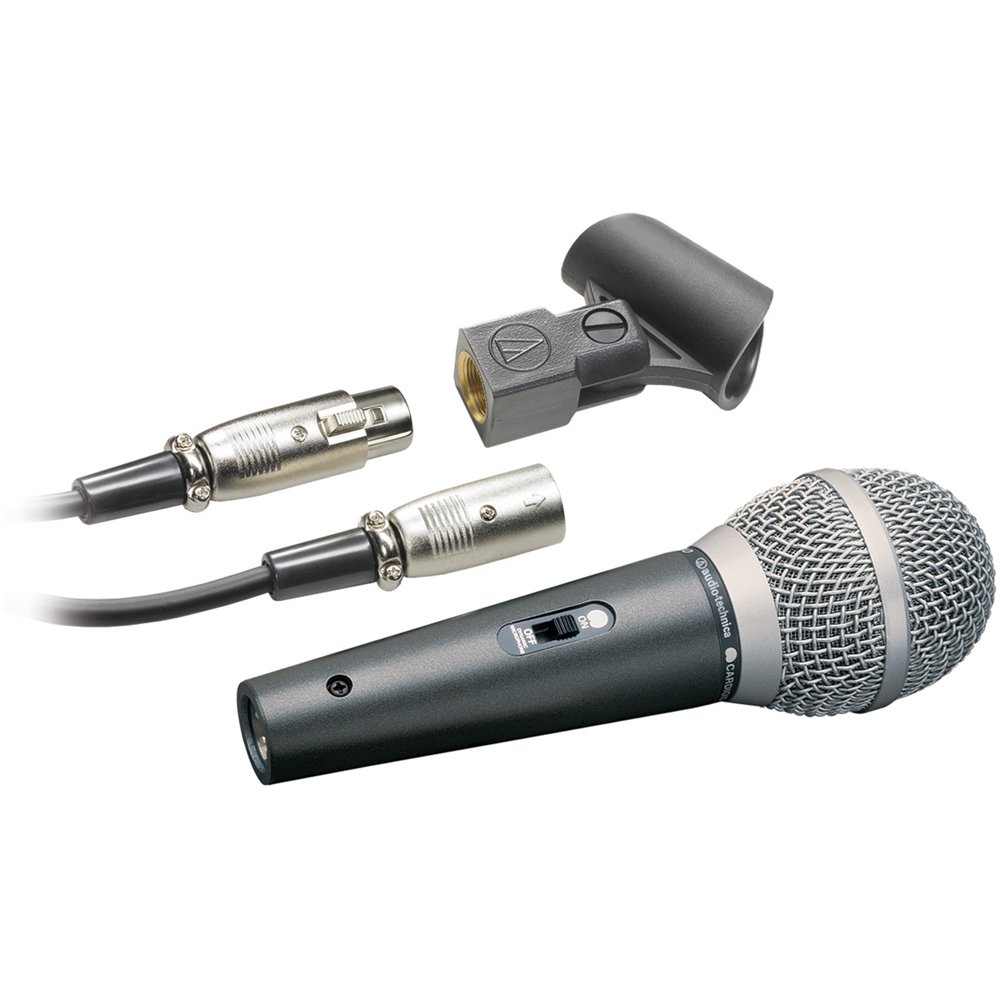
Image: Audio-Technica ATR-1500 Dynamic Microphone, showing its black body and grille.
Package Contents
Verify that all items listed below are included in your package:
- ATR-1500 Dynamic Microphone
- Stand clamp
- Detachable 5 meter (16.5') XLR to XLR cable
Features
- Designed for vocal and instrument use in live performance settings.
- Cardioid polar pattern for focused sound pickup, reducing off-axis noise and feedback.
- Durable metal construction ensures longevity.
- Integrated on/off switch for convenient control.
- Provides enhanced warmth when used in close proximity to the sound source.
Setup
- Unpack the Microphone: Carefully remove the ATR-1500 microphone and its accessories from the packaging.
- Attach the Stand Clamp: Secure the provided stand clamp to a microphone stand (not included).
- Mount the Microphone: Insert the microphone into the stand clamp. Ensure it is held firmly.
- Connect the Cable:
- Connect the XLR end of the supplied 5-meter cable to the XLR output connector at the base of the microphone.
- Connect the other XLR end of the cable to an XLR input on your audio mixer, amplifier, or recording device.
- Power On (if applicable): Ensure your connected audio device is powered on and its input gain is set to a low level initially.
Operating Instructions
- Microphone Placement: For vocals, hold the microphone 2-6 inches from your mouth. For instruments, position it appropriately for the sound source.
- On/Off Switch: The ATR-1500 features a convenient on/off switch located on the microphone body. Slide the switch to the "ON" position to activate the microphone and to "OFF" to mute or power down.
- Gain Adjustment: Gradually increase the input gain on your mixer or audio device until the desired volume level is achieved without distortion.
- Feedback Prevention: Due to its cardioid polar pattern, the microphone is designed to reduce feedback. To further minimize feedback, ensure the microphone is positioned behind loudspeakers and away from direct speaker output.
- Close-Up Use: The microphone is designed to provide enhanced warmth when used close to the sound source (proximity effect). Experiment with distance to achieve your preferred sound.
Maintenance
- Cleaning: Wipe the microphone body with a soft, dry cloth. Do not use harsh chemicals or abrasive cleaners.
- Storage: When not in use, store the microphone in a dry, dust-free environment.
- Cable Care: Avoid sharp bends or kinks in the cable. Coil it loosely for storage to prevent damage.
- Grille Maintenance: Periodically check the microphone grille for any debris. If necessary, gently clean with a soft brush.
Troubleshooting
| Problem | Possible Cause | Solution |
|---|---|---|
| No Sound Output |
|
|
| Low Volume/Weak Sound |
|
|
| Feedback (High-pitched squeal) |
|
|
Specifications
| Microphone Form Factor | Microphone Only |
| Polar Pattern | Unidirectional (Cardioid) |
| Connectivity Technology | XLR |
| Connector Type | XLR |
| Included Components | Microphone, stand clamp, 5 m (16.5') XLR to XLR cable |
| Item Weight | 1.64 pounds (approx. 0.74 kg) |
| Product Dimensions (L x W x H) | 11 x 2.8 x 3.1 inches (approx. 27.9 x 7.1 x 7.9 cm) |
| Signal-to-Noise Ratio | 65 dB |
| Power Source | Corded Electric (Phantom power not required for dynamic microphone) |
| Recommended Uses | Gaming, Singing, Voice Recording |
Warranty Information
Audio-Technica products are designed and manufactured to high quality standards. For specific warranty details, including coverage period and terms, please refer to the warranty card included with your product or visit the official Audio-Technica website. Keep your purchase receipt as proof of purchase for any warranty claims.
Customer Support
If you encounter any issues or have questions regarding your Audio-Technica ATR-1500 microphone, please contact Audio-Technica customer support. You can find contact information, FAQs, and additional resources on the official Audio-Technica website:
Please have your product model number (ATR1500) and purchase details ready when contacting support.