
EdgeStar IB120SS
EdgeStar IB120SS Built-In Ice Maker User Manual
Model: IB120SS
1. Introduction
Thank you for choosing the EdgeStar IB120SS Built-In Ice Maker. This manual provides essential information for the safe and efficient operation, installation, and maintenance of your appliance. Please read these instructions thoroughly before use and retain them for future reference.
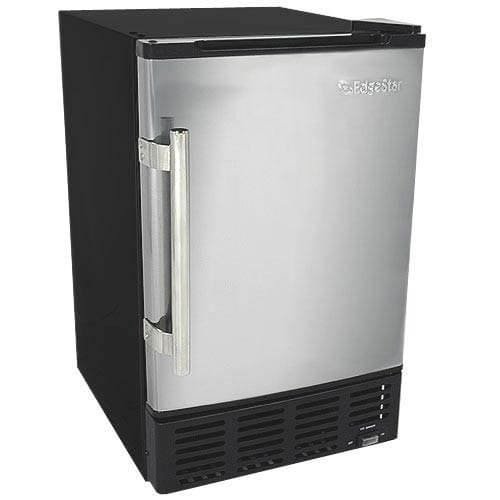
Figure 1: Front view of the EdgeStar IB120SS Built-In Ice Maker.
2. Safety Information
Your safety and the safety of others are very important. We have provided many important safety messages in this manual and on your appliance. Always read and obey all safety messages.
- Electrical Safety: Ensure the appliance is connected to a properly grounded electrical outlet. Do not use extension cords or ungrounded adapters.
- Water Connection: Connect to a potable water supply only. Ensure all water connections are secure to prevent leaks.
- Placement: Install the ice maker on a level surface capable of supporting its weight. Allow adequate ventilation around the unit.
- Flammable Refrigerant: This appliance contains R134a refrigerant. Handle with care and ensure proper ventilation during servicing.
- California Proposition 65 Warning: This product may contain chemicals known to the State of California to cause cancer and birth defects or other reproductive harm.
3. Package Contents
Verify that all items listed below are included in your package:
- EdgeStar IB120SS Built-In Ice Maker Unit
- 25-foot long 1/4" water line connection
- Ice scoop
- User Manual (this document)
4. Setup and Installation
The EdgeStar IB120SS ice maker is designed for both built-in and freestanding installation. It features front venting, allowing for flush installation under counters. Professional installation by a licensed technician is strongly recommended for optimal performance and safety.
4.1 Placement
- Ensure the unit is placed on a level, stable surface.
- Maintain adequate clearance around the unit for proper ventilation, especially for the front vent.
- This unit is ADA Height Compliant, fitting under standard countertops.
4.2 Water Line Connection
Connect the provided 25-foot 1/4" water line to a potable water supply. Ensure all connections are tight to prevent leaks. An inline water filter is recommended if your water supply has high mineral content.

Figure 2: Rear view of the ice maker, highlighting the water line connection point.
4.3 Reversible Door Installation
The door is reversible, allowing for left or right-hand swing to suit your installation needs. Refer to the detailed instructions in the separate door reversal guide (if provided) or consult a professional for assistance.

Figure 3: Close-up of the ice maker door handle, which can be reversed.

Figure 4: Dimensions of the EdgeStar IB120SS ice maker: 25.19" H x 15" W x 19.94" D.
5. Operating Instructions
5.1 Power On/Off
Locate the On/Off power switch, typically on the control panel or near the front vent. Press the switch to turn the unit on or off.
5.2 Ice Production
Once powered on and connected to a water supply, the ice maker will begin producing ice. It can produce up to 12 pounds of ice per day. The removable ice reservoir can store up to 6 pounds of ice.

Figure 5: Interior view of the ice maker with the door open, revealing the ice bin and included scoop.

Figure 6: Close-up of the ice bin containing crescent-shaped ice cubes and the ice scoop.
5.3 Auto Shut-Off
The unit features an automatic shut-off function. When the ice bin is full, the ice maker will cease production until ice is removed, preventing overflow.
6. Maintenance
Regular maintenance ensures the longevity and efficient operation of your ice maker.
6.1 Cleaning
- Clean the interior of the ice maker and the ice bin periodically with a mild detergent and warm water. Rinse thoroughly.
- Wipe down the exterior with a soft cloth. For stainless steel surfaces, use a stainless steel cleaner.
6.2 Defrosting
This unit requires manual defrosting. If frost accumulates excessively, turn off the unit, remove all ice, and allow the frost to melt naturally. Clean and dry the interior before restarting.
6.3 No Drain Line Required
The EdgeStar IB120SS functions as a freezer, keeping the ice frozen. Therefore, a drain line is not required, simplifying installation.
7. Troubleshooting
Before contacting customer support, please refer to the following common issues and solutions:
| Problem | Possible Cause | Solution |
|---|---|---|
| Unit does not turn on | No power, power switch off | Check power connection, ensure switch is on. |
| No ice production | No water supply, water line kinked, ice bin full | Check water connection, straighten water line, empty ice bin. |
| Ice production is slow | High ambient temperature, poor ventilation | Ensure proper ventilation, unit is not in direct sunlight or near heat sources. |
| Excessive frost buildup | Door not sealed properly, high humidity | Check door seal, manually defrost the unit. |
If the problem persists after attempting these solutions, please contact EdgeStar customer support.
8. Specifications
| Feature | Detail |
|---|---|
| Brand | EdgeStar |
| Model Name | IB120SS |
| Product Dimensions (D x W x H) | 19.94" x 15" x 25.19" |
| Ice Production Capacity | Up to 12 lbs per day |
| Ice Storage Capacity | Up to 6 lbs |
| Wattage | 425.5 watts |
| Voltage | 115 Volts |
| Refrigerant | R134a |
| Installation Type | Built-In, Countertop, Freestanding, Undercounter |
| Door Hinging | Reversible |
| Drain Required | No |
| Item Weight | 53.4 pounds |
| Material | Stainless Steel |
| UPC | 854502001375 |
9. Warranty and Customer Support
For warranty information or technical assistance, please refer to the warranty card included with your product or visit the official EdgeStar website. You may also contact EdgeStar customer support directly for service inquiries.
Online Support: www.edgestar.com/support
Related documentsIB120SS


Ask a question about this manual
Ask about setup, troubleshooting, compatibility, parts, safety, or missing instructions. Manuals+ will review the question and use this page’s manual context to help answer it.