
Introduction
This manual provides essential information for the safe and efficient use of your SINGER Electric Sewing Machine Model 66-18. Please read all instructions carefully before operating the machine to ensure proper function and to prevent damage or injury. Keep this manual for future reference.
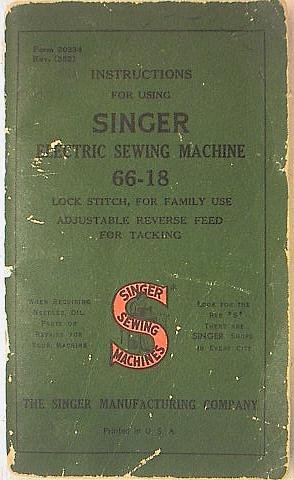
Image: The SINGER Electric Sewing Machine Model 66-18, showcasing its classic design and components.
Setup
1. Unpacking and Placement
Carefully remove the machine from its packaging. Place the machine on a stable, level surface with adequate lighting. Ensure there is enough space around the machine for comfortable operation and fabric handling.
2. Power Connection
Connect the power cord to the machine and then to a suitable electrical outlet. Ensure the voltage matches the machine's requirements. The foot controller should also be connected to the machine.
3. Needle Installation
- Turn the handwheel towards you to raise the needle bar to its highest position.
- Loosen the needle clamp screw.
- Insert a new needle with the flat side facing the back of the machine, pushing it up as far as it will go.
- Tighten the needle clamp screw securely.
Image: Close-up view of the needle clamp area, illustrating the correct orientation and insertion of a sewing machine needle.
4. Bobbin Winding
- Place a spool of thread on the spool pin.
- Guide the thread through the tension disc for bobbin winding.
- Place an empty bobbin onto the bobbin winder spindle.
- Wrap the thread around the bobbin a few times, then push the bobbin winder to the right.
- Press the foot controller to start winding. Stop when the bobbin is full.
- Cut the thread and remove the bobbin.
5. Threading the Machine
- Raise the presser foot and needle to their highest positions.
- Place the spool of thread on the spool pin.
- Guide the thread through the upper thread guides and tension discs.
- Pass the thread through the take-up lever from right to left.
- Thread the needle from front to back.
- Insert the wound bobbin into the bobbin case, ensuring the thread unwinds in the correct direction.
- Close the bobbin case cover.
- Hold the upper thread, turn the handwheel to lower and raise the needle, catching the bobbin thread. Pull both threads under the presser foot and to the back.
Image: Diagram illustrating the complete threading path for the SINGER 66-18, from spool to needle, including the take-up lever and tension discs.
Operating Instructions
1. Basic Stitching (Straight Stitch)
- Place the fabric under the presser foot.
- Lower the presser foot.
- Gently press the foot controller to start sewing. Guide the fabric smoothly.
- To stop, release the foot controller. Raise the needle to its highest position and lift the presser foot.
- Pull the fabric away from the machine and cut the threads.
2. Adjusting Tension
Proper thread tension is crucial for balanced stitches. The tension dial is typically located on the front of the machine. Turn the dial to a higher number for tighter tension and a lower number for looser tension. Test on a scrap piece of fabric.
- Too tight upper tension: Bobbin thread appears on the top side of the fabric.
- Too loose upper tension: Upper thread appears on the underside of the fabric.
3. Changing Stitch Length
The stitch length regulator controls the length of each stitch. Adjust this lever or dial to achieve desired stitch length. Longer stitches are suitable for basting or thick fabrics, while shorter stitches are for fine work or reinforcement.
4. Reverse Stitching
To secure the beginning and end of a seam, use the reverse stitch lever or button. Hold it down while sewing to stitch backward for a few stitches, then release to continue forward.
Maintenance
Regular maintenance ensures the longevity and smooth operation of your sewing machine.
1. Cleaning and Oiling
- Disconnect power before cleaning or oiling.
- Remove the needle plate and bobbin case.
- Use a small brush to remove lint and dust from the feed dogs, bobbin area, and tension discs.
- Apply a small drop of high-quality sewing machine oil to designated oiling points, as indicated in the machine's internal diagrams (refer to a service manual if available). Common points include the hook race and moving parts under the needle plate.
- Wipe off any excess oil.
Image: An exploded view or diagram highlighting key areas for cleaning and oiling on the SINGER 66-18 sewing machine.
2. Needle Replacement
Replace the needle regularly, especially after 8-10 hours of sewing or if it becomes bent or dull. A dull or bent needle can cause skipped stitches, fabric damage, or needle breakage. Follow the needle installation steps outlined in the Setup section.
3. Belt Inspection
Periodically inspect the motor belt for wear, cracks, or looseness. A worn belt can affect machine performance. If replacement is needed, consult a qualified technician.
Troubleshooting
This section addresses common issues you might encounter and their solutions.
1. Skipped Stitches
- Cause: Incorrectly installed needle, bent or dull needle, wrong needle size for fabric, improper threading, or incorrect tension.
- Solution: Reinstall needle correctly, replace needle, use appropriate needle, re-thread machine, adjust tension.
2. Tangled Thread (Bird's Nest)
- Cause: Improper threading (especially the upper thread or bobbin), incorrect tension, or lint in the bobbin area.
- Solution: Re-thread both upper and bobbin threads carefully, adjust tension, clean the bobbin case area.
3. Machine Jams or Stops
- Cause: Thread caught in the bobbin area, fabric pulled too hard, or heavy lint accumulation.
- Solution: Turn off power, remove fabric, clear any tangled threads from the bobbin area, clean thoroughly. If the machine is still jammed, do not force it; consult a technician.
Specifications
| Model: | SINGER 66-18 |
| Type: | Electric Sewing Machine |
| Manufacturer: | The Singer Manufacturing Company |
| Power: | AC (Specific voltage/amperage may vary by region and model variant; refer to machine label) |
Warranty and Support
For specific warranty information and technical support, please refer to the documentation provided at the time of purchase or contact an authorized SINGER service center. Keep your purchase receipt as proof of purchase.


