
North Star NSRO42C4
North Star NSRO42C4 Reverse Osmosis System User Manual
Model: NSRO42C4
1. Introduction
The North Star NSRO42C4 Reverse Osmosis System is designed to provide clean, great-tasting water directly from your tap. This advanced filtration system effectively reduces a wide range of contaminants, including lead, cysts (Giardia, Cryptosporidium), sediment, rust, sodium, chromium, and chlorine taste and odor. Its slim-line design allows for easy installation under most kitchen sinks, and the encapsulated filter design ensures quick and mess-free filter changes.
2. Safety Information
- Always turn off the main water supply before performing any installation or maintenance on the system.
- Ensure all connections are secure to prevent leaks. Use Teflon tape on threaded connections as recommended.
- Do not operate the system if any components are damaged.
- Keep the system away from direct sunlight and extreme temperatures.
- If you are unsure about any installation steps, consult a qualified plumber.
3. Components Overview
Your North Star NSRO42C4 Reverse Osmosis System includes the following main components:
- Reverse Osmosis Filtration Unit (with prefilter, RO membrane, and postfilter cartridges)
- Two-Gallon Storage Tank
- Dedicated Faucet
- Installation Kit (tubing, connectors, saddle valve, drain saddle)

Figure 3.1: Complete North Star NSRO42C4 Reverse Osmosis System components.

Figure 3.2: The main filtration unit showing the prefilter, reverse osmosis membrane, and postfilter cartridges.
4. Setup and Installation
This section provides general guidelines for installing your North Star NSRO42C4 system. Refer to the detailed instructions included with your product for specific steps and diagrams.
4.1 Pre-Installation Checklist
- Verify all components are present.
- Ensure adequate space under the sink for the filtration unit and storage tank (Product Dimensions: 18"L x 18.25"W x 18"H).
- Gather necessary tools (drill, wrench, utility knife, Teflon tape).
4.2 Installation Steps
- Turn off Water Supply: Locate and turn off the cold water supply valve under your sink. Open the existing kitchen faucet to relieve pressure.
- Install Faucet: Drill a hole (if necessary) in your sink or countertop for the dedicated RO faucet. Secure the faucet according to the manufacturer's instructions.
- Connect to Cold Water Line: Install the saddle valve onto the cold water supply line. Connect the system's inlet tubing to the saddle valve.
- Install Drain Saddle: Attach the drain saddle to the drainpipe under the sink, above the P-trap. Connect the system's drain tubing to the drain saddle.
- Position Filtration Unit and Tank: Place the filtration unit and the two-gallon storage tank in their desired locations under the sink. Ensure easy access for future filter changes.
- Connect Tubing: Connect the remaining tubing from the filtration unit to the storage tank and the dedicated faucet. Ensure all quick-connect fittings are fully seated.
- Flush System: Slowly turn on the main water supply. Check for leaks. Allow the storage tank to fill, then open the RO faucet to flush the system for several minutes as per the product manual to remove carbon fines and air.
5. Operation
Once installed and flushed, operating your North Star NSRO42C4 system is straightforward:
- To dispense filtered water, simply open the dedicated RO faucet. The system will draw water from the storage tank.
- When the tank is empty, the flow rate from the faucet will decrease. The tank will automatically refill once the faucet is closed.
- The system operates using manual water pressure and does not require electrical power.
6. Maintenance
Regular maintenance ensures optimal performance and water quality from your North Star NSRO42C4 system.
6.1 Filter Replacement
The encapsulated filter design allows for quick and easy filter changes without needing to turn off your water supply. Simply twist off your old filter and twist on the new one.
- Prefilter and Postfilter: Replace every 6-12 months, depending on water quality and usage.
- Reverse Osmosis Membrane: Replace every 2-3 years, or when water production significantly decreases or water quality declines.
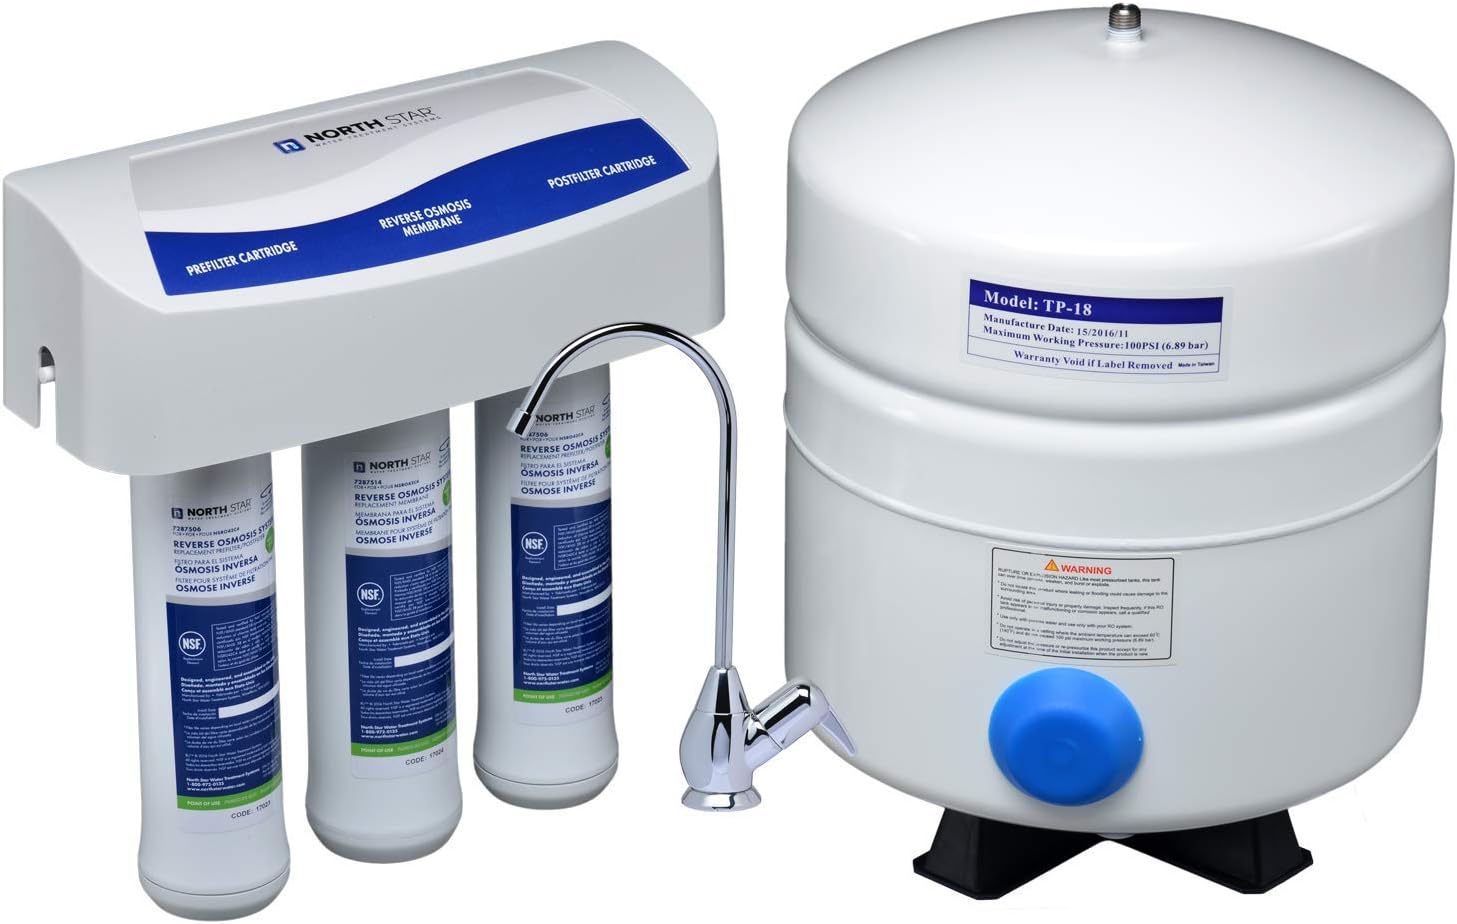
Figure 6.1: The system's compact design facilitates under-sink placement and filter access.
6.2 System Sanitization
It is recommended to sanitize your system annually or during filter changes to prevent bacterial growth. Refer to your product manual for detailed sanitization procedures.
7. Troubleshooting
| Problem | Possible Cause | Solution |
|---|---|---|
| Low water flow from faucet | Clogged filters, low water pressure, empty storage tank. | Replace filters, check household water pressure, allow tank to refill. |
| Water tastes bad or unusual | Expired filters, new system not fully flushed, membrane issue. | Replace filters, flush system thoroughly, check membrane. |
| Leaks | Loose connections, damaged O-rings, cracked housing. | Tighten connections, inspect and replace O-rings, contact support if housing is cracked. |
| System not producing water | Water supply off, clogged prefilter/membrane, kinked tubing. | Check water supply, replace filters, inspect tubing. |
8. Specifications
| Feature | Detail |
|---|---|
| Brand | North Star |
| Model Name | North Star Reverse Osmosis Filtration System |
| Model Number | NSRO42C4 |
| Product Dimensions | 18"L x 18.25"W x 18"H |
| Item Weight | 16.6 pounds |
| Installation Type | Under Sink |
| Power Source | Manual (Water Pressure) |
| Special Feature | Chlorine Reduction |
| UPC | 090259840847 |
9. Warranty and Support
For warranty information, technical support, or to purchase replacement parts and filters, please contact North Star customer service. Refer to the contact details provided in your product packaging or visit the official North Star website.
Note: Keep your purchase receipt for warranty claims.
Related documentsNSRO42C4


Ask a question about this manual
Ask about setup, troubleshooting, compatibility, parts, safety, or missing instructions. Manuals+ will review the question and use this page’s manual context to help answer it.