
Introduction
This manual provides comprehensive instructions for the safe and proper installation, operation, and maintenance of your VideoSecu MW340B2 Full Motion TV Wall Mount Bracket. This mount is designed to securely hold most 32-65 inch LED, LCD, OLED, UHD Plasma Flat Screen TVs with VESA mounting patterns up to 400x400mm and a weight capacity of up to 100 lbs. Please read all instructions carefully before beginning installation.
Safety Information
- Ensure the mounting surface can support the combined weight of the mount and your TV.
- Always use a stud finder to locate wood studs for secure mounting.
- Do not exceed the maximum weight capacity of 100 lbs (45 kg).
- Use appropriate tools and follow all steps precisely to prevent injury or property damage.
- If unsure about any part of the installation, consult a qualified professional.
- Keep children and pets away during installation.
Package Contents
Verify that all components listed below are present before beginning installation.
- VideoSecu MW340B2 Articulating Dual Arm TV Wall Mount
- Mounting Hardware Pack (various screws, washers, spacers)
- 6 feet HDMI cable (Bonus item)
Tools Required (Not Included)
- Stud Finder
- Drill
- 7/32" Drill Bit
- Hex Wrench Set
- Socket Set or Adjustable Wrench
- Philips Head Screwdriver
- Level
- Measuring Tape
- Pencil
Setup and Installation
This section guides you through the process of mounting your TV wall bracket. It is recommended to have at least two people for the installation of the TV onto the mount.
Step 1: Prepare the TV
Carefully place your TV face down on a soft, clean surface to prevent screen damage. Attach the vertical TV brackets to the back of your TV using the appropriate screws and spacers from the hardware pack. Ensure the brackets are securely fastened and aligned with your TV's VESA mounting holes (100x100mm to 400x400mm).
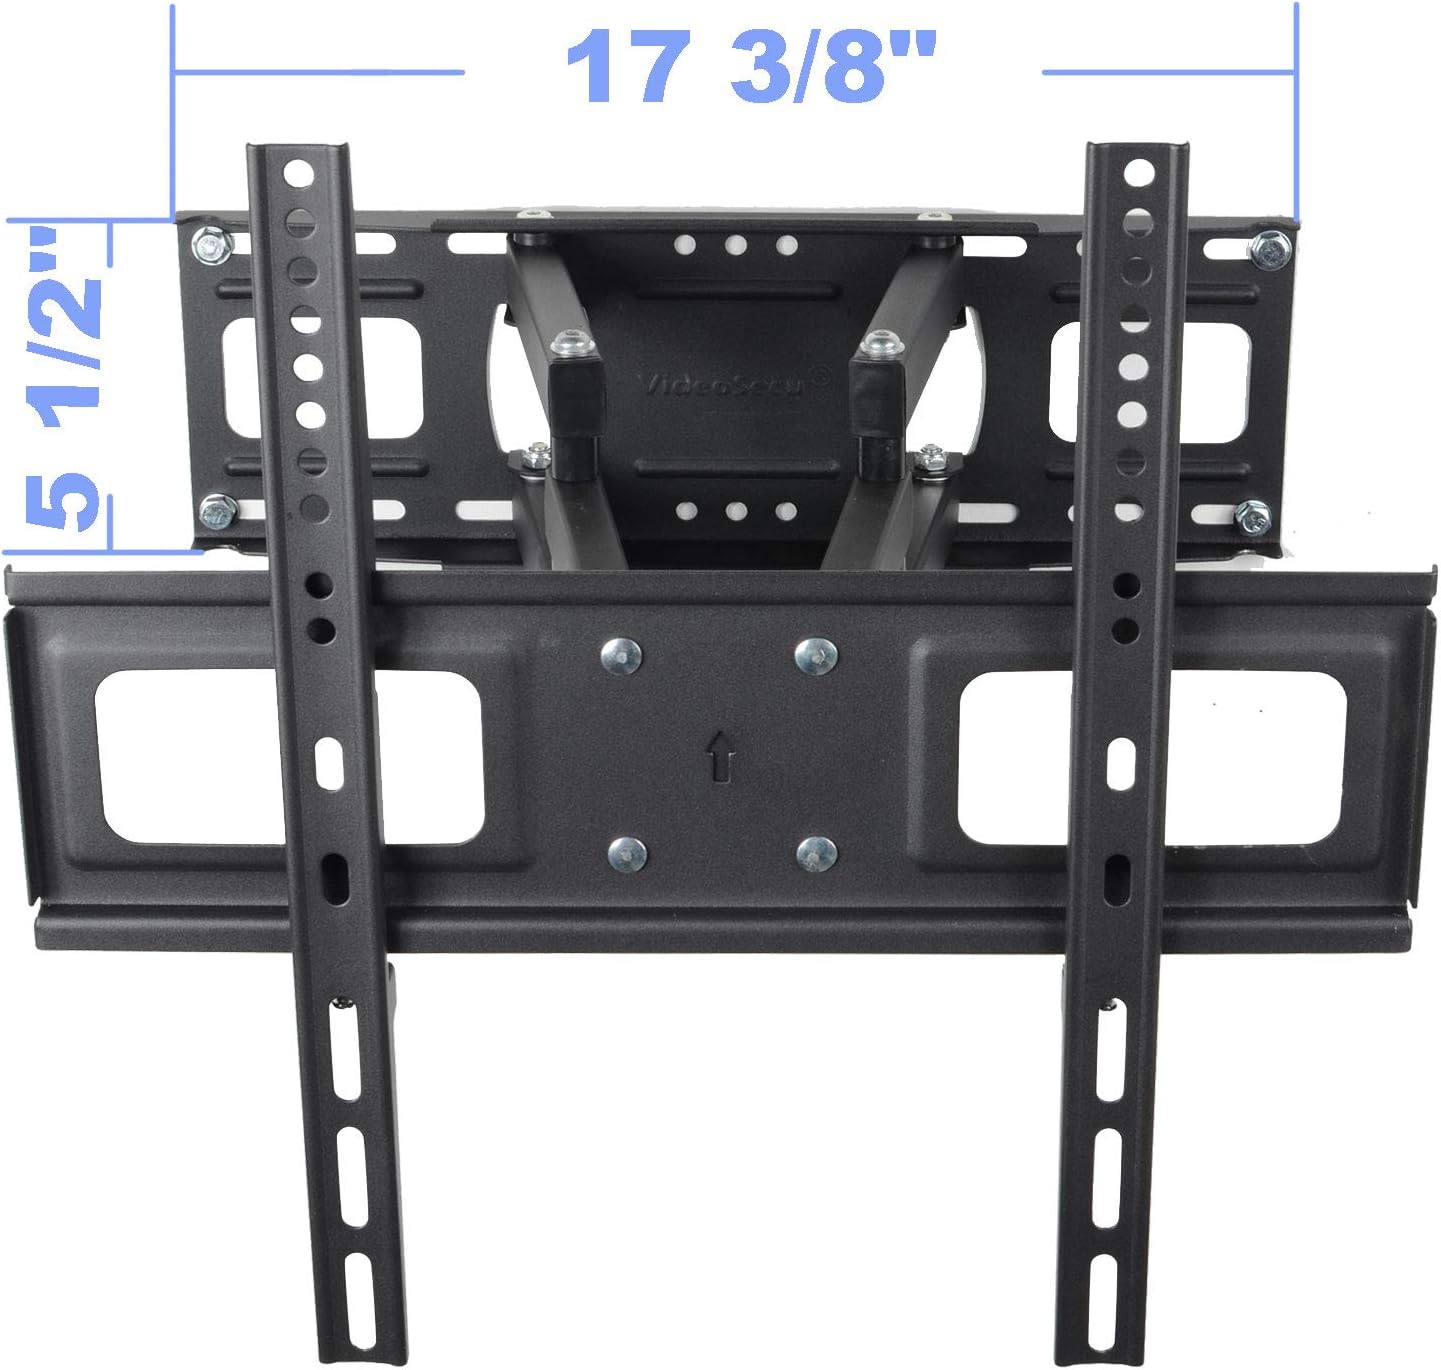
Image: Back of TV with vertical mounting brackets attached, illustrating VESA compatibility.
Step 2: Locate Mounting Position and Drill Pilot Holes
Determine the desired height for your TV. Use a stud finder to locate two adjacent wood studs (up to 16 inches on center) in your wall. Mark the center of the studs. Position the wall plate of the mount against the wall, ensuring it is level, and mark the pilot hole locations. Drill pilot holes using a 7/32" drill bit.

Image: Side view of the TV mount, highlighting its slim 2.3-inch profile when fully retracted.
Step 3: Mount the Wall Plate
Secure the wall plate to the wall using the provided lag bolts and washers. Tighten all bolts firmly with a socket wrench, ensuring the mount is stable and level.
Step 4: Attach TV to Wall Mount
With assistance, carefully lift the TV and hook the vertical brackets onto the wall plate. Secure the TV to the mount using the safety screws or locking mechanisms provided.
Operating Instructions
Extending and Retracting
Gently pull or push the TV to extend the arm up to 14.5 inches from the wall or retract it to a low profile of 2.3 inches.

Image: Side view of the TV mount fully extended, showing the maximum reach of 14.5 inches.
Tilting the TV
The mount allows for an adjustable tilt of 15 degrees forward or 5 degrees backward. Loosen the tilt adjustment knobs, set the desired angle, and then re-tighten the knobs to secure the TV in place.

Image: Illustration of the TV mount's tilt range, from 15 degrees forward to 5 degrees backward.
Swiveling the TV
The articulating arms allow for a 130-degree swivel. Gently push the TV to the left or right to achieve your desired viewing angle.
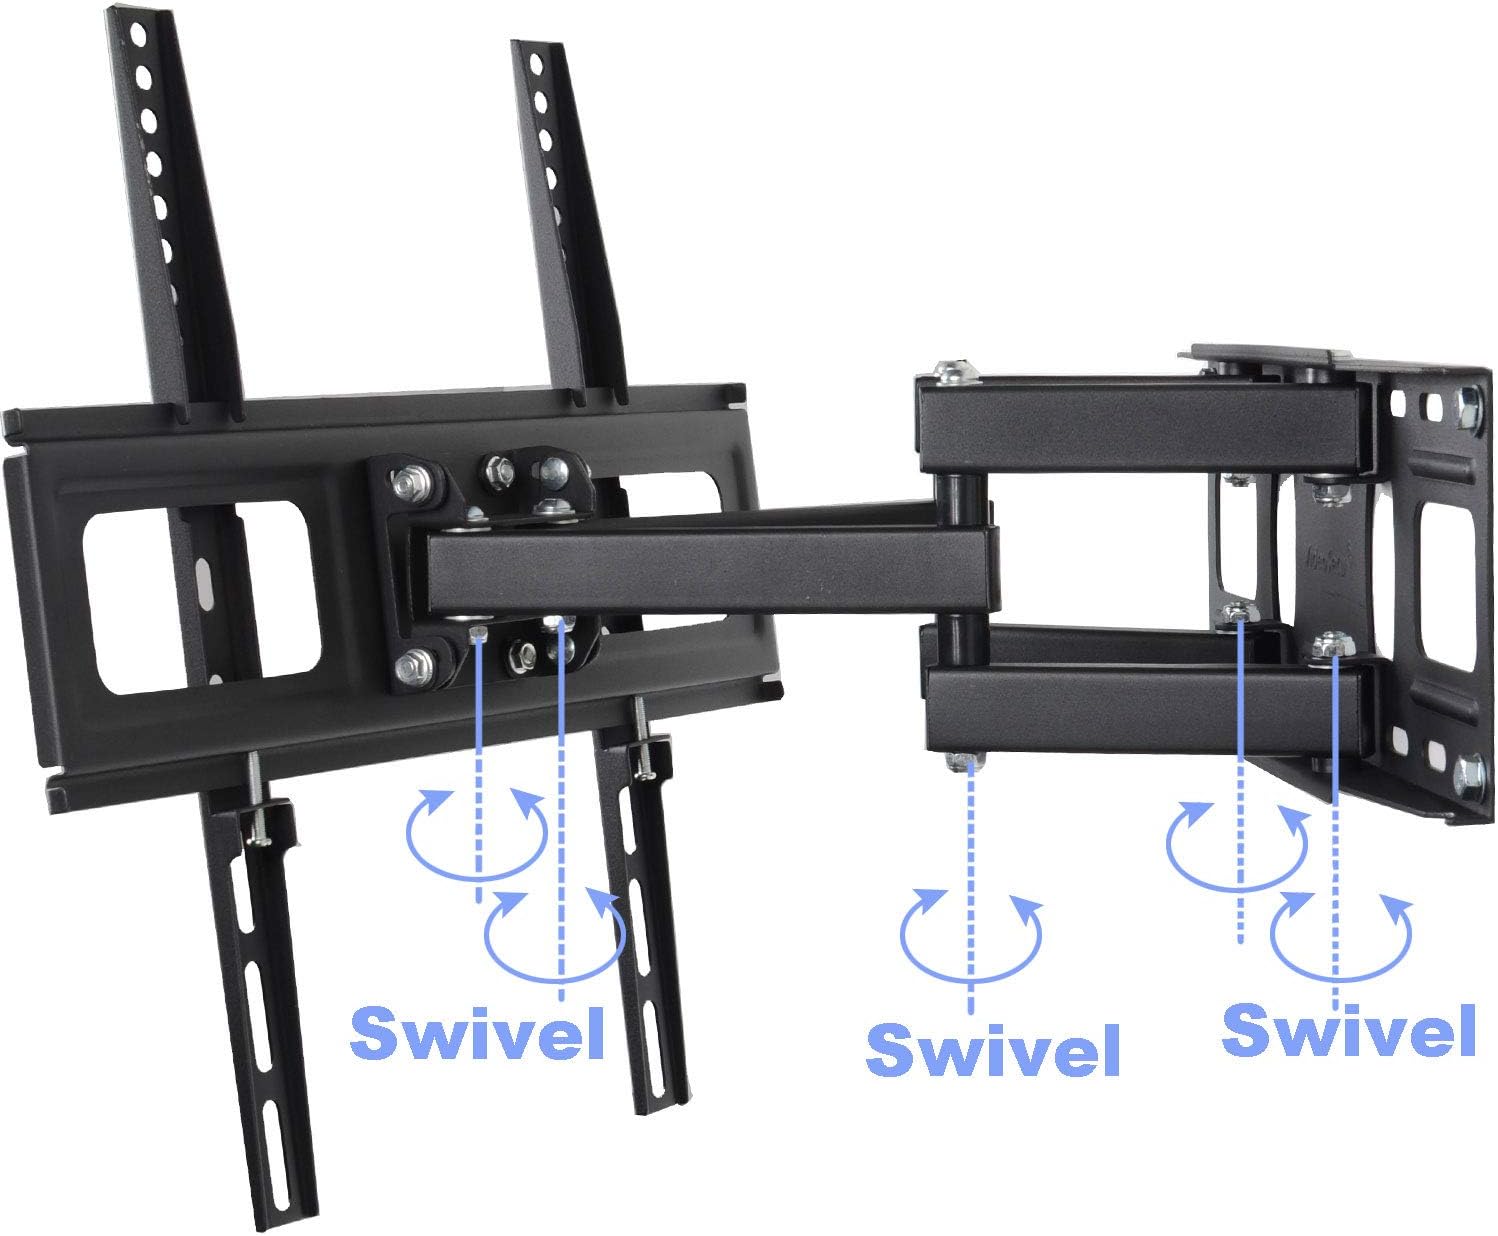
Image: Diagram showing the swivel points and range of motion for the TV mount.
Maintenance
- Periodically check all screws and bolts to ensure they remain tight and secure.
- Clean the mount with a soft, dry cloth. Avoid abrasive cleaners.
- Do not lubricate any moving parts unless specifically instructed by the manufacturer.
Troubleshooting
TV is not level after mounting.
Ensure the wall plate was installed level. Some mounts allow for minor post-installation leveling adjustments. Refer to the specific mechanism on your mount for fine-tuning.
Mount feels unstable.
Recheck all mounting bolts on both the wall plate and the TV brackets. Ensure they are tightened securely. Verify that the mount is installed into solid wood studs or appropriate concrete/masonry anchors. Do not exceed the weight capacity.
Difficulty adjusting tilt or swivel.
Check if any adjustment knobs or screws are too tight. Loosen them slightly to allow for movement, then re-tighten to secure the position.
Specifications
| Feature | Detail |
|---|---|
| Model | MW340B2 |
| Compatible TV Sizes | 32-65 inches |
| VESA Compatibility | 100x100mm to 400x400mm |
| Weight Capacity | 100 lbs (45 kg) |
| Profile (Retracted) | 2.3 inches |
| Extension (Max) | 14.5 inches |
| Tilt Adjustment | +15° / -5° |
| Swivel Adjustment | 130° |
| Material | Steel Construction |
Warranty and Support
For warranty information and technical support, please refer to the manufacturer's official website or contact their customer service. Keep your purchase receipt for warranty claims.