
Introduction
This manual provides essential information for the safe and effective use of your Black Widow AMC-400 Aluminum Dirt Bike Hitch Carrier. Please read all instructions carefully before assembly, installation, and operation to ensure proper usage and prevent injury or damage.
Key Features:
- Versatile Bike Hauling: Designed to transport motorcycles, e-bikes, and fat tire bikes using a Class III or IV 2-inch hitch.
- Lightweight & Durable: Constructed from high-strength aluminum, offering easy handling and supporting up to 400 pounds.
- Convenient Loading: Features a roll-on, roll-off ramp that can be installed on either side for effortless bike loading and secures flat on the carrier when not in use.
- Secure & Stable Ride: Includes an anti-rattle device to minimize movement during transport, ensuring a smooth and secure haul.
- Fits a Range of Bikes: Accommodates wheels up to 5.5 inches wide, with a spacer bar adapter for youth dirt bikes.
What's in the Box
Verify that all components are present before beginning assembly:
- Hitch Carrier Frame
- Loading Ramp
- Anti-tilt Device
- Youth Bike Spacer Adapter Bar
- All necessary hardware (bolts, nuts, washers)
Setup and Installation
Follow these steps to properly install your Black Widow AMC-400 Hitch Carrier:
- Attach Hitch Bar: Insert the carrier's hitch bar into your vehicle's 2-inch Class III or IV receiver. Align the pinholes.
- Secure with Pin: Insert the hitch pin through the aligned holes and secure it with the cotter pin or clip.
- Install Anti-Rattle Device: Attach the anti-rattle device to the hitch bar and tighten it according to the included instructions. This device is crucial for minimizing carrier movement during transit.
- Assemble Carrier Rails: Ensure all carrier rails and support structures are securely bolted together. Double-check all fasteners for tightness.

The Black Widow AMC-400 carrier installed on a truck, ready for use.

Detail of the anti-rattle mechanism, which helps minimize movement of the carrier.
Installation Video:
Official video demonstrating the installation and use of the Black Widow AMC-400 Aluminum Dirt Bike Carrier.
Operating Instructions
Proper loading and securing of your bike are crucial for safe transport.
- Attach Loading Ramp: Secure the loading ramp to either side of the carrier. Ensure it is firmly hooked into place before use.
- Load Bike: Carefully roll your motorcycle, e-bike, or fat tire bike up the ramp onto the carrier. Position the front wheel into the wheel chock.

A person guiding a dirt bike up the ramp onto the carrier, demonstrating the ease of loading.
- Secure Bike: Use appropriate tie-down straps (not included) to secure the bike to the integrated tie-down points on the carrier. Ensure the bike is stable and cannot shift during transit.

A dirt bike firmly secured on the carrier with tie-down straps, highlighting the stability during transport.
- Stow Ramp: Once the bike is loaded and secured, remove the loading ramp and secure it flat onto the carrier using the designated attachment points.
The loading ramp neatly stored on the carrier, illustrating its compact design when not needed.
Maintenance
Regular maintenance ensures the longevity and safe operation of your carrier.
- Inspect Before Each Use: Check all bolts, pins, and connections for tightness and wear. Ensure the anti-rattle device is functioning correctly.
- Clean Regularly: Wash the carrier with mild soap and water to remove dirt, mud, and road grime. Rinse thoroughly and dry to prevent corrosion.
- Check for Damage: Periodically inspect the aluminum frame and steel components for any signs of cracks, bends, or other damage. Do not use the carrier if any damage is found.
- Lubricate Moving Parts: If applicable, lightly lubricate any moving parts or pivot points to ensure smooth operation.
Troubleshooting
Here are solutions to common issues you might encounter:
- Carrier is wobbling or rattling: Ensure the anti-rattle device is properly installed and tightened. Check all hitch connections and bolts for tightness.
- Difficulty loading bike: Verify the ramp is securely attached and positioned correctly. Ensure the bike's tires are within the specified width (up to 5.5 inches).
- Bike feels unstable on carrier: Double-check that tie-down straps are correctly routed and tightened. Ensure the front wheel is seated firmly in the wheel chock.
- Ramp not stowing properly: Ensure the ramp is aligned with its designated storage position and all securing mechanisms are engaged.
Specifications
| Feature | Specification |
|---|---|
| Brand | Black Widow |
| Model Number | AMC-400 |
| Material | Aluminum |
| Load Capacity | 400 Pounds |
| Mounting Type | Hitch Mount (2-inch Class III/IV Receiver) |
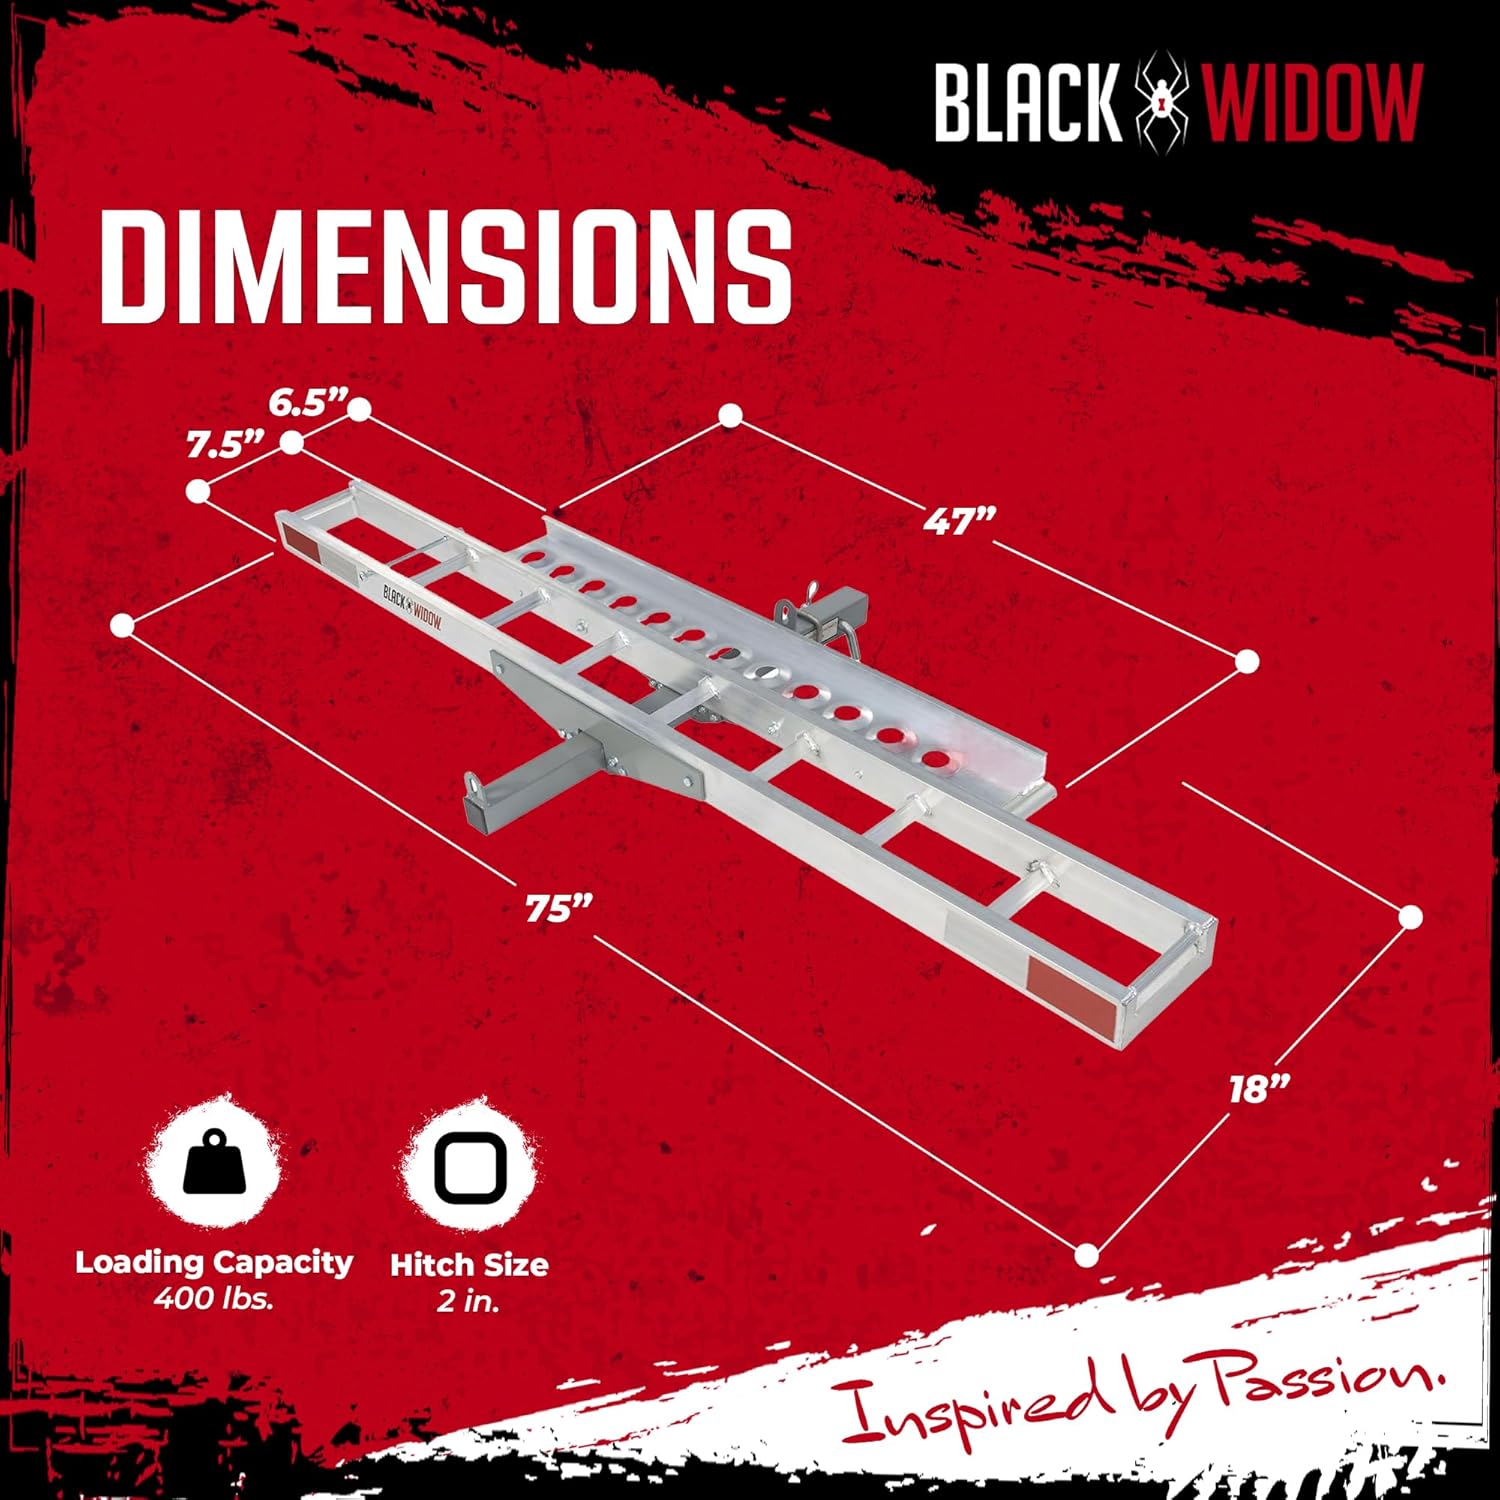
| Item Dimensions (L x W x H) | 75 x 5.5 x 7 inches |
| Max Wheel Width | 5.5 inches |
| Is Foldable | No |
| Included Components | Anti-tilt device, Loading ramp, Youth bike spacer adapter bar |

An illustration detailing the length, width, and height of the carrier, along with its 400 lb capacity and 2-inch hitch size.
Warranty and Support
The Black Widow AMC-400 Aluminum Dirt Bike Hitch Carrier comes with a 1-Year Manufacturer Warranty.
For warranty claims, technical support, or replacement parts, please contact Black Widow customer service through their official website or the retailer where the product was purchased. Keep your proof of purchase for warranty validation.


