
1. Introduction
Thank you for choosing the BELLA Electric Panini Press & Sandwich Grill. This appliance is designed for preparing paninis, sandwiches, burgers, chicken, and vegetables. Its non-stick plates ensure easy food release and simple cleaning. This manual provides essential information for the safe and efficient operation and maintenance of your new appliance.
2. Important Safety Information
Please read all instructions before using this appliance. Basic safety precautions should always be followed to reduce the risk of fire, electric shock, and personal injury.
- Do not touch hot surfaces. Use handles or knobs.
- To protect against electrical hazards, do not immerse cord, plugs, or the appliance in water or other liquid.
- Close supervision is necessary when any appliance is used by or near children.
- Unplug from outlet when not in use and before cleaning. Allow to cool before putting on or taking off parts, and before cleaning the appliance.
- Do not operate any appliance with a damaged cord or plug, or after the appliance malfunctions or has been damaged in any manner.
- The use of accessory attachments not recommended by the appliance manufacturer may cause injuries.
- Do not use outdoors.
- Do not let cord hang over edge of table or counter, or touch hot surfaces.
- Do not place on or near a hot gas or electric burner, or in a heated oven.
- Extreme caution must be used when moving an appliance containing hot oil or other hot liquids.
- Always attach plug to appliance first, then plug cord into the wall outlet. To disconnect, turn any control to "off", then remove plug from wall outlet.
- Do not use appliance for other than intended use.
3. Product Overview
The BELLA Panini Press & Sandwich Grill is designed for versatility and ease of use. Familiarize yourself with its components:
- Non-Stick Cooking Plates: Upper and lower plates with a reinforced non-stick coating for easy food release and cleaning.
- Adjustable Height Mechanism: Allows the top plate to float, accommodating various food thicknesses, from thin sandwiches to thicker cuts of meat.
- Temperature Control Dial: Located on the top, this dial allows you to select desired heat settings (Low, Medium, High) for customized browning.
- Power Indicator Light: Illuminates when the appliance is plugged in and receiving power.
- Ready Indicator Light: Illuminates when the grill has reached the selected cooking temperature.
- Removable Drip Tray: Collects excess grease and liquids for easy disposal and cleaning.
- Locking Mechanism: Secures the top and bottom plates together for upright storage.
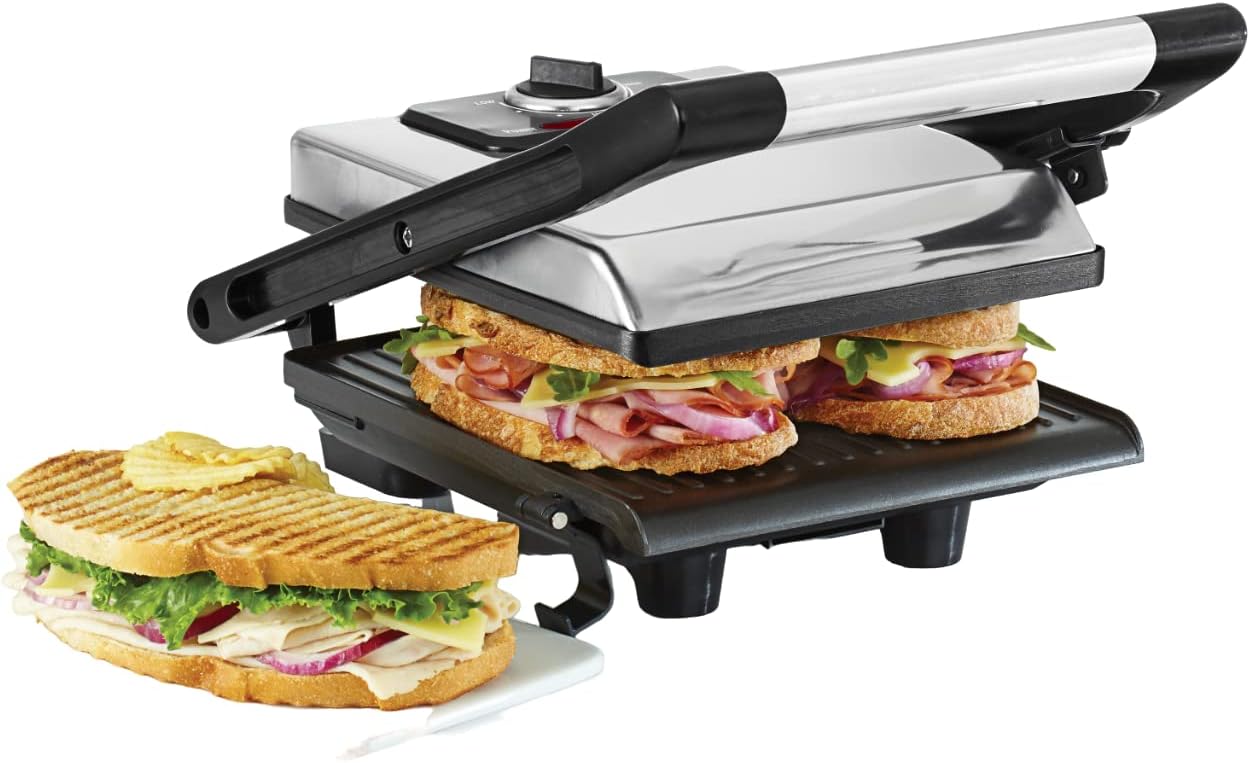
Image: Front view of the BELLA Electric Panini Press, showing the temperature dial, power and ready indicator lights, and overall dimensions (10.75 inches wide, 13.62 inches deep, 4.33 inches high).

Image: Close-up view of the adjustable height locking mechanism on the side of the panini press, labeled "Unlock" and "Lock". This feature allows the top plate to adjust to the thickness of food.

Image: The BELLA Panini Press shown with a sandwich cooking on the lower plate and the removable drip tray visible at the front, designed for easy cleanup.
4. Setup and First Use
- Unpack: Carefully remove the panini press and all accessories from the packaging. Retain packaging for future storage or transport.
- Initial Cleaning: Wipe the cooking plates with a damp cloth or sponge. Ensure the drip tray is clean and properly inserted. Do not immerse the appliance in water.
- Placement: Place the appliance on a stable, heat-resistant, and dry surface, away from walls or other heat-sensitive objects. Ensure adequate ventilation.
- Power Connection: Plug the power cord into a standard 120V AC electrical outlet. The Power indicator light will illuminate.
- Preheat: Turn the temperature control dial to your desired setting (e.g., "MED" or "HIGH"). Allow the grill to preheat until the Ready indicator light illuminates. This may take a few minutes.
- First Use Odor: During the first use, a slight odor or smoke may be noticeable. This is normal and will dissipate quickly.
5. Operating Instructions
5.1. General Grilling
- Ensure the grill is preheated to your desired temperature (Power and Ready lights on).
- Carefully open the grill using the handle.
- Place food onto the lower cooking plate. For thicker items, use the adjustable height mechanism to set the top plate to hover above the food without crushing it.
- Close the top plate. Cooking times will vary based on food type and thickness.
- Monitor food to prevent overcooking. Use heat-resistant, non-metallic utensils to remove food.
- After use, unplug the appliance and allow it to cool completely before cleaning.
5.2. Making Paninis and Sandwiches
- Preheat the panini press to a medium or high setting.
- Assemble your sandwich or panini. Lightly butter or oil the outer surfaces of the bread for best results.
- Place the sandwich onto the lower cooking plate.
- Gently lower the top plate onto the sandwich. The floating hinge will adjust to the sandwich thickness.
- Cook for 3-6 minutes, or until the bread is golden brown and crispy, and fillings are heated through.
- Carefully remove the cooked panini using a non-metallic spatula.
Video: Official product video from Sensio Inc. demonstrating the BELLA Electric Panini Press, Sandwich Maker & Indoor Grill in use, highlighting its versatility for various foods.
6. Maintenance and Cleaning
Proper cleaning and maintenance will ensure the longevity and optimal performance of your panini press.
- Always Unplug: Before cleaning, always unplug the appliance from the power outlet and allow it to cool completely.
- Clean Cooking Plates: Once cooled, wipe the non-stick cooking plates with a soft, damp cloth or sponge. For stubborn food residue, use a small amount of mild dish soap. Avoid abrasive cleaners or scouring pads, as these can damage the non-stick coating.
- Clean Drip Tray: Remove the drip tray and wash it in warm, soapy water. Rinse thoroughly and dry before reinserting.
- Exterior Cleaning: Wipe the exterior surfaces with a damp cloth. Do not use harsh chemicals or abrasive materials.
- Do Not Immerse: Never immerse the main unit of the panini press in water or any other liquid.
- Storage: Once clean and dry, the panini press can be stored upright to save space. Use the locking mechanism to secure the plates.

Image: The BELLA Panini Press shown in its upright storage position, demonstrating its compact design for saving counter space.
7. Troubleshooting
If you encounter issues with your BELLA Panini Press, refer to the following common problems and solutions:
| Problem | Possible Cause | Solution |
|---|---|---|
| Appliance does not turn on. | Not plugged in; power outlet malfunction. | Ensure the power cord is securely plugged into a working electrical outlet. Check the circuit breaker. |
| Food not cooking evenly or taking too long. | Insufficient preheating; incorrect temperature setting; food too thick. | Allow the grill to fully preheat until the Ready light illuminates. Adjust the temperature dial to a higher setting. Ensure food is not excessively thick; use the adjustable hinge for thicker items. |
| Food sticks to the plates. | Plates not properly seasoned (first use); food not oiled; residue buildup. | For first use, wipe plates with a small amount of cooking oil. Lightly brush food or bread with oil or butter before grilling. Clean plates thoroughly after each use. |
| Smoke or unusual odor during operation. | First use odor; food residue burning; excessive oil/grease. | A slight odor is normal during first use. Ensure plates are clean from previous use. Use the drip tray to collect excess grease. If smoke is excessive or persistent, unplug and contact customer support. |
8. Product Specifications
- Model: 13267
- Brand: BELLA
- Color: Silver
- Material: Metal (Lead Free, PFAS Free, PFOA Free)
- Product Dimensions: 10.74"D x 13.62"W x 4.33"H
- Item Weight: 3 Pounds
- Wattage: 1400 Watts
- Voltage: 120 Volts
- Special Feature: Manual temperature control
- Included Components: Panini Maker Press, Drip Tray
9. Warranty and Customer Support
This BELLA Electric Panini Press & Sandwich Grill (Model 13267) comes with a 1-year limited parts and labor warranty.
For warranty claims, technical assistance, or customer support, please refer to the contact information provided with your purchase documentation or visit the official BELLA website.
Manufacturer: BELLA (Sensio Inc.)


