
1. Introduction
The Kaito KA500 Portable Analog Radio is a versatile and reliable device designed for emergency preparedness, outdoor activities, and everyday use. It offers multiple power options and reception across various bands to keep you informed and connected.
Key features include:
- 5-way powered emergency radio: AC, battery, hand crank, solar, and USB.
- AM/FM/Shortwave radio reception.
- 7 pre-programmed NOAA weather channels with alert function.
- Adjustable 180-degree solar panel.
- Integrated flashlight and reading light.
- USB port for charging external devices.

Figure 1: Kaito KA500 Portable Analog Radio (Green)
2. Important Safety Instructions
Please read and understand all safety instructions before operating this device. Keep this manual for future reference.
- Do not expose the radio to extreme temperatures, direct sunlight for prolonged periods (beyond charging), or high humidity.
- Avoid dropping the radio or subjecting it to strong impacts.
- Do not attempt to disassemble or modify the radio. This will void the warranty and may cause damage or injury.
- Keep the radio away from water and other liquids. While it has some water resistance, it is not fully submersible.
- Use only the specified batteries (3 AA batteries) and power adapters.
- When using the hand crank, turn it at a steady, moderate pace. Excessive force or speed can damage the internal mechanism.
- Ensure proper ventilation when charging via AC or USB.
3. What's in the Box
Upon unpacking your Kaito KA500 radio, please ensure all items are present:
- Kaito KA500 Portable Analog Radio
- Rechargeable Battery (internal)
- User Manual
Note: AA batteries are required for optional use and are not included.
4. Parts and Controls
Familiarize yourself with the main components and controls of your KA500 radio:
- Telescopic Antenna: For improved radio reception.
- Solar Panel: Located on top, adjustable for optimal sun exposure.
- Hand Crank: On the side, for manual power generation.
- Tuning Dial: To select radio frequencies.
- Volume Control: Adjusts audio output.
- Band Selector: Switches between AM, FM, SW, and NOAA Weather bands.
- Power Button: Turns the radio on/off.
- Flashlight: Integrated LED light.
- Reading Light: Panel light for illumination.
- USB Output Port: For charging external devices.
- USB Input Port: For charging the radio via USB.
- Battery Compartment: For optional AA batteries.

Figure 2: Front Panel Controls
5. Initial Setup
5.1. Battery Installation (Optional AA Batteries)
- Locate the battery compartment cover on the back of the radio.
- Open the cover and insert 3 AA batteries, ensuring correct polarity (+/-).
- Close the battery compartment cover securely.
Note: The radio has an internal rechargeable battery. AA batteries provide an additional power source.
5.2. Initial Charging
Before first use, it is recommended to fully charge the internal battery using one of the following methods:
- USB Charging: Connect the radio to a USB power source (e.g., computer, USB wall adapter) using a compatible USB cable. The charging indicator will illuminate.
- AC Charging: If an AC adapter is available, connect it to the radio's AC input port.
- Hand Crank: Rotate the hand crank clockwise or counter-clockwise at a steady pace for 3-5 minutes to provide initial power.
- Solar Panel: Place the radio in direct sunlight with the solar panel tilted towards the sun.

Figure 3: Five Power Supply Options
6. Operating Instructions
6.1. Powering On/Off
Press the Power button to turn the radio on. Press it again to turn the radio off.
6.2. Radio Reception (AM/FM/SW/NOAA)
- Extend the telescopic antenna for optimal reception.
- Use the Band Selector switch to choose your desired band: AM, FM, SW (Shortwave), or NOAA (Weather Band).
- Rotate the Tuning Dial to find a station. The tuning indicator light will illuminate when a strong signal is received.
- Adjust the Volume Control to your preferred listening level.
For NOAA Weather Band, select the NOAA band and tune through the 7 pre-programmed channels to find your local weather broadcast. The radio also features a NOAA Weather Alert function.
6.3. Using the Flashlight
To activate the integrated flashlight, locate the flashlight switch (usually on the side or front) and slide it to the 'ON' position. Slide it back to 'OFF' when not in use.

Figure 4: Flashlight in Use
6.4. Using the Reading Light
To activate the reading light panel, locate the reading light switch and slide it to the 'ON' position. This provides broader illumination for reading or working in low-light conditions. Slide it back to 'OFF' when not in use.
6.5. Charging External Devices (USB Output)
The KA500 can act as a power bank to charge small electronic devices (e.g., mobile phones) in an emergency.
- Connect your device's USB charging cable to the radio's USB Output Port.
- The radio will begin charging your device.
Note: Charging external devices will consume the radio's internal battery power. Use this feature sparingly in emergency situations.

Figure 5: Reading Light and USB Charging
6.6. Power Sources
- Hand Crank Power: Rotate the hand crank for approximately 1-2 minutes to get 15-20 minutes of radio operation at medium volume. Continuous cranking can also charge the internal battery.
- Solar Power: Place the radio in direct sunlight. The solar panel will charge the internal battery. For best results, tilt the solar panel towards the sun. This method is best for maintaining charge or slow charging over time.
- USB Power: Connect a USB cable to the radio's input port and a USB power adapter or computer. This is the most efficient way to fully charge the internal battery.
- AA Batteries: If installed, the radio can operate on 3 AA batteries when the internal rechargeable battery is depleted.
- AC Power: (If applicable, using a compatible AC adapter, sold separately).
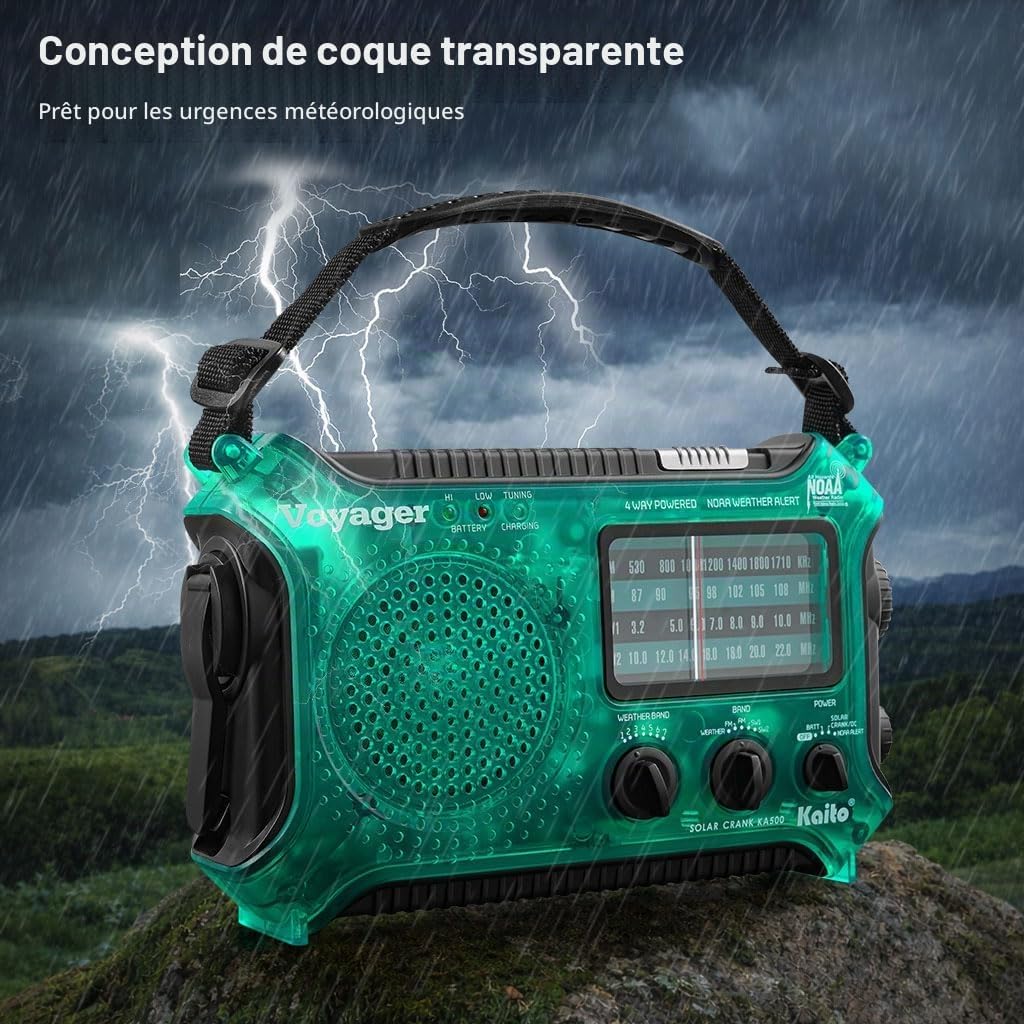
Figure 6: Hand Crank Operation

Figure 7: Solar Panel Tilted for Charging
7. Care and Maintenance
- Cleaning: Wipe the radio with a soft, damp cloth. Do not use abrasive cleaners or solvents.
- Battery Care: If using AA batteries, remove them if the radio will not be used for an extended period to prevent leakage. For the internal rechargeable battery, periodically charge it to maintain its lifespan, even if not in use.
- Storage: Store the radio in a cool, dry place away from direct sunlight and extreme temperatures.
- Antenna: Handle the telescopic antenna carefully to avoid bending or breaking. Retract it when not in use.
8. Troubleshooting
| Problem | Possible Cause | Solution |
|---|---|---|
| Radio does not turn on. | Internal battery is depleted. AA batteries are depleted or incorrectly installed. | Charge the internal battery via USB, hand crank, or solar. Replace AA batteries with fresh ones, ensuring correct polarity. |
| Poor radio reception. | Antenna not extended. Weak signal in the area. Interference. | Fully extend the telescopic antenna. Try repositioning the radio. Move away from electronic devices that may cause interference. |
| External device not charging. | Radio's internal battery is too low. Incorrect cable or port used. | Ensure the radio's internal battery has sufficient charge. Use the correct USB output port and a functional charging cable. |
| Hand crank is stiff or makes noise. | Mechanism may be damaged or obstructed. | Do not force the crank. Contact customer support if the issue persists. |
9. Specifications
- Brand: Kaito
- Model Number: KA500GRN
- Color: Green
- Connectivity Technology: USB
- Tuning Technology: FM (Analog)
- Radio Bands Supported: AM, FM, Shortwave (SW), NOAA Weather Band (7 channels)
- Frequency Range:
- FM: 87-108 MHz
- AM: 520-1710 kHz
- SW: 3200-22000 kHz
- Power Source: Solar Powered, Hand Crank, USB, AC, 3x AA Batteries (not included)
- Special Features: Integrated Flashlight, Solar Powered, Adjustable Solar Panel, Reading Light, USB Charging Output
- Product Dimensions: 21.1L x 5.8W x 13.5H cm (8.3L x 2.3W x 5.3H inches)
- Item Weight: 1.3 pounds (approx. 0.59 kg)
- Max Product Power: 5 Watts
- Voltage: 120 Volts
- Water Resistance Level: Water Resistant
- Internal Material: Plastic
- Recommended Uses: Emergency Preparedness, Outdoor Activities
10. Warranty Information
Warranty information is typically provided with your purchase. Please refer to the documentation included in your product packaging for details regarding the warranty period and terms. For warranty claims or service, retain your proof of purchase.
11. Customer Support
If you have any questions, encounter issues not covered in this manual, or require technical assistance, please contact Kaito customer support. Refer to the contact information provided on the product packaging or the official Kaito website.
For more information, visit the official Kaito website: www.kaito.us


