Introduction
The Biggest Loser AJ-1400-BL 2-in-1 Double-Up 2-Speed Fruit-and-Vegetable Processor and Juicer is designed to help you extract fresh juice from a variety of fruits and vegetables. This versatile appliance functions as both a fruit and vegetable processor and a citrus juicer, offering two speed controls and a pulse function for optimal performance. Its design focuses on ease of use, continuous juicing, and simple cleanup.
Important Safety Instructions
When using electrical appliances, basic safety precautions should always be followed to reduce the risk of fire, electric shock, and/or injury to persons, including the following:
- Read all instructions before operating the appliance.
- Do not immerse the motor base in water or other liquids.
- Ensure the appliance is properly assembled before operation. The safety interlocking latch prevents operation if not correctly assembled.
- Keep hands and utensils out of the feed chute during operation to prevent injury.
- Unplug from outlet when not in use, before putting on or taking off parts, and before cleaning.
- Do not operate any appliance with a damaged cord or plug, or after the appliance malfunctions or has been dropped or damaged in any manner.
- Use only attachments recommended or sold by the manufacturer.
- Do not use outdoors.
- Do not let cord hang over edge of table or counter, or touch hot surfaces.
- Always ensure the lid is securely locked in place before turning on the appliance.
Parts and Features
Familiarize yourself with the components of your 2-in-1 juicer and processor.

Figure 1: The Biggest Loser AJ-1400-BL configured as a citrus juicer, showing the reamer, pulp filter, and juice collection cup.

Figure 2: The appliance set up as a fruit and vegetable processor, with various produce items like apples, carrots, and leafy greens around it, demonstrating its intended use.
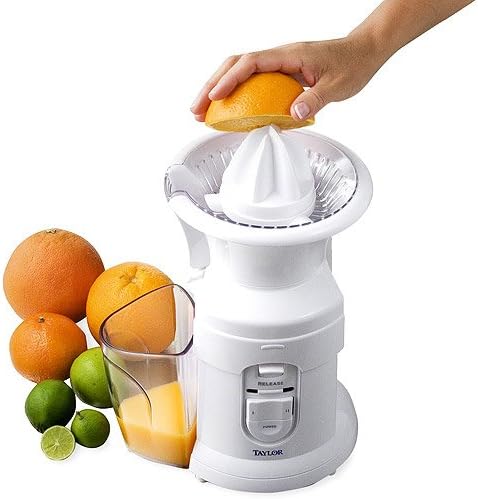
Figure 3: A hand demonstrating the use of the citrus juicer attachment, pressing half an orange onto the reamer to extract juice into the transparent cup.
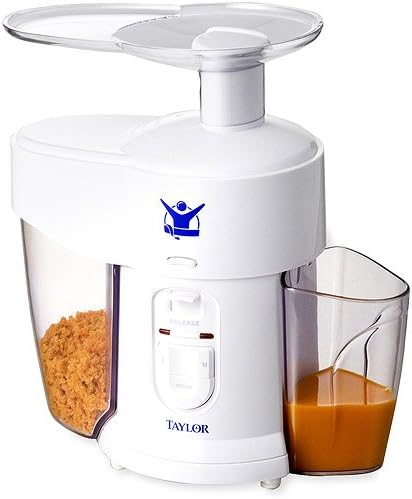
Figure 4: The fruit and vegetable processor in operation, clearly showing the separated pulp in the large container and the extracted juice in the collection cup.

Figure 5: A side view of the fruit and vegetable processor, highlighting its compact design and the transparent pulp container.
Key Components:
- Motor Base: Contains the 320-watt motor and control panel.
- Control Panel: Features "LO" (low speed), "HI" (high speed), and "POWER" (pulse) buttons.
- Safety Interlocking Latch: Ensures the unit operates only when correctly assembled.
- Feed Chute: For inserting fruits and vegetables into the processor.
- Pusher: Used to guide produce down the feed chute.
- Stainless Steel Pulp Container: 1-1/4 quart capacity for collecting pulp.
- Transparent Juice Cup: With pouring spout for collecting extracted juice.
- Juicing Screen/Filter: Separates pulp from juice.
- Citrus Reamer: Attachment for juicing citrus fruits.
- Non-slip Rubberized Feet: Provides stability during operation.
Setup
Before first use, wash all removable parts in warm, soapy water, rinse thoroughly, and dry. Ensure the motor base is unplugged from the power outlet.
Assembling for Fruit and Vegetable Processing:
- Place the motor base on a stable, flat, and dry surface.
- Insert the juicing screen/filter into the motor base.
- Attach the stainless steel pulp container to the designated slot on the side of the motor base.
- Place the transparent juice cup under the juice spout.
- Secure the lid onto the motor base, ensuring the safety interlocking latch engages properly.
- Insert the pusher into the feed chute.
Assembling for Citrus Juicing:
- Place the motor base on a stable, flat, and dry surface.
- Place the citrus reamer directly onto the motor shaft.
- Position the transparent juice cup under the juice spout.
- Ensure the reamer is securely seated.
Operating Instructions
Preparing Produce:
- Wash all fruits and vegetables thoroughly.
- For the fruit and vegetable processor: Cut produce into pieces small enough to fit into the feed chute. Remove large seeds, pits, and hard skins (e.g., pineapple, melon, citrus).
- For the citrus juicer: Cut citrus fruits (oranges, lemons, limes, grapefruits) in half.
Using the Fruit and Vegetable Processor:
- Ensure the unit is assembled correctly and the juice cup is in place.
- Plug the appliance into a standard electrical outlet.
- Turn the unit on by pressing either the "LO" (low speed) or "HI" (high speed) button. Use "LO" for softer fruits and vegetables, and "HI" for harder produce like carrots and apples.
- Gradually feed prepared produce into the feed chute using the pusher. Do not force produce down; allow the motor to process it at its own pace.
- For quick bursts of speed, press and hold the "POWER" button (pulse function). Release to stop.
- Continue juicing until the juice cup is full or you have processed all desired produce. The 1-1/4 quart pulp container allows for continuous juicing without frequent emptying.
- When finished, turn off the appliance and unplug it from the outlet.
Using the Citrus Juicer:
- Ensure the unit is assembled with the citrus reamer and juice cup.
- Plug the appliance into a standard electrical outlet.
- Place a cut half of a citrus fruit onto the reamer.
- Apply gentle downward pressure to activate the reamer and extract juice. The reamer will rotate, extracting juice into the cup below.
- Continue until all juice is extracted from the fruit half.
- When finished, unplug the appliance.
Cleaning and Maintenance
Proper cleaning ensures the longevity and hygiene of your appliance. Always unplug the unit before cleaning.
- Disassembly: Press the "RELEASE" button to unlock the lid and carefully disassemble all removable parts: pusher, lid, juicing screen/filter, pulp container, juice cup, and citrus reamer.
- Washing: All removable parts are dishwasher-safe. Alternatively, wash them in warm, soapy water using a brush to remove pulp residue from the juicing screen. Rinse thoroughly.
- Motor Base: Wipe the motor base with a damp cloth. Never immerse the motor base in water or any other liquid.
- Drying: Dry all parts completely before reassembling or storing.
- Storage: Store the appliance in a clean, dry place. The cord storage feature helps keep the cord tidy.
Troubleshooting
If you encounter issues with your juicer, refer to the following common problems and solutions:
| Problem | Possible Cause | Solution |
|---|---|---|
| Appliance does not turn on. | Not plugged in; safety latch not engaged; power outage. | Ensure plug is securely in outlet. Check that all parts are correctly assembled and the safety interlocking latch is engaged. Check household circuit breaker. |
| Motor sounds weak or unit slows down. | Overloading with produce; hard produce; pulp container full. | Reduce the amount of produce fed at once. Use "HI" speed for harder items. Empty the pulp container if full. |
| Unit smokes or emits burning smell. | Overheating due to continuous heavy use; motor strain. | Immediately turn off and unplug the unit. Allow it to cool down for at least 30 minutes. Do not operate if smoking persists after cooling. Contact customer support if the issue reoccurs. |
| Low juice yield or excessive pulp in juice. | Juicing screen clogged; improper produce preparation. | Clean the juicing screen thoroughly. Ensure produce is cut to appropriate size and not forced into the chute. |
Specifications
| Feature | Detail |
|---|---|
| Model Number | AJ-1400-BL |
| Brand | Taylor (Manufactured by Biggest Loser) |
| Power | 320 watts |
| Speeds | 2 speeds (LO, HI) + Pulse function |
| Pulp Container Capacity | 1-1/4 quart (stainless steel) |
| Material | Stainless Steel (for pulp container), Plastic |
| Dimensions (Vegetable Processor) | 11-1/2 by 7 by 12 inches (approx. 29.2 x 17.8 x 30.5 cm) |
| Dimensions (Citrus Juicer) | 9-1/4 by 7 by 12-1/2 inches (approx. 23.5 x 17.8 x 31.8 cm) |
| Power Source | Corded Electric |
| Special Features | Safety interlocking latch, Non-slip rubberized feet, Cord storage |
| Care Instructions | Dishwasher-safe parts |
Warranty and Support
This appliance comes with a 1-year limited warranty from the date of purchase. This warranty covers defects in materials and workmanship under normal household use.
For warranty claims, technical support, or replacement parts, please contact Taylor customer service. Keep your purchase receipt as proof of purchase for warranty validation.
For further assistance, please refer to the contact information provided with your product packaging or visit the manufacturer's official website.


