
1. Introduction
This manual provides instructions for the proper use, setup, operation, and maintenance of the 3M Professional Caulking Gun, Model 08993. This tool is designed for the professional application of 3M sealants, caulks, and adhesives in 1/10-gallon cartridges. Adherence to these instructions will ensure optimal performance and longevity of the product.
2. Safety Information
WARNING:
3M industrial and occupational products are intended, labeled, and packaged for sale to trained industrial and occupational customers for workplace use. These products are not intended, labeled, or packaged for sale to or use by consumers (e.g., for home, personal, primary or secondary school, recreational/sporting, or other uses not described in the applicable product packaging or literature). Users must select and use this product in compliance with applicable health and safety regulations and standards (e.g., U.S. OSHA, ANSI), as well as all product literature, user instructions, warnings, and other limitations. The user must take any action required under any recall, field action, or other product use notice. Misuse of 3M industrial and occupational products may result in injury, sickness, death, or property damage. For help with product selection and use, consult your on-site safety professional, industrial hygienist, or other subject matter expert. For additional product information, visit www.3M.com.
- Always wear appropriate personal protective equipment (PPE) when handling sealants, caulks, and adhesives.
- Ensure proper ventilation in the work area.
- Keep hands clear of moving parts during operation.
- Do not modify the caulking gun.
- Store the tool in a safe, dry place away from children and untrained personnel.
3. Product Overview
3.1 Features
- High-performance professional applicator gun for applying caulks, sealants, and adhesives.
- Constructed with a cast steel barrel, rod, handle, and trigger mechanism for enhanced durability and extended service life.
- Features a curved back rod, providing a convenient hook for hanging the gun on racks when not in use.
- Equipped with a thumb-operated pressure release lever for ease of use and precise control.
- Designed to accommodate 1/10-gallon cartridges, ensuring compatibility with a wide range of 3M products.
- Suitable for industrial/occupational use only.
3.2 Components

Figure 1: 3M Professional Caulking Gun Model 08993. This image displays the complete caulking gun, featuring its orange barrel, black handle, and metal rod, ready for use.
- Barrel: Holds the sealant cartridge.
- Plunger Rod: Pushes the cartridge plunger to dispense material.
- Handle: Provides grip for operation.
- Trigger: Activates the plunger rod to dispense material.
- Pressure Release Lever: Releases pressure on the cartridge to stop material flow.
4. Setup
- Prepare the Cartridge:
- Ensure the sealant, caulk, or adhesive cartridge is a standard 1/10-gallon size.
- Cut the tip of the cartridge nozzle at a 45-degree angle to the desired bead size. Use a utility knife or a dedicated cartridge tip cutter.
- Puncture the inner seal of the cartridge using a long nail or the integrated puncture tool if available on the cartridge itself.
- Load the Cartridge:
- Pull the plunger rod all the way back by pressing the thumb-operated pressure release lever and retracting the rod.
- Insert the prepared cartridge into the barrel of the caulking gun, nozzle end first.
- Push the plunger rod forward until it makes firm contact with the back of the cartridge plunger.
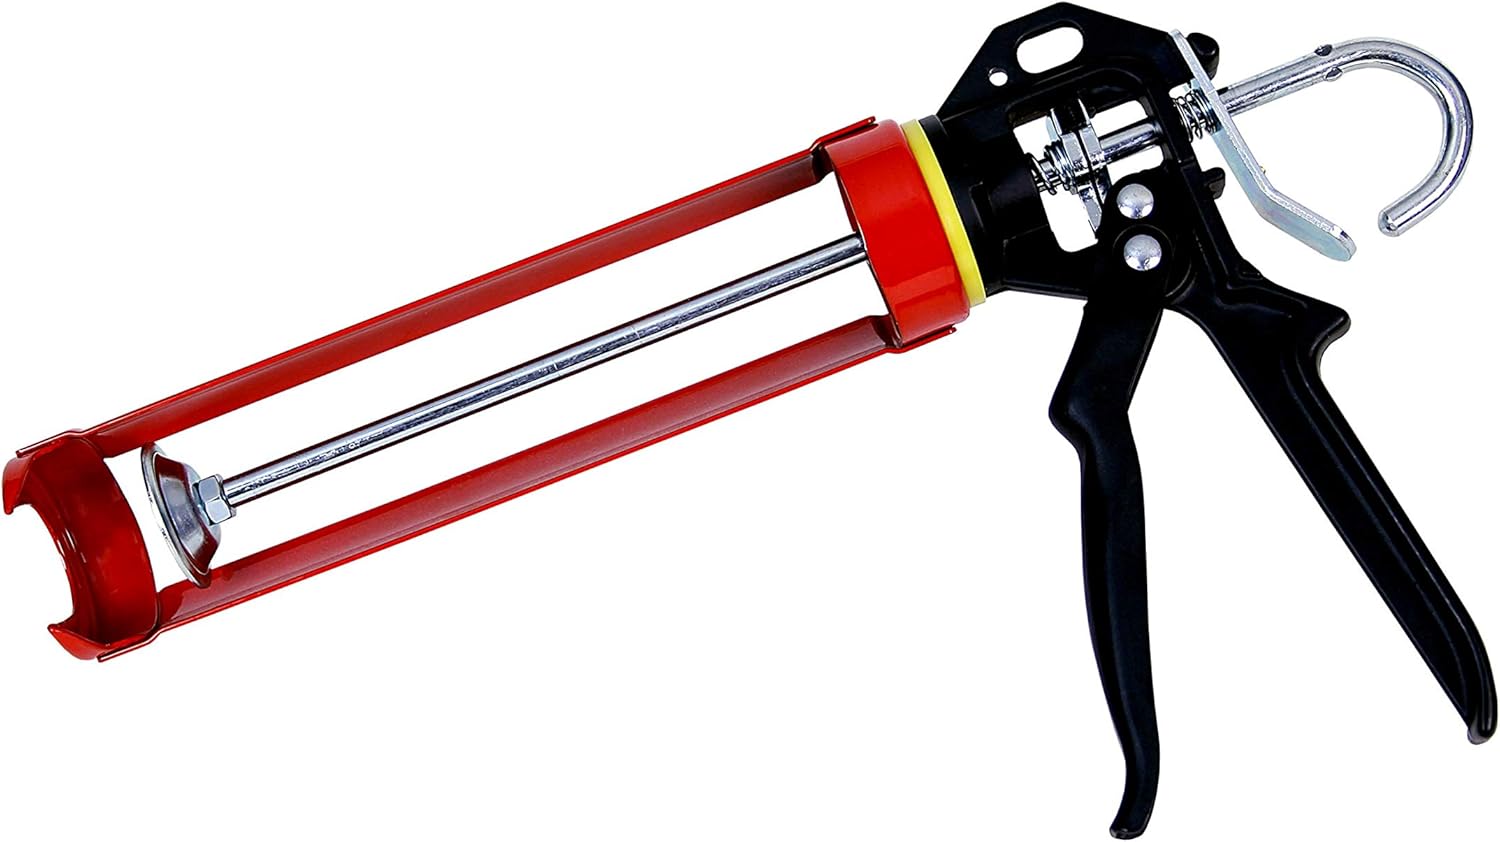
Figure 2: Illustrative view of a caulking gun, similar to the 3M 08993, with a cartridge loaded. This image highlights the mechanism for holding and dispensing material.
5. Operating Instructions
- Initiate Flow: Squeeze the trigger repeatedly until the sealant or adhesive begins to flow from the nozzle.
- Apply Material:
- Position the nozzle at the starting point of your application, maintaining a consistent angle (typically 45 degrees) and pressure.
- Squeeze the trigger steadily to dispense an even bead of material.
- Move the gun smoothly along the desired path.
- Stop Flow: To stop the flow of material, release the trigger and immediately press the thumb-operated pressure release lever. This retracts the plunger rod slightly, preventing excess material from oozing out.
- Clean Up: After use, ensure the nozzle is wiped clean. If the cartridge will be stored, cap the nozzle to prevent drying.
6. Maintenance
- Cleaning: Regularly wipe down the exterior of the caulking gun with a clean cloth to remove any sealant or adhesive residue. For stubborn residue, use a solvent compatible with the material being cleaned, ensuring proper ventilation.
- Lubrication: Periodically apply a light lubricant to the plunger rod and trigger mechanism to ensure smooth operation.
- Inspection: Before each use, inspect the gun for any signs of damage, wear, or loose components. Ensure the cast steel barrel, rod, handle, and trigger mechanism are intact and functioning correctly.
- Storage: Store the caulking gun in a dry, clean environment. The curved back of the rod can be used to hang the gun on a rack.
7. Troubleshooting
| Problem | Possible Cause | Solution |
|---|---|---|
| Material not dispensing |
|
|
| Material continues to flow after trigger release (oozing) |
|
|
| Trigger is stiff or jammed |
|
|
8. Specifications
| Brand | 3M |
| Model Number | 08993 |
| Item Weight | 2 pounds |
| Product Dimensions | 7 x 5 x 3 inches |
| Cartridge Size Compatibility | 1/10-gallon |
| Material | Cast Steel (Barrel, Rod, Handle, Trigger) |
| Manufacturer Part Number | 08993 |
9. Warranty and Support
For product support, technical assistance, or inquiries regarding warranty information, please contact 3M directly. Refer to the official 3M website or product packaging for the most current contact details.
Online Resources: www.3M.com
