
1. Introduction
Welcome to the Absaar 6/12V 8A Battery Charger. This device is designed for charging 6V and 12V lead-acid batteries commonly found in cars and motorcycles. Please read this manual thoroughly before operation to ensure safe and efficient use of the product.
2. Product Features
- Semi-professional design for automotive and motorcycle batteries.
- Input Voltage: 230V AC.
- Output Voltage: Selectable 6V or 12V DC.
- Charging Current: 8 Amperes maximum.
- Charging Type: Normal charge.
- Robust metal casing for durability.
- Requires manual disconnection after charging.
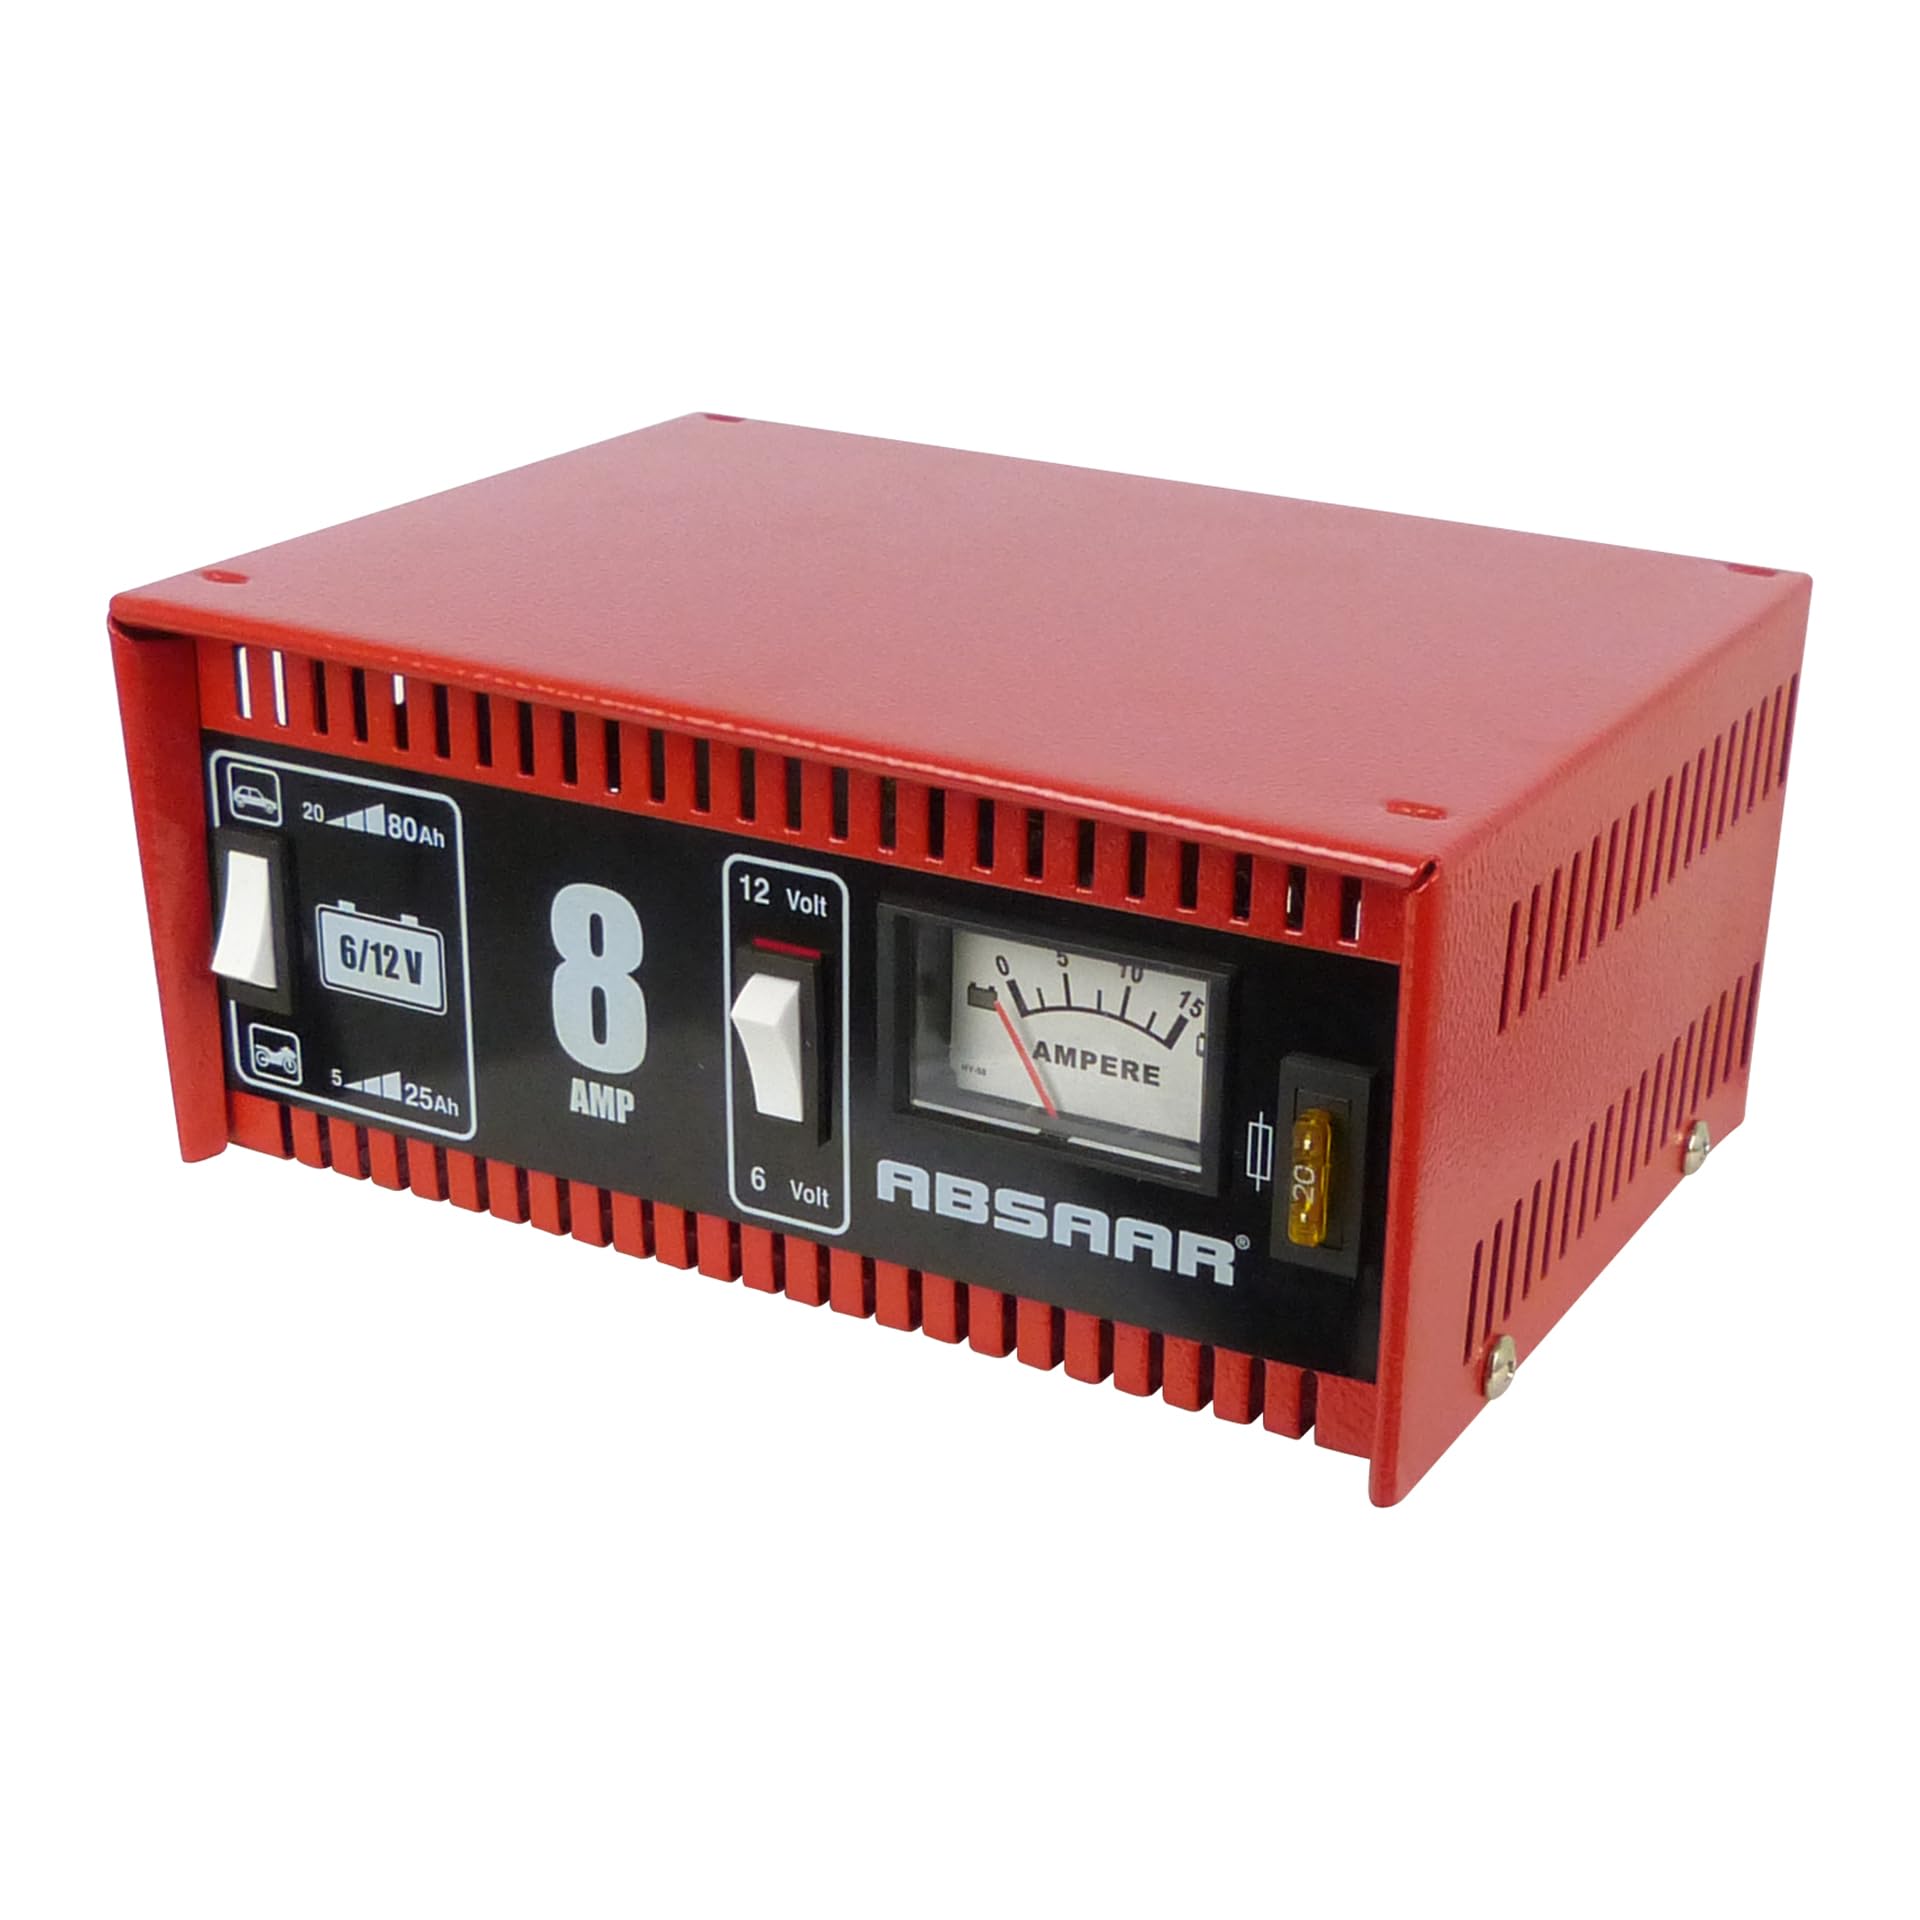
Image of the Absaar 6/12V 8A Battery Charger's control panel. It features a switch for selecting 6V or 12V charging, a large '8 AMP' indicator, and an analog ampere meter to show the charging current. A fuse holder is also visible.
3. Safety Instructions
Always read and understand these safety instructions before operating the charger. Failure to do so may result in injury or damage to the equipment.
3.1 General Safety
- Always wear eye protection and protective clothing when working with batteries.
- Ensure adequate ventilation in the charging area to disperse explosive gases.
- Keep the charger away from flammable materials, sparks, and open flames.
- Do not expose the charger to rain or excessive moisture.
- Keep out of reach of children and unauthorized persons.
3.2 Electrical Safety
- Connect the charger to a properly grounded 230V AC outlet only.
- Do not operate the charger with damaged power cords, charging cables, or plugs.
- Disconnect the power supply from the mains outlet before making or breaking connections to the battery.
3.3 Battery Safety
- Never attempt to charge frozen batteries. Allow them to warm up to room temperature first.
- Ensure battery terminals are clean and free of corrosion before connecting the charger.
- Connect the positive (+) red charger clamp to the positive (+) battery terminal first.
- Then, connect the negative (-) black charger clamp to the negative (-) battery terminal or to the vehicle chassis away from the battery and fuel line.
- Disconnect in reverse order: negative clamp first, then positive clamp, after unplugging the charger from the mains.
- This charger is designed for lead-acid batteries only. Do not attempt to charge other battery types (e.g., Lithium-ion, Ni-Cd).
4. Setup
- Unpacking: Carefully remove the Absaar battery charger from its packaging. Inspect the unit for any visible damage that may have occurred during transit.
- Placement: Place the charger on a stable, level, and non-flammable surface. Ensure the area is well-ventilated and free from direct sunlight, excessive heat, or moisture.
- Initial Inspection: Before connecting, verify that the power cable and charging cables (with clamps) are intact, free from cuts, fraying, or other damage.
5. Operating Instructions
- Prepare the Battery:
- Ensure the battery is clean and free of corrosion on its terminals.
- If the battery has removable vent caps, check the electrolyte level. If low, add distilled water to the recommended level before charging. Do not overfill.
- Connect the Charger to the Battery:
- Ensure the charger is unplugged from the mains power outlet before making any connections.
- Connect the red (+) charging clamp securely to the positive (+) terminal of the battery.
- Connect the black (-) charging clamp securely to the negative (-) terminal of the battery. If the battery is installed in a vehicle, connect the black clamp to the vehicle chassis, away from the battery and fuel line, to minimize sparking near the battery.
- Select Voltage:
- Using the selector switch on the charger's front panel (refer to the product image), choose either 6V or 12V output to match your battery's voltage.
- Power On:
- Plug the charger's power cord into a standard 230V AC mains outlet.
- The analog ampere meter on the charger will indicate the charging current. The needle will typically show a higher current initially and gradually decrease as the battery charges.
- Monitor Charging:
- Monitor the ampere meter periodically. A fully charged battery will draw very little or no current.
- This is a standard charger and requires manual disconnection. It does not automatically shut off when the battery is full. Do not leave the charger unattended for extended periods.
- Charging time varies based on battery capacity and discharge level. For example, a 70Ah battery may take approximately 8 hours for a slow charge or 2 hours for a faster charge.
- Disconnect the Charger:
- Once the battery is fully charged (ampere meter shows minimal current), first unplug the charger from the mains power outlet.
- Then, disconnect the black (-) charging clamp from the battery's negative terminal or vehicle chassis.
- Finally, disconnect the red (+) charging clamp from the battery's positive terminal.
6. Maintenance
- Cleaning: Wipe the charger casing with a dry, soft cloth. Do not use solvents, abrasive cleaners, or immerse the unit in water.
- Storage: When not in use, store the charger in a dry, cool, and well-ventilated place. Keep the cables neatly coiled to prevent damage.
- Inspection: Periodically inspect the charging cables, clamps, and power cord for any signs of wear, cuts, or damage. Replace damaged components immediately to ensure safe operation.
- Fuse Replacement: The charger is equipped with a fuse (20A, visible on the front panel). If the charger stops functioning, unplug it from the mains, open the fuse holder, and check if the fuse is blown. Replace it with a new fuse of the exact same rating (20A).
7. Troubleshooting
- Charger not turning on / No power:
- Check if the power cord is securely plugged into a live 230V AC mains outlet.
- Verify the mains outlet is functioning by plugging in another appliance.
- Check the fuse on the charger (refer to Section 6. Maintenance for fuse replacement).
- Battery not charging / Ampere meter shows no current:
- Ensure correct polarity: red clamp to positive (+), black clamp to negative (-) or chassis.
- Verify that the selected voltage (6V or 12V) on the charger matches your battery's voltage.
- Check for loose or corroded connections at the battery terminals and charger clamps. Clean terminals if necessary.
- The battery might be deeply discharged, sulfated, or faulty and unable to accept a charge. In such cases, consult a professional or consider battery replacement.
- If the battery is already fully charged, the ampere meter will show very low or no current.
- Ampere meter not moving or stuck:
- If the meter shows no current, refer to the points above regarding 'Battery not charging'.
- If the meter appears stuck or provides inconsistent readings, it might be a faulty meter. The charger may still be functioning correctly, but accurate current monitoring will be compromised.
8. Specifications
| Model | 77911 |
| Input Voltage | 230V AC |
| Output Voltage | 6V / 12V DC (selectable) |
| Charging Current | 8A (maximum) |
| Compatible Battery Types | Lead-acid batteries (for cars and motorcycles) |
| Dimensions (L x W x H) | Approx. 22 x 11 x 17 cm |
| Weight | Approx. 3.03 kg |
| Casing Material | Solid metal |
9. Warranty and Support
This Absaar battery charger comes with a 2-year manufacturer's warranty from the date of purchase. This warranty covers defects in materials and workmanship under normal use.
The warranty does not cover damage resulting from misuse, accidents, unauthorized repairs, modifications, or normal wear and tear. For warranty claims or technical support, please contact your retailer or the Absaar customer service department. Please retain your proof of purchase for warranty validation.


