
1. Product Overview
The Grohe Europlus Lever Handle (Model 46415IP0) is a high-quality replacement part designed for use with Grohe Europlus faucet systems. Crafted from durable brass with a polished chrome finish, this lever ensures reliable performance and a seamless aesthetic integration with your existing fixtures. It is engineered for a perfect fit and hassle-free replacement.
Key Features:
- Original Replacement Part: Ensures compatibility and performance with Grohe Europlus systems.
- Robust Construction: Made from high-quality brass for longevity.
- Durable Finish: Polished chrome exterior finish resists corrosion and tarnishing.
- Perfect Fit: Designed for easy and precise installation.

Figure 1.1: Grohe Europlus Lever Handle (Model 46415IP0) shown with included installation hardware, including a set screw and a decorative ring. The handle features a polished chrome finish and ergonomic design.
2. Specifications
Refer to the table below for detailed product specifications of the Grohe Europlus Lever Handle.
| Attribute | Detail |
|---|---|
| Model Number | 46415IP0 |
| Brand | GROHE |
| Material | Brass (Messing verchromt) |
| Color | Silver (Chrome) |
| Exterior Finish | Chrome, Polished |
| Product Dimensions (L x W) | 6.77"L x 3.86"W |
| Item Weight | 0.26 Kilograms |
| Handle Type | Lever |
| Handle Attachment Mechanism | Screw |
| Included Components | Installation Hardware |
| Room Type | Bathroom |
| Indoor/Outdoor Usage | Indoor |
3. Safety Information
Please read all instructions carefully before installation and use. Failure to follow these instructions may result in property damage or personal injury.
- Always turn off the water supply to the faucet before beginning any installation or maintenance.
- Wear appropriate personal protective equipment, such as safety glasses and gloves, during installation.
- If you are unsure about any part of the installation process, consult a qualified plumber.
- Keep small parts out of reach of children to prevent choking hazards.
4. Setup & Installation
This section provides general guidelines for replacing a Grohe Europlus lever handle. Specific steps may vary slightly depending on your exact faucet model.
Tools Required (Typical):
- Adjustable wrench or pliers
- Small flat-head screwdriver
- Hex key (Allen wrench) - often included with faucet or replacement part
- Soft cloth
Installation Steps:
- Turn Off Water Supply: Locate the shut-off valves for your faucet (usually under the sink) and turn them clockwise until the water flow stops completely. Open the faucet to drain any remaining water.
- Remove Old Handle:
- Carefully pry off any decorative cap or cover on the top or front of the existing handle using a small flat-head screwdriver.
- Locate the set screw (often a hex screw) underneath the cap or on the side of the handle base. Loosen this screw with the appropriate hex key or screwdriver.
- Once the set screw is loose, the old handle should lift straight off the faucet stem.
- Clean Faucet Stem: Clean any mineral deposits or debris from the faucet stem and surrounding area with a soft cloth.
- Install New Handle:
- Align the new Grohe Europlus Lever Handle (46415IP0) with the faucet stem. Ensure the handle is oriented correctly for hot and cold indicators (if present).
- Slide the new handle onto the stem until it sits flush with the faucet body.
- Insert and tighten the new set screw (provided with the replacement part) using the hex key or screwdriver. Do not overtighten, as this can damage the handle or stem.
- If applicable, replace the decorative cap or cover.
- Restore Water Supply: Slowly turn the water shut-off valves counter-clockwise to restore the water supply. Check for any leaks around the handle base.
- Test Operation: Operate the new handle to ensure smooth movement and proper water flow.
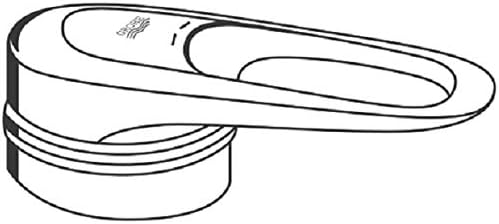
Figure 4.1: Exploded diagram illustrating the components and assembly of the Grohe Europlus Lever Handle. This diagram shows the handle, base, and the internal mechanism for attachment to the faucet stem.
5. Operating Instructions
The Grohe Europlus Lever Handle is designed for intuitive operation.
- Water Flow Control: Lift the lever upwards to increase water flow. Push the lever downwards to decrease or stop water flow.
- Temperature Control: Move the lever to the left for hot water and to the right for cold water. The range of motion allows for precise temperature blending.
6. Maintenance
Proper care and maintenance will ensure the longevity and appearance of your Grohe Europlus Lever Handle.
- Cleaning: Clean the chrome finish regularly with a soft cloth and mild soap and water. Avoid abrasive cleaners, scouring pads, or harsh chemicals, as these can damage the finish.
- Drying: Always dry the handle thoroughly after cleaning to prevent water spots and mineral buildup.
- Inspection: Periodically check the handle for any looseness. If the handle feels loose, gently tighten the set screw as described in the installation section. Do not overtighten.
7. Troubleshooting
This section addresses common issues you might encounter with your lever handle.
| Problem | Possible Cause | Solution |
|---|---|---|
| Handle is loose | Set screw is loose. | Tighten the set screw with the appropriate hex key or screwdriver. Do not overtighten. |
| Water drips from handle base | Improper installation or worn O-rings/gaskets in the faucet cartridge (not the handle itself). | Ensure the handle is properly seated and the set screw is tightened. If dripping persists, the issue is likely with the faucet's internal cartridge, which may need replacement. Consult a plumber if necessary. |
| Handle is stiff or difficult to move | Mineral buildup or worn faucet cartridge. | Clean the handle and surrounding area. If the stiffness is within the faucet's internal mechanism, the cartridge may need servicing or replacement. |
8. Warranty and Support
For specific warranty information and customer support, please refer to the documentation provided with your original Grohe faucet or visit the official Grohe website. Grohe products are known for their quality and durability, and replacement parts like this lever handle are designed to meet the same high standards.
If you require further assistance or have questions not covered in this manual, please contact Grohe customer service or a certified plumbing professional.


