
Soundmaster NR513
Soundmaster NR 513A Nostalgic Stereo Music Center User Manual
Model: NR513
Introduction
This manual provides essential information for the safe and efficient operation of your Soundmaster NR 513A Nostalgic Stereo Music Center. Please read this manual thoroughly before using the device and retain it for future reference.
The Soundmaster NR 513A is a versatile audio system designed to bridge classic and modern media formats. It features a built-in CD player, a multi-speed record player, a cassette deck, and an FM/MW radio. Additionally, it offers a unique MP3 encoding function, allowing you to digitize your vinyl records and cassette tapes directly to a USB storage device without the need for a computer.

Figure 1: The Soundmaster NR 513A unit with the turntable lid open, showcasing its classic design and integrated record player.
Important Safety Instructions
- Ensure the power supply matches the voltage specified on the unit (220V, 50Hz).
- Do not expose the unit to rain or moisture to prevent fire or electric shock.
- Do not block any ventilation openings. Install in accordance with the manufacturer's instructions.
- Protect the power cord from being walked on or pinched.
- Only use attachments/accessories specified by the manufacturer.
- Unplug this apparatus during lightning storms or when unused for long periods.
- Refer all servicing to qualified service personnel.
Package Contents
Please check that all items are present and in good condition:
- Soundmaster NR 513A Music Center Unit
- Remote Control
- User Manual (this document)

Figure 2: The included remote control for convenient operation of the music center.
Setup
1. Unpacking and Placement
- Carefully remove the unit from its packaging.
- Place the unit on a stable, flat surface away from direct sunlight, heat sources, and excessive dust or moisture.
- Ensure adequate ventilation around the unit.
2. Power Connection
Connect the power cord to the AC inlet on the back of the unit, then plug it into a standard 220V, 50Hz wall outlet.
3. Antenna Connection (for FM/MW Radio)
The unit features a 75 Ohm antenna connection. For optimal FM/MW radio reception, connect an external antenna (not included) to the designated input on the rear panel.

Figure 3: Rear panel connections, including AUX IN and LINE OUT ports. The antenna connection is typically located near these ports.
4. External Audio Connections (Optional)
- AUX-IN: Connect external audio devices (e.g., smartphones, tablets) to the 3.5mm AUX-IN jack on the rear panel using an appropriate audio cable.
- LINE-OUT: For enhanced audio, connect the RCA LINE-OUT jacks to an external amplifier or powered speakers.
Operating Instructions
General Operation
- Press the POWER button to turn the unit on or off.
- Use the FUNCTION selector buttons (MW, UKW, CD/USB, TAPE, PHONO/AUX IN) on the front panel to switch between different modes.
- Adjust the volume using the VOLUME knob.
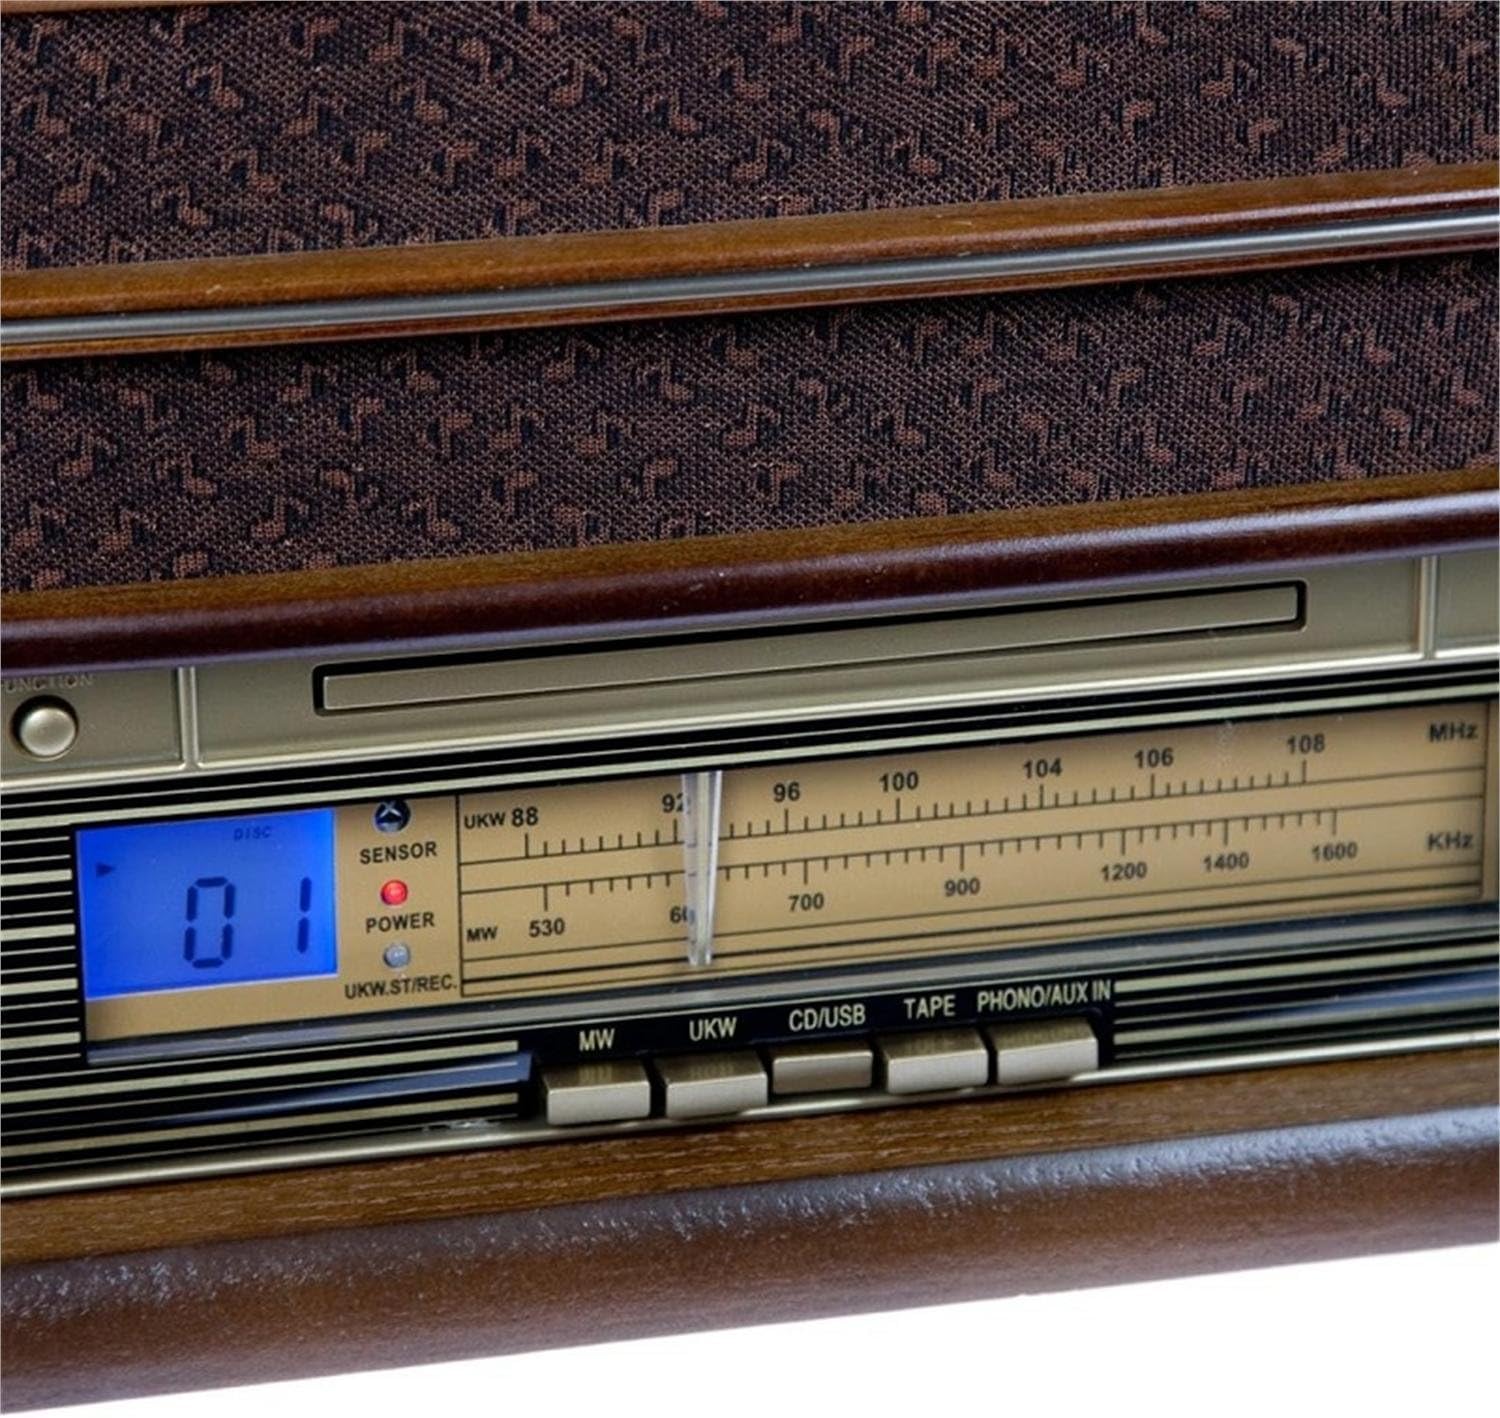
Figure 4: Front panel controls, including the LED CD display and function selection buttons.
Radio Operation (FM/MW)
- Select the MW or UKW (FM) function.
- Rotate the TUNING knob to select your desired radio station.
- Extend the telescopic antenna (if applicable) or adjust your external antenna for best reception.

Figure 5: Detailed view of the radio tuner dial and tuning knob for precise station selection.
CD Player Operation
- Select the CD/USB function.
- Gently insert a CD into the CD slot until it clicks into place.
- Playback will usually start automatically. Use the PLAY/PAUSE, STOP, SKIP, and REPEAT buttons on the unit or remote control to manage playback.
- The CD player supports programming functions. Refer to the remote control section for details.
Record Player Operation
- Open the turntable lid.
- Select the PHONO/AUX IN function.
- Place a record on the turntable platter.
- Select the appropriate speed (33, 45, or 78 RPM) using the speed selector switch.
- Carefully lift the tone arm using the tone arm lift lever and position it over the desired track on the record.
- Lower the tone arm gently onto the record. Playback will begin.
- At the end of the record, lift the tone arm and return it to its rest.

Figure 6: The turntable in operation, showing a record on the platter and the tone arm positioned.
Cassette Deck Operation
- Select the TAPE function.
- Insert a cassette tape into the side-loading cassette slot.
- Use the cassette deck controls (Play, Stop, Fast Forward, Rewind) to operate the tape.
USB Playback and MP3 Encoding
- USB Playback: Insert a USB flash drive containing MP3 files into the USB slot. Select the CD/USB function. The unit will automatically detect and play MP3 files.
- MP3 Encoding (from Vinyl/Cassette/CD/Radio):
- Ensure a USB flash drive is inserted into the USB slot.
- Select the desired source (PHONO, TAPE, CD, or MW/UKW).
- Begin playback of the source material.
- Press the RECORD button on the remote control or unit to start recording to the USB drive.
- Press RECORD again to stop recording. The audio will be saved as an MP3 file on the USB drive.
Maintenance
Cleaning the Unit
- Always unplug the unit from the power outlet before cleaning.
- Use a soft, dry cloth to wipe the exterior surfaces.
- Do not use abrasive cleaners, waxes, or solvents as they may damage the finish.
Turntable Care
- Keep the stylus (needle) clean. Use a soft brush to gently remove dust from the tip, brushing from back to front.
- Replace the stylus when sound quality deteriorates or after approximately 300-500 hours of playback.
- Keep the turntable platter and lid free of dust.
CD/Cassette Deck Care
- Use only clean, scratch-free CDs.
- Avoid touching the recording surface of CDs.
- Periodically clean the cassette deck's head and pinch rollers with a specialized cleaning kit.
Troubleshooting
| Problem | Possible Cause | Solution |
|---|---|---|
| No power | Power cord not connected; Power outlet not active. | Ensure power cord is securely plugged in; Try a different outlet. |
| No sound | Volume too low; Incorrect function selected; External speakers not connected/powered. | Increase volume; Select correct function (CD, PHONO, TAPE, etc.); Check external speaker connections and power. |
| Turntable not spinning or playing | Speed setting incorrect; Tone arm not lowered; Unit not in PHONO mode. | Select correct RPM (33/45/78); Lower tone arm onto record; Switch to PHONO/AUX IN function. |
| Poor radio reception | Antenna not connected or poorly positioned; Weak signal. | Connect an external antenna; Adjust antenna position for better reception; Try tuning to a stronger station. |
| USB recording not working | USB drive not inserted or full; Incorrect source selected; USB drive format not supported. | Ensure USB drive is inserted and has free space; Select the correct source (PHONO, TAPE, CD, RADIO); Ensure USB drive is formatted to FAT32. |
Specifications
- Model: Soundmaster NR 513A (NR513)
- Power Supply: AC 220V, 50Hz
- Power Consumption: 13 Watts
- Dimensions (W x H x D): 50 x 21 x 34 cm (approx. 19.7 x 8.3 x 13.4 inches)
- Weight: Approx. 8.6 kg (19 lbs)
- Radio Frequencies: FM, MW
- Turntable Speeds: 33 1/3, 45, 78 RPM
- CD Player: Supports Audio CD, MP3 CD
- Cassette Deck: Side-loading
- USB: Playback of MP3 files, MP3 encoding from Vinyl/Cassette/CD/Radio
- Inputs: 3.5mm AUX-IN, USB
- Outputs: RCA LINE-OUT
- Included Accessories: Remote Control
Warranty and Support
For warranty information and technical support, please refer to the warranty card included with your purchase or contact Soundmaster customer service directly. Contact details can typically be found on the manufacturer's official website or on the product packaging.
Please have your model number (NR513) and purchase date ready when contacting support.
Related documentsNR513


Ask a question about this manual
Ask about setup, troubleshooting, compatibility, parts, safety, or missing instructions. Manuals+ will review the question and use this page’s manual context to help answer it.