
Behringer PMP2000
Behringer EUROPOWER PMP2000 User Manual
800 Watt 14 Channel Powered Mixer with Multi-FX Processor
1. Introduction
Thank you for choosing the Behringer EUROPOWER PMP2000. This ultra-compact, 800-Watt, 14-channel powered mixer is designed to deliver exceptional sound quality for a variety of live sound applications, from small club gigs to church services and speeches. It integrates a powerful amplifier, a versatile mixer section, and a studio-grade multi-FX processor into a single, portable unit.
The PMP2000 features an Ultra-Low Noise (ULN) design, ensuring high headroom and ultra-transparent audio reproduction. Its 14-channel mixer section includes 6 mono and 4 stereo channels, providing ample connectivity for microphones, instruments, and external audio sources. The built-in 24-bit stereo FX processor offers 100 awesome presets, including reverb, chorus, flanger, delay, and pitch shifter, allowing for creative sound shaping.
This manual provides essential information for the safe and efficient operation of your PMP2000. Please read it thoroughly before initial use and keep it for future reference.
2. Safety Instructions
Always observe the following basic precautions when operating this unit:
- Power Supply: Connect the unit only to the mains voltage specified on the device. Ensure the power cable is not damaged or frayed.
- Ventilation: Do not block any ventilation openings. Ensure adequate airflow around the unit. The thermal protection circuit will activate if cooling vents are blocked.
- Moisture: Do not expose this appliance to rain or moisture. Do not place objects filled with liquids on the apparatus.
- Heat: Do not place the unit near heat sources such as radiators, heat registers, stoves, or other apparatus (including amplifiers) that produce heat.
- Cleaning: Clean only with a dry cloth.
- Servicing: Do not attempt to service this unit yourself. Refer all servicing to qualified service personnel.
- Cables: Use only high-quality shielded cables for all audio connections to prevent interference.
- Ear Protection: Prolonged exposure to high volume levels may cause permanent hearing loss. Use caution when setting volume levels.
3. Setup
3.1 Unpacking and Placement
Carefully unpack your PMP2000. Inspect the unit for any signs of damage during transit. Place the mixer on a stable, flat surface, ensuring proper ventilation around all sides.
3.2 Power Connection
Connect the supplied power cable to the AC IN socket on the rear panel of the PMP2000 and then to a suitable mains outlet. Ensure the mixer's power switch is in the OFF position before connecting to power.
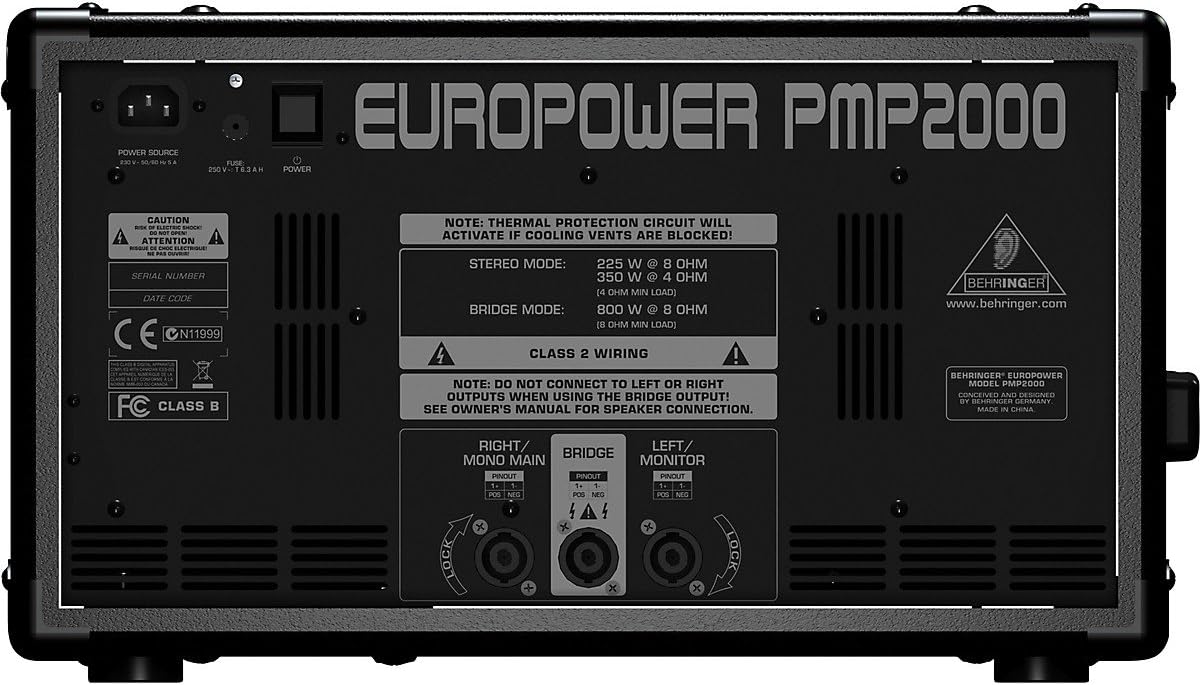
Figure 3.1: Rear panel connections, including power input and speaker outputs.
The rear panel of the PMP2000 features the power input socket, fuse holder, and the main speaker output connectors. It also displays important information regarding stereo and bridged mode power output, and a warning about blocked cooling vents.
3.3 Input Connections
The PMP2000 offers various input options:
- Mono Channels (1-6): These channels feature XLR inputs for microphones and 1/4" TRS inputs for line-level instruments or other mono sources. Use the +48V phantom power switch for condenser microphones.
- Stereo Channels (7/8, 9/10, 11/12, 13/14): These channels are designed for stereo line-level sources such as keyboards, drum machines, or media players. They typically use 1/4" TRS or TS connectors.
- 2TR IN (RCA): Use these inputs to connect external stereo devices like CD players or tape decks.
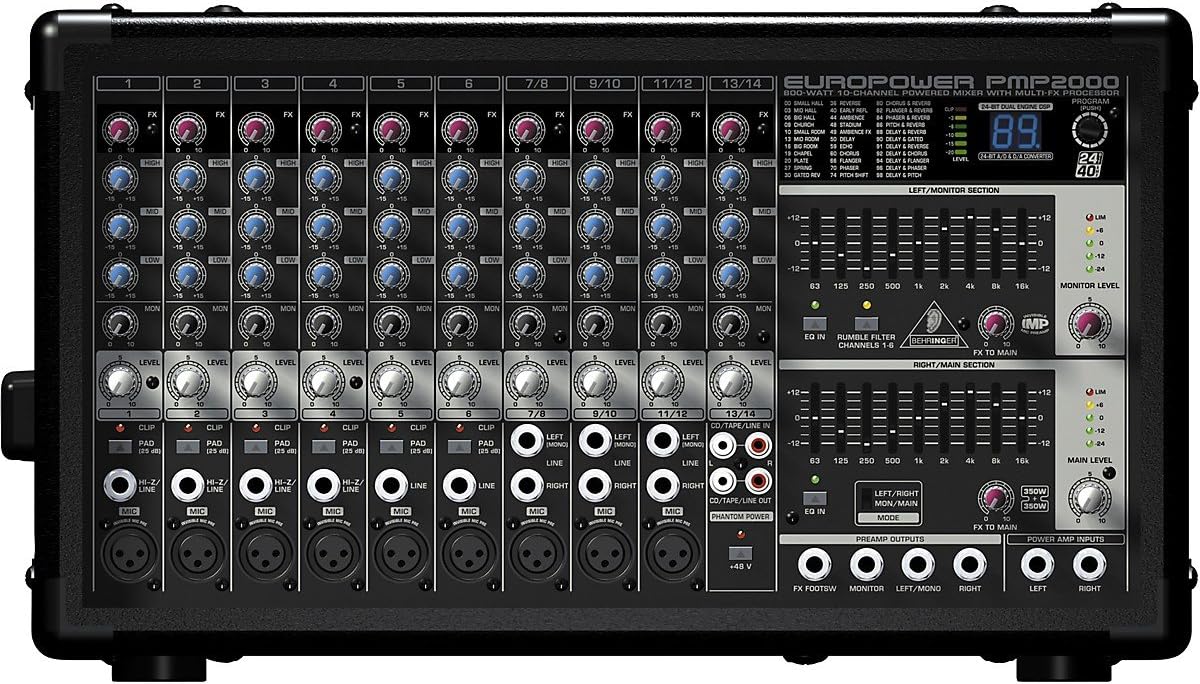
Figure 3.2: Detailed view of input channels and controls.
This image shows the comprehensive layout of the PMP2000's input channels, including XLR and 1/4" jacks for microphones and line-level sources, along with individual channel controls for gain, EQ, and effects sends.
3.4 Output Connections
Connect your speakers to the PMP2000's power amplifier outputs. The unit supports various configurations:
- Speaker Outputs: Use Speakon connectors for reliable and secure connection to passive loudspeakers. The PMP2000 can operate in 2 x 350-Watt stereo mode, 2 x 350-Watt dual mono mode, or 800-Watt bridged mono mode.
- MONITOR Output: Connect your monitor power amps or active monitor speakers to this output.
- REC OUT (RCA): Send line-level signals from the mixer to a recording device.
- Preamp Outputs / Power Amp Inputs: These provide flexibility for connecting external processors or additional power amplifiers.
4. Operating the PMP2000
4.1 Channel Controls
Each input channel features a set of controls to shape its sound:
- GAIN: Adjusts the input sensitivity for the connected microphone or instrument. Use the CLIP LED to ensure the signal is not distorting.
- PAD: Attenuates the input signal by 25 dB for very hot signals (mono channels 1-6).
- EQ (HIGH, MID, LOW): Three-band equalizer to adjust the treble, midrange, and bass frequencies of the channel.
- FX: Controls the amount of signal sent from the channel to the internal effects processor.
- MON: Controls the amount of signal sent from the channel to the monitor mix.
- LEVEL: Adjusts the overall volume of the channel in the main mix.
4.2 Master Section Controls
The master section provides overall control over the mixer's output:
- FX TO MAIN: Adjusts the overall level of the effects signal sent to the main output.
- FX TO MONITOR: Adjusts the overall level of the effects signal sent to the monitor output.
- MONITOR LEVEL: Controls the overall volume of the monitor mix.
- MAIN LEVEL: Controls the overall volume of the main output.
- Graphic EQ: Dual 9-band graphic EQ allows precise frequency correction for both monitor and main outputs.
- MODE Switch: Selects the amplifier operation mode: Stereo (Main L/R), Dual Mono (Main/Monitor), or Bridged Mono.
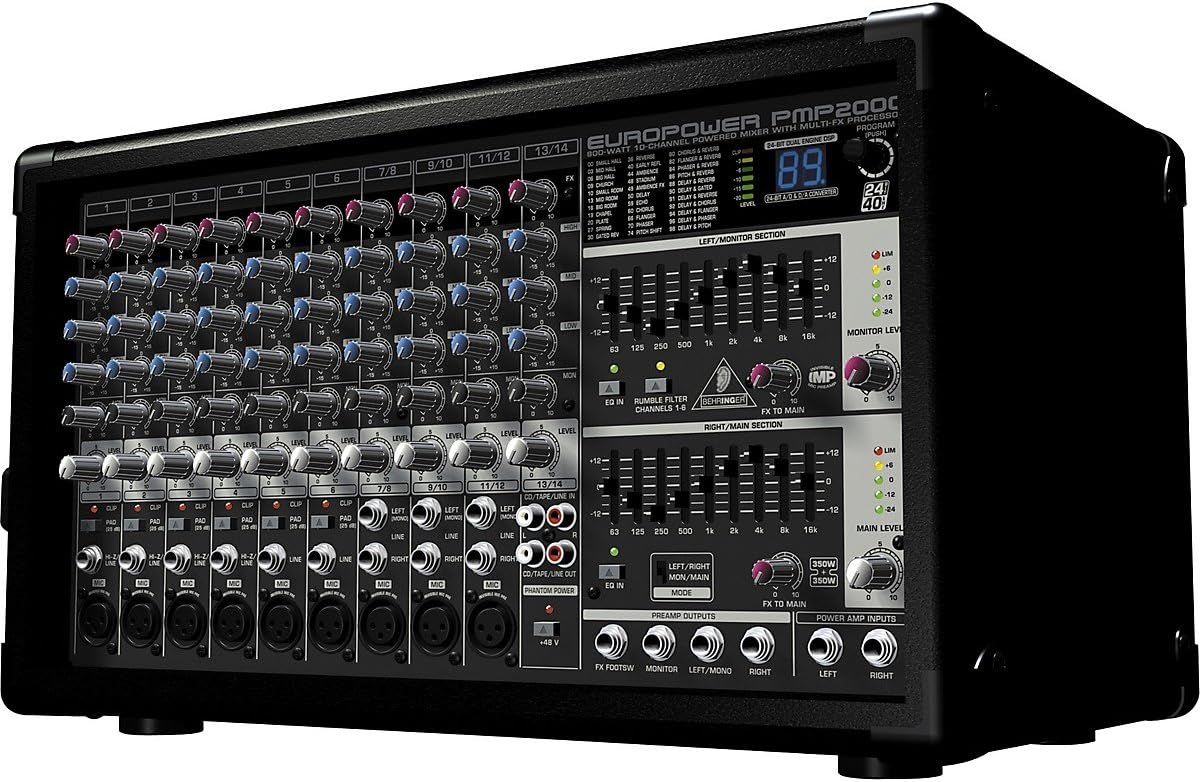
Figure 4.1: Overview of the PMP2000's control surface.
This image provides a comprehensive view of the PMP2000's front panel, highlighting the arrangement of channel strips, master section controls, graphic equalizers, and the digital effects display.
4.3 Digital Effects Processor
The PMP2000 includes a 24-bit stereo FX processor with 100 presets. Use the PROGRAM knob to select different effects (e.g., reverb, chorus, delay). The FX display shows the currently selected program number. The FX processor also has a footswitch jack for remote on/off control (footswitch not included).
5. Maintenance
- Cleaning: Disconnect the unit from power before cleaning. Use a soft, dry cloth to wipe down the exterior. Do not use liquid cleaners or aerosols.
- Ventilation: Regularly check that the ventilation openings are clear of dust and debris to ensure proper cooling.
- Storage: If storing the unit for an extended period, keep it in a dry, dust-free environment, preferably in its original packaging or a protective case.
- Cable Care: Inspect all cables regularly for damage. Replace any damaged cables immediately.
6. Troubleshooting
| Problem | Possible Cause | Solution |
|---|---|---|
| No sound output |
|
|
| Distorted sound |
|
|
| Hum or noise |
|
|
| Effects not working |
|
|
7. Specifications
| Feature | Detail |
|---|---|
| Model | PMP2000 |
| Power Output (Bridged) | 800 Watts @ 8 Ohms |
| Power Output (Stereo) | 2 x 350 Watts @ 4 Ohms |
| Channels | 14 (6 Mono, 4 Stereo) |
| Mic Preamps | 9 x IMP "Invisible" Mic Preamps with +48V Phantom Power |
| FX Processor | 24-bit Stereo FX Processor with 100 Presets |
| Equalizer | 3-band EQ per channel, Dual 9-band Graphic EQ (Main/Monitor) |
| Dimensions (H x W x D) | 20.08 x 13.74 x 12.6 inches (approx.) |
| Weight | 30 pounds (approx.) |
| Voltage | 2.3E+2 Volts (AC) |
8. Warranty and Support
Behringer products are designed for reliability and performance. For detailed warranty information, please refer to the warranty card included with your product or visit the official Behringer website. In case of technical issues or questions not covered in this manual, please contact Behringer customer support or an authorized service center.
You can find additional resources, FAQs, and contact information on the Behringer website: www.behringer.com
Related documentsPMP2000


Ask a question about this manual
Ask about setup, troubleshooting, compatibility, parts, safety, or missing instructions. Manuals+ will review the question and use this page’s manual context to help answer it.