
Maverick ET-808
Maverick Digital Roasting Thermometer and Timer
Model: ET-808
1. Introduction
The Maverick ET-808 Digital Roasting Thermometer and Timer is designed to assist in achieving precise cooking temperatures for various foods, particularly roasts. It features a digital display for current and target temperatures, a timer function, and a durable probe for in-oven use. This manual provides essential information for the proper setup, operation, and maintenance of your ET-808 unit to ensure accurate and reliable performance.
2. Safety Information
- Probe Handling: The probe tip is sharp. Handle with care to prevent injury.
- Heat Resistance: The probe and its cable are designed for high temperatures, but avoid direct contact of the cable with open flames or heating elements.
- Main Unit: The main unit is not waterproof. Do not immerse it in water or expose it to excessive moisture. Clean with a damp cloth only.
- Hot Surfaces: Always use oven mitts or heat-resistant gloves when handling the probe or cable during or after cooking, as they will be hot.
- Children: Keep the device and its components out of reach of children.
- Battery Safety: Follow proper battery installation and disposal guidelines. Do not mix old and new batteries or different types of batteries.
3. Package Contents
Verify that all items are present in the package:
- Maverick ET-808 Main Unit
- Temperature Probe with 48-inch Cable
- Instruction Manual (this document)
Note: One AAA battery is required for operation and may not be included.
4. Setup
- Battery Installation:
Locate the battery compartment on the back of the main unit. Open the compartment cover and insert one AAA battery, ensuring correct polarity (+/-). Close the cover securely.
- Probe Connection:
Insert the stainless steel probe's plug into the jack located on the side of the main unit. Ensure it is fully seated for proper contact.
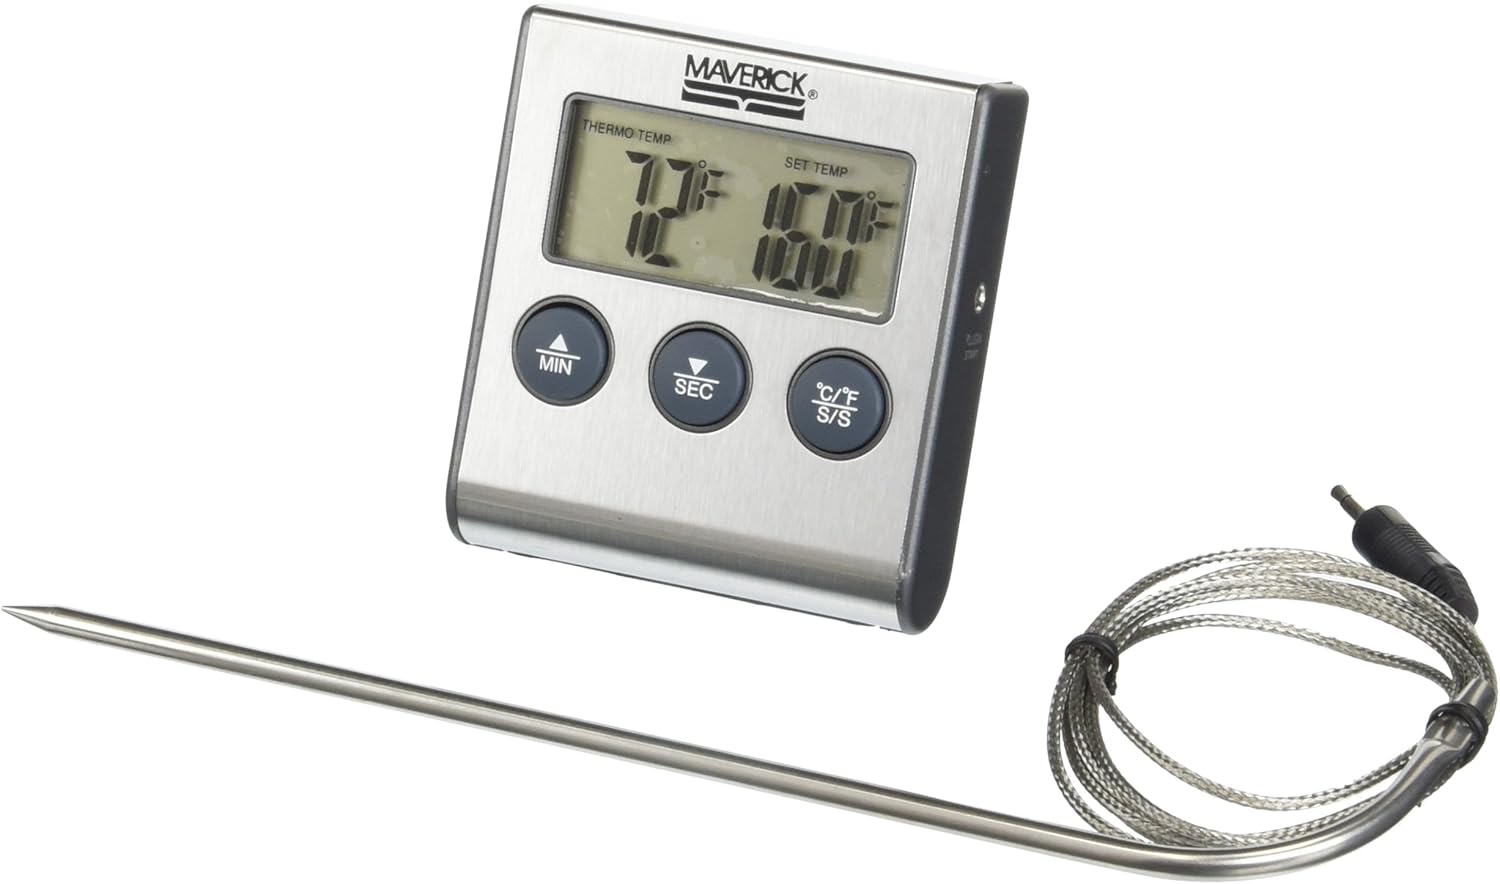
Image 1: The Maverick ET-808 main unit connected to its temperature probe. The main unit features a digital display and control buttons, while the probe has a sharp tip and a long, braided cable.
- Placement:
The main unit features a flip-down stand for countertop placement and a magnet on the back for attachment to metallic surfaces, such as an oven door or refrigerator. Position the unit in a convenient location where the display is easily visible.

Image 2: The Maverick ET-808 Digital Roasting Thermometer held in a hand, illustrating its compact size and dimensions (3.3 inches / 8 cm in height).
5. Operating Instructions
The ET-808 operates immediately upon battery insertion and probe connection. There is no dedicated ON/OFF switch; the unit powers on when the battery is installed and the probe is connected.
5.1. Temperature Monitoring
- Insert Probe: Carefully insert the probe into the thickest part of the food, avoiding bone or gristle.
- Read Current Temperature: The "THERMO TEMP" display will show the current internal temperature of the food.
- Set Target Temperature:
- Press the SET TEMP button once to activate the setting mode.
- Use the MIN (up arrow) and SEC (down arrow) buttons to adjust the desired target temperature.
- Press SET TEMP again to confirm and exit setting mode.
- Temperature Alarm: When the food reaches the set target temperature, the unit will beep to alert you.
- Switching Units (°F/°C): Press the °C/°F S/S button to toggle between Fahrenheit and Celsius display.
5.2. Timer Function
The ET-808 also features a 99-minute countdown timer.
- Set Timer:
- Press the MIN button to set minutes.
- Press the SEC button to set seconds.
- Start/Stop Timer: Press the °C/°F S/S button to start or stop the countdown timer.
- Timer Alarm: When the timer reaches zero, the unit will beep.
- Reset Timer: To reset the timer, press and hold both MIN and SEC buttons simultaneously.
6. Maintenance and Care
- Cleaning the Probe: After each use, clean the stainless steel probe with hot soapy water. Rinse thoroughly and dry completely. Do not immerse the probe cable connector in water.
- Cleaning the Main Unit: Wipe the main unit with a damp cloth. Do not use abrasive cleaners or immerse the unit in water.
- Storage: Store the thermometer in a dry place at room temperature when not in use. Ensure the probe cable is not kinked or damaged during storage.
- Battery Replacement: If the display becomes dim or the unit functions erratically, replace the AAA battery. Remove the battery if the unit will not be used for an extended period to prevent leakage.
7. Troubleshooting
| Problem | Possible Cause | Solution |
|---|---|---|
| No display or dim display | Dead or improperly installed battery. | Replace the AAA battery, ensuring correct polarity. |
| "HI" or "HHH" displayed | Temperature exceeds the maximum measurable range (482°F / 250°C). | Remove the probe from the heat source. Allow it to cool down. Ensure the probe is not exposed to temperatures above its specified limit. |
| Inaccurate temperature readings | Probe not fully inserted into the jack; damaged probe or cable; battery low. | Ensure the probe plug is fully seated. Inspect the probe and cable for visible damage. Replace the battery. |
| Timer not functioning | Timer not started; incorrect setting. | Ensure the °C/°F S/S button was pressed to start the timer. Verify the minutes and seconds are set correctly. |
8. Specifications
- Model: ET-808
- Temperature Range: 32°F to 482°F (0°C to 250°C)
- Timer Range: 99 minutes, 59 seconds
- Probe Material: Stainless Steel
- Cable Length: 48 inches (approx. 122 cm)
- Display Type: LCD
- Power Source: 1 x AAA Battery (not included)
- Product Dimensions: 6.35 x 6.99 x 1.59 cm (2.5 x 2.75 x 0.63 inches)
- Item Weight: 113.4 g (4 oz)
9. Warranty and Support
Maverick Industries, Inc. warrants this product to be free of defects in parts, materials, and workmanship for a period of one year from the date of purchase. Should any repairs or servicing be required under this warranty, contact Maverick Customer Service for assistance. This warranty does not cover damage resulting from misuse, abuse, accidents, or unauthorized alterations.
For technical support or warranty inquiries, please refer to the contact information provided on the official Maverick website or your purchase documentation.
Ask a question about this manual
Ask about setup, troubleshooting, compatibility, parts, safety, or missing instructions. Manuals+ will review the question and use this page’s manual context to help answer it.