
VIAIR 10005
VIAIR 10005 Heavy Duty Onboard Air System
User Instruction Manual
Introduction
The VIAIR 10005 Heavy Duty Onboard Air System is a comprehensive, pre-packaged compressed air solution designed for vehicle integration. This system provides reliable air supply for various applications, including tire inflation and powering small pneumatic tools. It features a robust 400C compressor and a 2.5-gallon air tank, ensuring efficient performance for demanding tasks.

Image: All components of the VIAIR 10005 Heavy Duty Onboard Air System, including the compressor, air tank, hoses, and fittings, are displayed.
What's in the Box
- 1 x 2.5-gallon VIAIR Air Tank (six port)
- 1 x 400C 150 PSI VIAIR Air Compressor
- 1 x 35' Coil Hose with Clip-on Tire Chuck
- 1 x ¼" NPT Quick Connect Coupler (Female)
- 1 x Dash Panel Gauge with On/Off Switch
- 1 x Pressure Switch with Relay (110 PSI-on, 150 PSI-off)
- 1 x Reducer (⅛" NPT Female to ¼" NPT Male)
- 1 x ¼" NPT - 175 PSI Safety Valve
- 1 x ¼" NPT Drain Cock
- 1 x ¼" NPT Compression Fittings
- 1 x 4" Strip of Continuous Grommet Material
- 1 x 20' Section of 12 Gauge Wire with Inline Fuse Holder
- Electrical Connectors
- 1 x Accessory Airline
- Owner's Manual
Specifications
| Feature | Detail |
|---|---|
| Motor Voltage | 12 Volt (DC) |
| Motor Type | Permanent Magnetic |
| Max. Duty Cycle | 33% @ 100 PSI |
| Max. Working Pressure | 150 PSI |
| Max. Amp Draw | 26 Amps |
| Max. Ambient Temperature | 158°F (70°C) |
| Min. Ambient Temperature | -40°F (-40°C) |
| CFM @ 0 PSI | 2.54 |
| Intake Port | ¼" NPT |
Fill Rates (2.5 Gallon Tank)
| Pressure Range | Time to Fill | 33" x 12.5" Tire | 35" x 12.5" Tire |
|---|---|---|---|
| 0 - 145 PSI | 2 min. 20 sec. | n/a | n/a |
| 110 - 145 PSI | 48 sec. | n/a | n/a |
| 0 - 30 PSI | n/a | 4 min 00 sec. | 4 min. 50 sec. |
| 15 - 30 PSI | n/a | 2 min 00 sec. | 2 min 20 sec. |
Setup and Installation
This section provides detailed steps for installing your VIAIR 10005 Onboard Air System. Proper installation ensures optimal performance and longevity of the unit.
Step 1: Choose the Location to Mount Your Compressor
The 400C compressor is completely weatherproof, allowing for flexible mounting options including upright, sideways, or even upside down. However, for a longer lifespan and to prevent overheating, it is recommended to mount the compressor upright to allow for proper heat dissipation through its cooling fins.

Image: A white Jeep Wrangler on a dirt trail, highlighting the typical environment where the onboard air system would be used.
Step 2: Take Proper Measurements
Once the desired location for the compressor and tank is identified (e.g., inside the vehicle's cargo area), accurately measure the distances between the mounting holes on the compressor and transfer these measurements to the vehicle's body for precise drilling.
Step 3: Install the Components into Your Tank
Install the drain cock into the tank. All fittings come with pre-applied thread sealant. Ensure the drain cock is accessible for periodic draining to release condensation and moisture. Install the compression fitting and the safety pop-off valve into their respective ports on the tank. Snug them down securely.
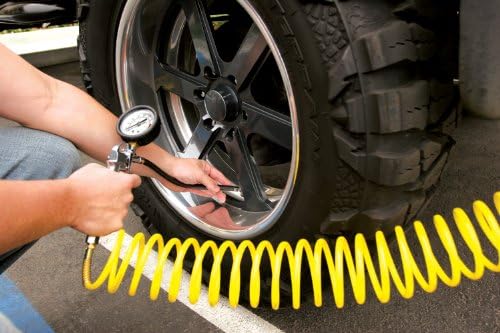
Image: A person using the yellow coil hose to inflate a vehicle tire, demonstrating the primary function of the system.
Step 4: Mount Your Onboard Air System
Drill pilot holes using a 3/16" drill bit, then enlarge them to 1/4" for the compressor hardware and 5/8" for the air tank. These holes will allow the mounting bolts and air lines to pass through. Install the rubber isolators onto the air tank mounting brackets to prevent noise and vibration.
Step 5: Begin Your Wiring Setup
The kit's wiring is pre-tagged and clearly marked for ease of installation. Connect the white wire from the pressure switch to the compressor's lead wire. Connect the red wire (battery source) to a fused positive power source, typically the vehicle's battery. This wire includes an inline fuse holder. The smaller red wire connects to a keyable power source or the in-dash gauge kit. The black wire serves as a ground connection.
Step 6: Remote Mounting Options for Onboard Air
The remote air filter can be mounted away from the compressor in a clean, dry location. Ensure the element inside the air filter body is properly seated. For external air chuck access, you can drill a hole in your vehicle's bumper or another suitable location and mount the air chuck there. When inserting the air line into the fitting, ensure it goes over the barb for a secure connection.
Operation
The VIAIR 10005 system is designed for convenient air supply. To operate, ensure the system is properly installed and wired. Use the dash panel gauge with the on/off switch to activate the compressor. Connect the 35' coil hose to the quick connect coupler on the tank and attach the clip-on tire chuck to the tire valve. Monitor the pressure gauge while inflating. The system is capable of inflating tires up to 35 inches and can be used for various pneumatic tools.
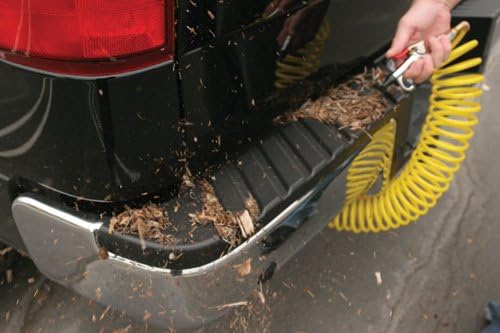
Image: Using the air hose to clear debris from a vehicle's bumper, showcasing versatility.

Image: An air tool connected to the system, ready for tire removal or other tasks.
Maintenance
- Drain the Air Tank: Regularly drain the air tank using the drain cock to remove any accumulated condensation or moisture. This prevents rust and ensures the longevity of the tank and system components.
- Check Air Filter: If you use your compressor frequently, check the remote air filter element every month. Replace if dirty or clogged to ensure clean air intake and optimal compressor performance.
- Inspect Connections: Periodically inspect all air line connections and electrical wiring for any signs of wear, leaks, or damage. Ensure all fittings are snug and secure.
Troubleshooting
- Compressor Not Turning On:
- Check the inline fuse for the battery lead wire. Replace if blown.
- Verify all electrical connections are secure and properly wired according to the instructions.
- Ensure the vehicle's ignition is on if connected to a keyable power source.
- Low Air Pressure/Slow Inflation:
- Inspect all air line connections for leaks. Use soapy water to detect bubbles at fittings.
- Check the air filter element for clogs and clean or replace as necessary.
- Ensure the air tank drain cock is fully closed.
- Excessive Noise/Vibration:
- Verify that the rubber isolators are correctly installed on the air tank and compressor mounts.
- Ensure the compressor and tank are securely mounted and not loose.
Warranty
VIAIR Corporation warrants this product, when properly installed and under normal conditions of use, to be free from defects in workmanship and materials for a period of one (1) year from its original date of purchase. This warranty covers product defects only. It does not cover incidental or consequential damages as a result of misuse or abuse.
Support
For further assistance, detailed installation guides, or to download the official owner's manual, please refer to the following resources:
- Download Installation Manual (PDF)
- Visit the official VIAIR website for product information and customer support.
Related documents10005


Ask a question about this manual
Ask about setup, troubleshooting, compatibility, parts, safety, or missing instructions. Manuals+ will review the question and use this page’s manual context to help answer it.