1. Introduction
This manual provides essential information for the safe and effective operation, maintenance, and troubleshooting of the Sealey RE232 Coil Spring Compressing Station. This unit is an air-actuated hydraulic tool designed for compressing coil springs with a capacity of up to 1500kg. It offers a quicker and easier alternative to traditional ratchet-driven spring compressors.
Please read this manual thoroughly before operating the equipment to ensure proper use and to prevent injury or damage.
2. Safety Information
WARNING: Failure to follow these instructions may result in serious injury or death.
- Always wear appropriate personal protective equipment (PPE), including safety glasses, gloves, and sturdy footwear.
- Ensure the unit is placed on a stable, level, and non-slip surface before operation.
- Do not exceed the maximum load capacity of 1500kg.
- Ensure the air supply pressure does not exceed 120psi (8.3 bar).
- Keep hands and other body parts clear of moving parts during operation.
- Inspect the unit for damage or wear before each use. Do not operate if damaged.
- Only use the unit for its intended purpose: compressing coil springs within the specified diameter range (Ø80mm to Ø175mm).
- Ensure the spring is securely seated in the plastic-coated yokes before applying pressure.
- Do not modify the equipment in any way.
- Keep children and unauthorized persons away from the work area.
3. Components and Parts
The Sealey RE232 Coil Spring Compressing Station consists of the following main components:
- Main Vertical Column with adjustable upper yoke positions.
- Hydraulic Cylinder and Piston Assembly.
- Air Actuated Control Valve.
- Foot Pedal for alternative operation.
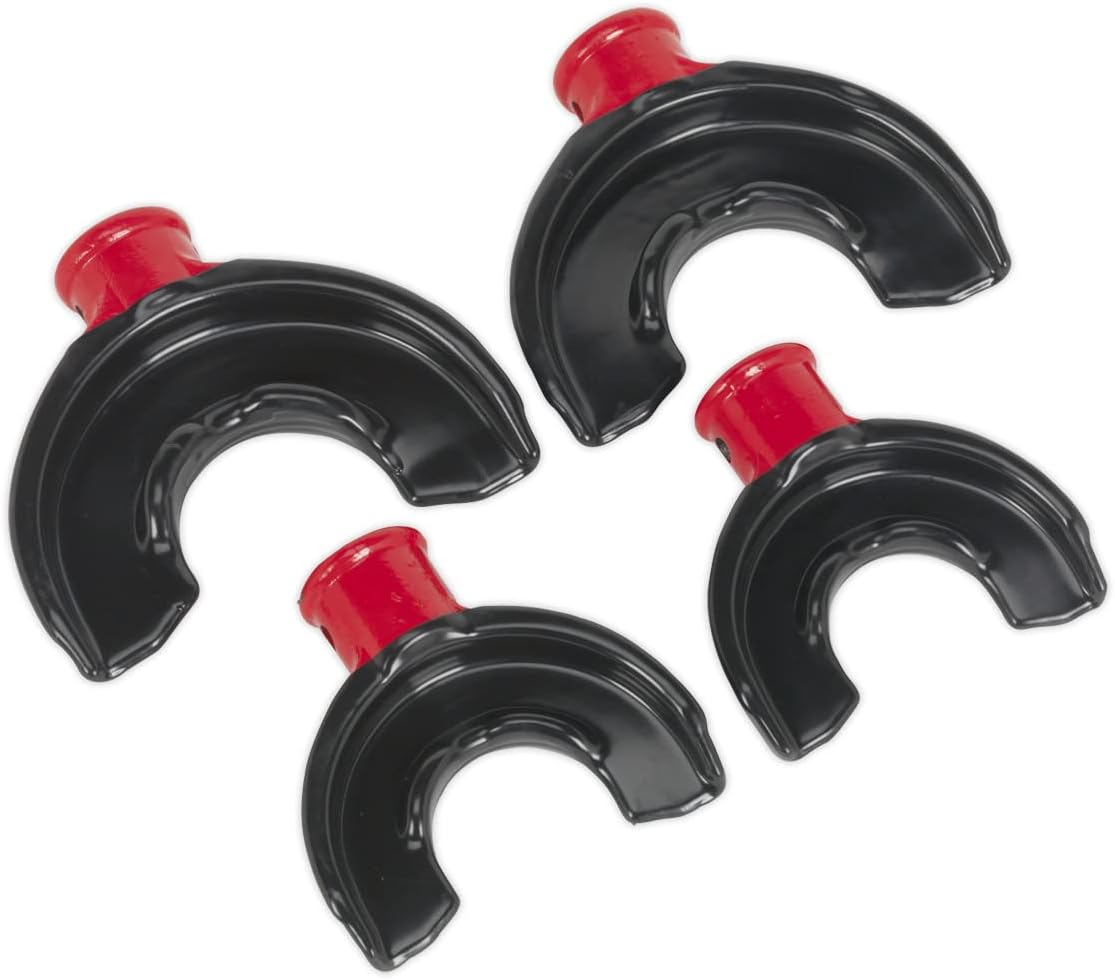
- Upper and Lower Plastic-Coated Yokes (suitable for springs Ø80mm to Ø175mm).
- Base Plate for stability.
- Air Hose with quick connector.

4. Setup
- Unpacking: Carefully remove all components from the packaging. Inspect for any shipping damage. Report any damage to your supplier immediately.
- Assembly: The main unit typically comes pre-assembled. Ensure all bolts and fasteners are tight before first use. Refer to the assembly diagram (if provided separately) for detailed steps if any assembly is required.
- Placement: Position the compressing station on a firm, level, and clean concrete surface capable of supporting the unit's weight and the maximum load. Ensure adequate clear space around the unit for safe operation.
- Air Supply Connection: Connect a suitable air compressor to the air inlet on the unit using the provided air hose. Ensure the air supply is clean, dry, and regulated to a maximum of 120psi (8.3 bar).
- Initial Check: Before loading a spring, perform a test cycle by operating the foot pedal or air control to ensure the hydraulic ram extends and retracts smoothly.
5. Operating Instructions
- Prepare the Spring: Ensure the coil spring is clean and free from debris.
- Position the Yokes: Adjust the upper yoke to an appropriate height for the spring being compressed. The unit features 7 upper yoke positions for versatility. The lower yoke has a travel of 340mm.
- Load the Spring: Carefully place the coil spring into the plastic-coated yokes. Ensure it is centered and securely seated. The yokes are designed for springs with diameters from Ø80mm to Ø175mm.
- Compress the Spring:
- Air Actuation: Use the air control valve to slowly apply pressure, causing the hydraulic ram to compress the spring.
- Foot Pedal Operation: Alternatively, use the foot pedal to manually actuate the hydraulic unit and compress the spring.
- Secure the Spring: Once the spring is compressed to the desired level, secure it using appropriate spring clamps or retaining tools (not included with the unit).
- Release Pressure: Slowly release the pressure from the hydraulic unit.
- Remove the Spring: Carefully remove the secured spring from the compressing station.
Note: The plastic-coated yokes are designed to reduce the risk of spring slippage or damage during the compression process.
6. Maintenance
Regular maintenance ensures the longevity and safe operation of your Sealey RE232 Coil Spring Compressing Station.
- Daily Inspection: Before each use, inspect the unit for any visible damage, loose fasteners, or signs of hydraulic fluid leaks. Check the condition of the air hose and connections.
- Cleaning: Keep the unit clean and free from dirt, grease, and debris. Wipe down surfaces with a clean cloth. Do not use harsh solvents that could damage paint or seals.
- Hydraulic Fluid Level: Periodically check the hydraulic fluid level. Refer to the unit's specific instructions for accessing the reservoir and the type of hydraulic fluid recommended (typically ISO VG 32 or equivalent). Top up if necessary.
- Lubrication: Lubricate moving parts and pivot points as recommended by the manufacturer to ensure smooth operation.
- Storage: When not in use, store the unit in a clean, dry, and secure location, away from extreme temperatures and corrosive environments.
- Professional Servicing: Any repairs or major maintenance, especially involving the hydraulic system, should only be performed by qualified personnel.
7. Troubleshooting
| Problem | Possible Cause | Solution |
|---|---|---|
| Unit does not compress spring or compresses slowly. | Low air pressure; Insufficient hydraulic fluid; Air in hydraulic system; Leaking seals. | Check air supply and pressure (max 120psi); Check and top up hydraulic fluid; Bleed air from system (refer to service manual); Contact qualified service personnel for seal replacement. |
| Hydraulic ram does not retract fully. | Return spring issue; Obstruction; Air in system. | Check for obstructions; Bleed air from system; Contact qualified service personnel. |
| Unusual noises during operation. | Lack of lubrication; Loose components; Internal hydraulic issue. | Lubricate moving parts; Check and tighten all fasteners; Cease operation and contact qualified service personnel. |
| Spring slips from yokes. | Improper seating of spring; Spring diameter outside specified range; Damaged yokes. | Ensure spring is correctly centered and seated; Verify spring diameter is between Ø80mm and Ø175mm; Inspect and replace damaged yokes. |
8. Specifications
| Specification | Value |
|---|---|
| Model No. | RE232 |
| Maximum Load Capacity | 1500kg |
| Upper Yoke Positions | 7 |
| Lower Yoke Travel | 340mm |
| Spring Diameter Range | Ø80mm - Ø175mm |
| Actuation | Air or Foot Pedal |
| Maximum Air Pressure | 120psi (8.3 bar) |
| Product Dimensions (L x W x H) | 33 x 123 x 7 cm (approximate, based on product data) |
| Item Weight | 37 kg |
| Colour | Red |
9. Warranty and Support
For warranty information, technical support, or to purchase replacement parts, please contact Sealey customer service or visit the official Sealey website. Keep your proof of purchase for warranty claims.
Sealey Contact Information:
- Website: www.sealey.co.uk
- Refer to the product packaging or Sealey's official website for the most current contact details and warranty terms specific to your region.


