
1. Introduction
This manual provides essential information for the safe and effective operation, setup, and maintenance of your Sealey Supermig150 Professional MIG Welder. The Supermig150 is designed for welding with CO2, Argon, or CO2/Argon gas mixtures. It features a Forced Air Cooling System to manage transformer temperature and increase duty cycle, along with a non-live torch for enhanced safety.
2. Safety Instructions
WARNING: Welding can be dangerous. Always follow safety precautions to prevent injury or death.
- Eye and Face Protection: Always wear a welding helmet with appropriate shade lenses to protect your eyes and face from arc rays and sparks.
- Body Protection: Wear flame-resistant clothing, heavy-duty gloves, and safety shoes. Avoid synthetic clothing.
- Ventilation: Ensure adequate ventilation to remove welding fumes, which can be hazardous to your health. Work in a well-ventilated area or use fume extraction equipment.
- Fire Prevention: Keep a fire extinguisher nearby. Remove all flammable materials from the welding area. Sparks and hot metal can cause fires.
- Electrical Safety: Ensure the welder is properly grounded. Do not operate in damp or wet conditions. Inspect cables for damage before each use.
- Gas Cylinder Safety: Secure gas cylinders to prevent them from falling. Use the correct regulator and ensure connections are tight.
- Work Area: Keep the work area clean and free of clutter. Ensure stable footing.
- Non-Live Torch: The Supermig150 features a non-live torch to reduce the risk of accidental arc striking. However, always treat the torch as potentially live.
3. Product Overview
The Sealey Supermig150 is a robust MIG welder designed for professional and industrial use. It offers a welding current range of 30-150A and is compatible with various shielding gases.

Figure 1: Front view of the Sealey Supermig150 Professional MIG Welder, showing the control panel, power cable, and handle.
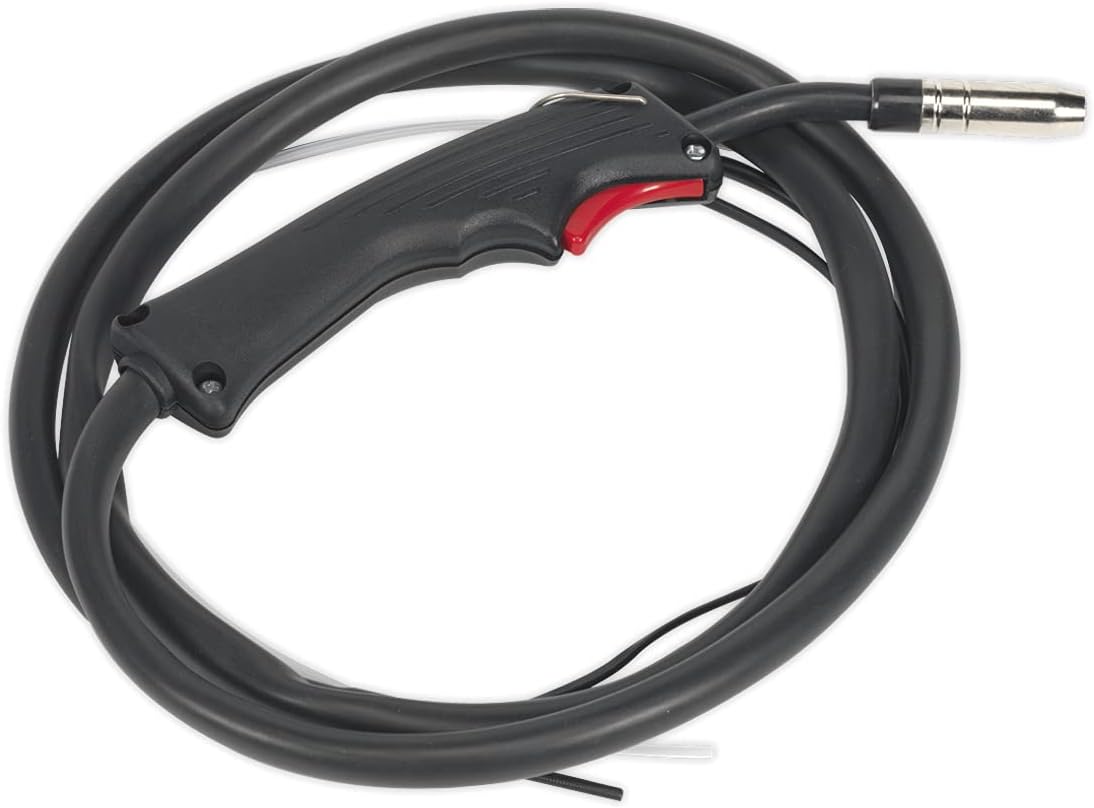
Figure 2: The MIG welding torch with its integrated cable, featuring an ergonomic handle and trigger.
4. Setup and Installation
4.1. Unpacking
Carefully remove the welder and all accessories from the packaging. Inspect for any shipping damage. Retain packaging for future transport or storage.
4.2. Power Connection
Connect the welder to a 230V power supply. Ensure the power outlet is properly grounded and capable of handling the welder's absorbed power of 4.1kW.
4.3. Gas Cylinder and Regulator Installation
The Supermig150 is supplied with an industrial Argon/CO2 regulator. Obtain a suitable gas cylinder (CO2, Argon, or CO2/Argon mix) from a local gas distributor. Gas is not included with the welder.
- Securely fasten the gas cylinder to a stable support or the welder's integrated cylinder platform if available.
- Attach the industrial Argon/CO2 regulator to the gas cylinder valve. Ensure a tight, leak-free connection.
- Connect the gas hose from the regulator to the gas inlet on the rear of the welder.
- Slowly open the gas cylinder valve and check for leaks using a soapy water solution.
4.4. Welding Wire Installation
The welder supports wire capacities from 0.7kg to 5kg. Refer to the internal diagram for correct wire spool mounting and feeding through the drive rollers and torch liner.
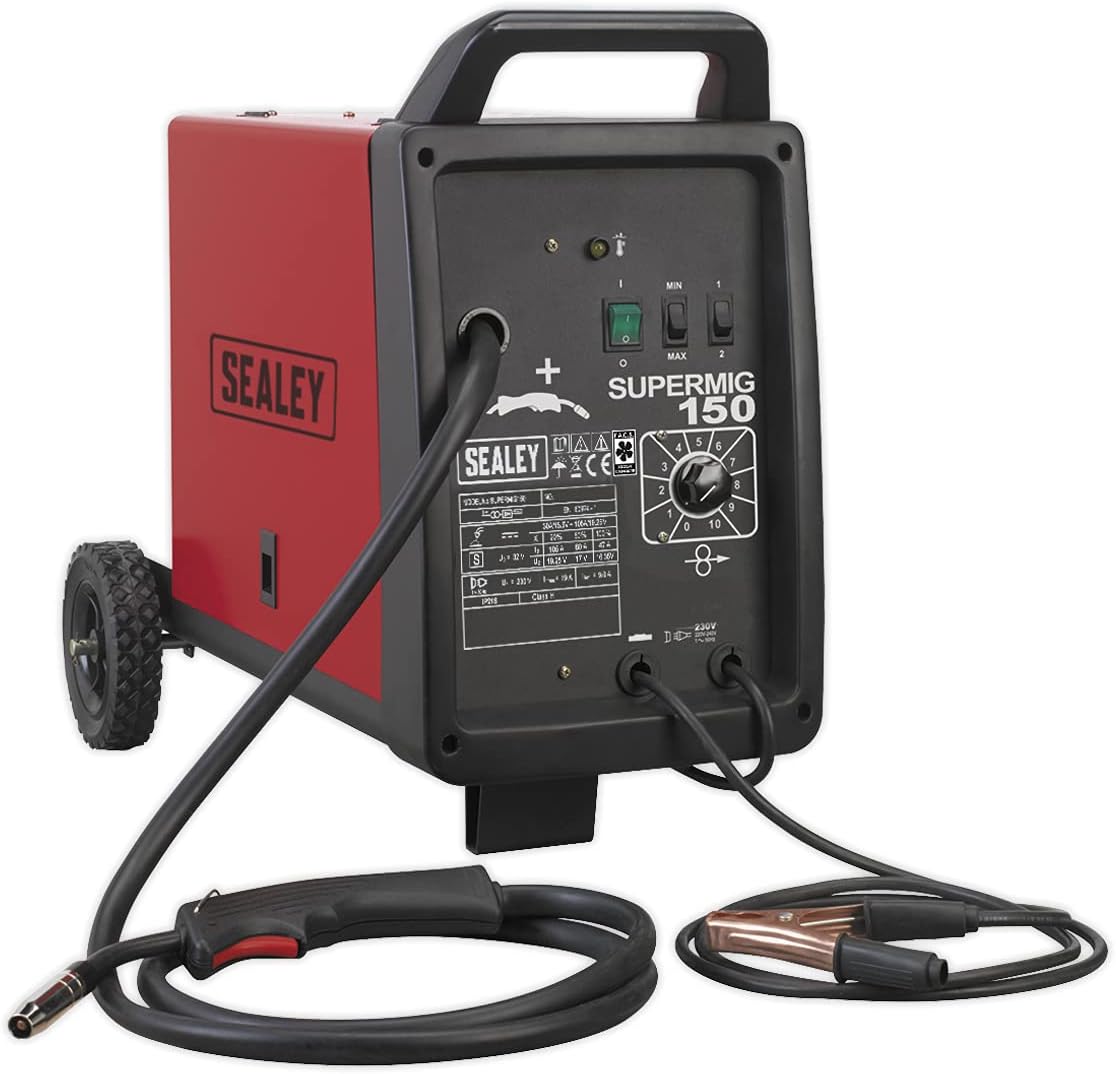
Figure 3: The Sealey Supermig150 Welder with the MIG torch and earth clamp cables connected, ready for operation.
5. Operation
5.1. Controls and Settings
The control panel features settings for welding current (30-150A). Adjust these according to the material thickness and type of weld required. Consult a welding chart for recommended settings.
5.2. Welding Procedure
- Ensure all safety precautions are in place.
- Connect the earth clamp securely to the workpiece, ensuring good electrical contact.
- Turn on the welder.
- Adjust the wire feed speed and voltage settings.
- Position the non-live torch at the starting point of the weld.
- Press the torch trigger to initiate the arc and begin welding.
- Maintain a consistent travel speed and torch angle for optimal weld quality.
- Release the trigger to stop welding.
5.3. Duty Cycle
The Supermig150 has a duty cycle of 100% at 47A, 60% at 60A, and 20% at 105A. The Forced Air Cooling System helps manage heat. If the welder exceeds its duty cycle, a thermal overload protection system will activate, temporarily shutting down the output to prevent damage. Allow the unit to cool down before resuming operation.
6. Maintenance
6.1. Regular Cleaning
Periodically clean the welder's exterior and internal components (if accessible and safe to do so after disconnecting power) to prevent dust and debris buildup, which can hinder the Forced Air Cooling System's efficiency.
6.2. Torch and Cable Inspection
Regularly inspect the welding torch, cables, and earth clamp for signs of wear, cuts, or damage. Replace any damaged components immediately to ensure safe and effective operation.
6.3. Wire Feed System
Check the wire feed rollers for wear and ensure they are clean and free of debris. Adjust tension as needed for smooth wire feeding.
7. Troubleshooting
- No Arc: Check power supply, earth clamp connection, wire feed, and torch connections. Ensure the gas is flowing if using gas-shielded welding.
- Poor Weld Quality: Adjust voltage and wire feed speed. Ensure proper gas flow and correct torch angle. Check for contaminated workpiece.
- Welder Shuts Off (Thermal Overload): This indicates the unit has exceeded its duty cycle. Allow the welder to cool down. Reduce the welding current or duration of continuous welding.
- Irregular Wire Feed: Check wire spool for tangles, ensure drive rollers are clean and tensioned correctly, and inspect the torch liner for blockages or damage.
8. Technical Specifications
| Specification | Value |
|---|---|
| Model No. | SUPERMIG150 |
| Welding Current Range | 30-150A |
| Wire Capacity | 0.7-5kg |
| Duty Cycle (100%) | @ 47A |
| Duty Cycle (60%) | @ 60A |
| Duty Cycle (20%) | @ 105A |
| Cooling System | Forced Air |
| Gas Type | CO2, Argon, CO2/Argon Mix |
| Torch Type | 2mtr Non-Live |
| Supply Voltage | 230V |
| Absorbed Power | 4.1kW |
| Weight | 30kg (approx. 22 lbs listed in specs) |
| Dimensions (H x W x L) | 445mm x 695mm x 332mm (approx. 17.52 x 27.56 x 12.99 inches) |
9. Warranty and Support
For warranty information, technical support, or service inquiries, please contact your authorized Sealey dealer or visit the official Sealey website. Keep your purchase receipt as proof of purchase.


