
Nady DKW-DUO-HT-BD
Nady DKW DUO HT B/D VHF Dual Wireless Handheld Microphone System User Manual
Model: DKW-DUO-HT-BD
1. Introduction
This manual provides instructions for the Nady DKW DUO HT B/D VHF Dual Wireless Handheld Microphone System. This system offers the advantages of wireless operation for various speaking and performance applications. Please read this manual thoroughly before operating the system to ensure proper setup and optimal performance.
2. Package Contents
Verify that all items are present in your package:
- DKW-DUO Receiver Unit
- HT-DUO Handheld Microphones (2 units)
- AC Power Adapter (for receiver)
- 1/4" to 1/4" Audio Cable
- User Manual (this document)

Image 1: Nady DKW DUO HT B/D VHF Dual Wireless Handheld Microphone System showing the receiver and two handheld microphones.
3. Setup Instructions
3.1 Receiver Placement and Connection
- Position the Receiver: Place the DKW-DUO receiver in a location where there is a clear line of sight to the area where the microphones will be used. Avoid placing it near large metal objects, concrete walls, or other obstructions that can interfere with the wireless signal. Extend the receiver antennas as high as possible for optimal reception.
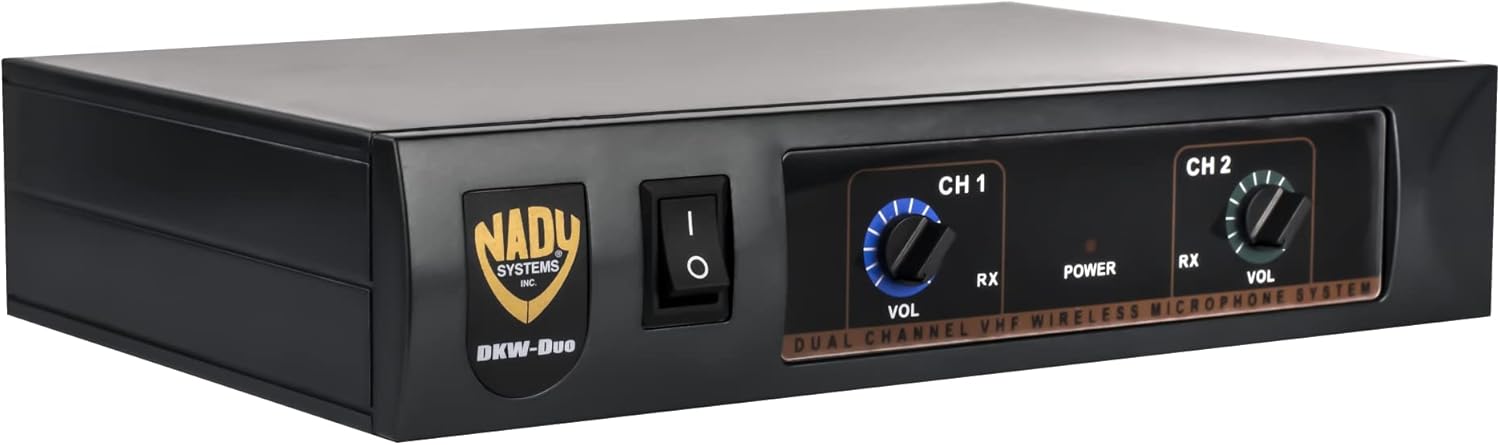
Image 2: Front panel of the Nady DKW-DUO receiver, showing volume controls and power switch.
- Connect Power: Connect the supplied AC power adapter to the 9V DC input jack on the rear of the receiver. Plug the adapter into a standard AC power outlet.

Image 3: Rear panel of the Nady DKW-DUO receiver, highlighting the 9V DC input and 1/4" MIX OUTPUT jack.
- Connect Audio Output: Connect one end of the supplied 1/4" audio cable to the MIX OUTPUT jack on the rear of the receiver. Connect the other end to an available 1/4" input on your mixer, PA system, or amplifier.
3.2 Microphone Setup
- Install Batteries: Unscrew the bottom part of each handheld microphone to reveal the battery compartment. Insert a fresh 9V alkaline battery, observing the correct polarity (+/-). Securely reattach the bottom part.

Image 4: Nady HT-DUO handheld microphone with the battery compartment open, showing where to insert the 9V battery.
- Power On Microphones: Locate the OFF/ON switch on each microphone. Slide the switch to the "ON" position. The LED indicator on the microphone will flash once to confirm it is powered on. A steady LED indicates a low battery.

Image 5: Close-up of a Nady HT-DUO handheld microphone, showing the power switch and grille.
4. Operating Instructions
- Power On Receiver: Flip the power switch on the front panel of the DKW-DUO receiver to the "ON" position. The "POWER" LED will illuminate.
- Verify Signal: With the microphones powered on, the "RX" (Receive) LED for each channel (CH A and CH B) on the receiver's front panel should illuminate, indicating a successful wireless connection.
- Adjust Volume: Use the individual "VOL" (Volume) control knobs for CH 1 and CH 2 on the receiver's front panel to adjust the output level of each microphone. Start with the volume low and gradually increase it to a comfortable listening level on your connected audio system.
- Usage Tips:
- Maintain a clear line of sight between the microphones and the receiver antennas.
- Avoid holding the microphone by the antenna or covering the grille, as this can affect performance.
- For best sound quality, speak or sing directly into the top of the microphone grille.
5. Important Considerations
- Line of Sight: Ensure a clear, unobstructed line of sight between the receiver antennas and the microphone transmitters. Metal objects, concrete walls, and other physical barriers can significantly reduce the operating range and signal quality.
- Antenna Positioning: Extend the receiver antennas fully and position them as high as possible to maximize reception range and stability.
- Battery Quality: Always use fresh, high-quality alkaline 9V batteries in the microphones. Weak or worn-out batteries are a common cause of poor range, distortion, and interference. Battery life is approximately 15 hours with fresh alkaline batteries.
- Frequency Interference: This system operates in the VHF frequency range (170-216MHz). Check that the operating frequencies do not coincide with local TV channels or other external sources like FM radio transmitters or cable TV systems to avoid interference.
6. Maintenance
- Cleaning: Use a soft, dry cloth to clean the exterior of the receiver and microphones. Do not use liquid cleaners or solvents.
- Battery Replacement: Replace microphone batteries promptly when the LED indicator shows a steady light, or if performance degrades. Remove batteries if the microphones will not be used for an extended period to prevent leakage.
- Storage: Store the system in a cool, dry place away from direct sunlight and extreme temperatures.
7. Troubleshooting
| Problem | Possible Cause | Solution |
|---|---|---|
| No sound from microphone |
|
|
| Poor sound quality, static, or dropouts |
|
|
| Receiver "RX" LED not lighting up |
|
|
8. Specifications
Overall System
- Frequency Response: 80Hz-14kHz (±3dB)
- Dynamic Range: 95dB
- Total Harmonic Distortion: <0.7%
- RF Carrier Frequency Range: 170-216MHz (VHF)
- Frequency Stability: ±0.005%, crystal controlled
- Modulation: FM (F3E), ±15kHz max.
- Operating Range: 150 ft. typical, up to 300+ ft. line-of-sight
Transmitter (Handheld Microphone)
- Audio Input: Nady DM-20D unidirectional dynamic cartridge
- Controls: OFF/ON switch
- LED Indicator: "ON" (single flash), Low Battery Alert (steady)
- RF Power Out: 50mW
- Harmonic & Spurious Emissions: >-40dB
- Battery: 9V Alkaline
- Battery Life: Up to 15 hours
- Weight: 5.4 ounces (per microphone)
Receiver
- Controls: Power ON/OFF, CH 1 Volume, CH 2 Volume
- Connectors: 1/4" unbalanced audio out jack, 2.1 mm barrel-type DC input jack
- LED Indicators: Power ON, Transmitter RF (CH A & CH B)
- Power Requirements: 9V @ 120mA, nominal, AC/DC adapter supplied
- Antennas: Dual 15" (38 cm), collapsible
- Dimensions: 7 x 4.5 x 13.5 inches (Product Dimensions, likely for receiver)
9. Warranty and Support
For warranty information or technical support, please refer to the official Nady website or contact Nady customer service directly. Contact details are typically provided with the product packaging or on the manufacturer's website.
Note: This product is from a small business brand.
Related documentsDKW-DUO-HT-BD


Ask a question about this manual
Ask about setup, troubleshooting, compatibility, parts, safety, or missing instructions. Manuals+ will review the question and use this page’s manual context to help answer it.