
1. Introduction
Thank you for choosing the TPI Fan-Forced Wall-Mount Heater. This manual provides essential information for the safe installation, operation, and maintenance of your heater. Please read these instructions thoroughly before installation and use, and retain them for future reference.
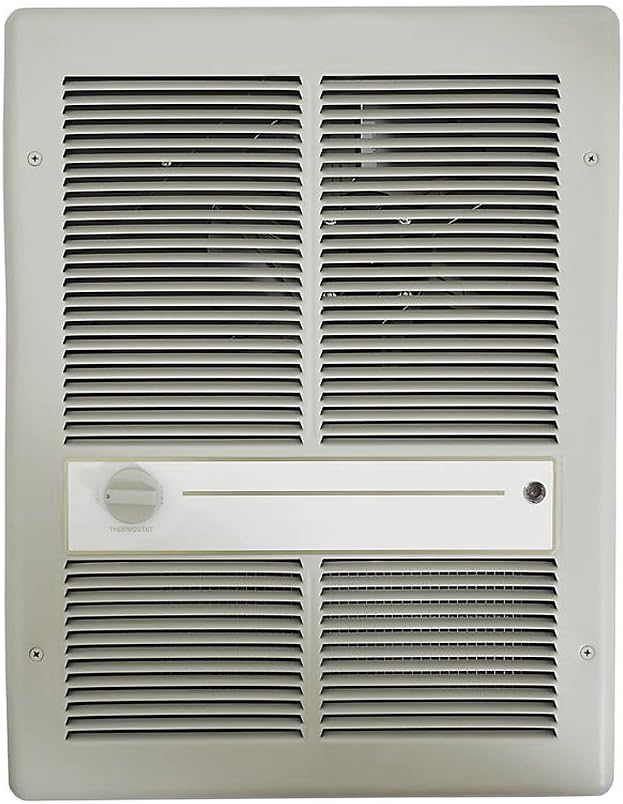
This heater is designed for indoor use, providing efficient supplemental heating for various spaces such as bedrooms, home offices, and study rooms. It features a durable ivory powder coat finish and a single-pole thermostat for temperature control.
2. Safety Information
WARNING: Risk of fire, electric shock, or injury to persons. Improper installation or operation can lead to serious hazards.
- Electrical Connection: This unit operates on 240/208V. All electrical wiring must be performed by a qualified electrician in accordance with national and local electrical codes. Ensure the power supply is disconnected before any installation or servicing.
- Clearances: Maintain proper clearances from combustible materials. Do not install the heater near curtains, furniture, or other flammable objects. Refer to local codes for specific clearance requirements.
- Hot Surface: The heater grill and internal components become hot during operation. To avoid burns, do not touch hot surfaces. Keep children and pets away from the heater.
- Ventilation: Do not block or obstruct the air intake or exhaust openings. Restricted airflow can cause overheating.
- Moisture: Do not install the heater in areas where it may be exposed to water or excessive moisture.
- Grounding: Ensure the heater is properly grounded to prevent electric shock.
3. Product Overview
The TPI Fan-Forced Wall-Mount Heater is designed for efficient heating with a durable construction. Key features include:
- Fan-forced operation for rapid heat distribution.
- Dual-wattage capability, adjustable at the time of installation.
- Single-pole thermostat for temperature control.
- Automatic reset thermal limit for safety.
- Vane axial fan blade and steel block fin element for maximum heat output.
- Temperature range of 50°F to 90°F.
- Durable ivory powder coat finish.
Components
The heater consists of a main housing, a front grill, a fan assembly, a heating element, and a thermostat control.
4. Specifications
| Feature | Specification |
|---|---|
| Model Number | HF3316TRP |
| Brand | TPI |
| Voltage | 240/208 Volts AC |
| Wattage (Adjustable) | 4000/3000/2000/1500 Watts |
| Amperage (Max) | 16.8 Amps |
| BTUs (Max) | 13648 BTUs |
| Temperature Range | 50°F - 90°F |
| Dimensions (WxDxH) | 15-3/8" x 4" x 20-1/8" |
| Item Weight | 22 pounds |
| Color | Ivory |
| Mounting Type | Wall Mount |
| Fuel Type | Electric |
| Special Feature | Manual Thermostat, Automatic Reset Thermal Limit |
5. Setup and Installation
IMPORTANT: Installation must be performed by a qualified electrician in compliance with all national and local electrical codes.
5.1 Pre-Installation Checks
- Verify that the supply voltage matches the heater's requirements (240/208V).
- Ensure the mounting location provides adequate clearances from combustible materials.
- Confirm that the electrical circuit is properly sized for the heater's wattage and amperage.
5.2 Mounting the Heater
- Disconnect power at the main circuit breaker before proceeding.
- Remove the front grill of the heater to access the mounting holes and wiring compartment.
- Position the heater on the wall, ensuring it is securely fastened to wall studs or appropriate blocking. The unit is designed for wall-mount installation.
- Ensure the heater is level and plumb.
5.3 Electrical Wiring
- Route the electrical supply wires into the heater's wiring compartment.
- Connect the supply wires to the heater terminals according to the wiring diagram provided inside the unit and local electrical codes. Ensure all connections are tight and secure.
- Wattage Adjustment: The heater ships wired to the highest wattage. If a lower wattage is desired (e.g., 3000W, 2000W, or 1500W), adjust the internal wiring connections as indicated in the heater's internal wiring diagram. This adjustment must be made at the time of installation by a qualified electrician.
- Ensure proper grounding of the unit.
- Once wiring is complete, replace the front grill, ensuring it is securely attached.
6. Operating Instructions
6.1 Initial Startup
- After installation and wiring are complete, restore power to the heater at the main circuit breaker.
- Turn the thermostat dial clockwise to the maximum setting. The fan should activate, and the heating element should begin to warm up.
- Allow the heater to operate for a few minutes to ensure proper function. A slight odor may be present during the first few hours of operation; this is normal and will dissipate.
6.2 Setting the Temperature
The heater features a manual single-pole thermostat with a temperature range of 50°F to 90°F.
- Turn the thermostat dial clockwise to increase the desired room temperature.
- Turn the thermostat dial counter-clockwise to decrease the desired room temperature.
- Once the desired room temperature is reached, slowly turn the thermostat dial counter-clockwise until the heater turns off. The heater will then cycle on and off to maintain this set temperature.
7. Maintenance
Regular maintenance ensures optimal performance and longevity of your heater. Always disconnect power at the main circuit breaker before performing any maintenance.
7.1 Cleaning the Grill
- Periodically, use a soft brush or vacuum cleaner with a brush attachment to remove dust and debris from the heater grill.
- Do not use abrasive cleaners or solvents, as these can damage the finish.
7.2 Internal Cleaning (Professional Recommended)
For internal cleaning of the fan and heating element, it is recommended to consult a qualified service technician. Accumulation of dust inside the unit can reduce efficiency and pose a fire hazard.
7.3 Automatic Reset Thermal Limit
This heater is equipped with an automatic reset thermal limit, which will shut off the heater if it overheats. Once the unit cools down, it will automatically reset and resume operation. If the thermal limit trips frequently, inspect for blocked airflow or other issues and consult a qualified technician.
8. Troubleshooting
If your heater is not operating correctly, refer to the following troubleshooting guide. Always disconnect power before inspecting the unit.
| Problem | Possible Cause | Solution |
|---|---|---|
| Heater does not turn on. | No power supply. Circuit breaker tripped. Thermostat set too low. | Check circuit breaker. Ensure power is on. Turn thermostat dial to a higher setting. |
| Heater produces insufficient heat. | Thermostat set too low. Incorrect wattage setting. Blocked airflow. | Increase thermostat setting. Verify wattage setting (professional adjustment). Clear any obstructions from grill. |
| Heater cycles on and off too frequently. | Thermostat differential too narrow. Overheating (thermal limit tripping). | Adjust thermostat setting. Check for blocked airflow. Ensure proper clearances. |
| Fan runs but no heat. | Heating element failure. Wiring issue. | Contact a qualified electrician or service technician for diagnosis and repair. |
If the problem persists after attempting these solutions, contact a qualified electrician or TPI customer support.
9. Warranty and Support
For warranty information or technical support regarding your TPI Fan-Forced Wall-Mount Heater, please refer to the warranty card included with your product or contact TPI customer service directly. Keep your purchase receipt as proof of purchase.
Manufacturer: TPI
Contact Information: Please refer to the official TPI website or product packaging for the most current customer support contact details.


