
Intermatic T103
Intermatic T103 24-Hour Mechanical Timer Switch User Manual
Model: T103
Brand: Intermatic
Product Overview
The Intermatic T103 24-Hour Mechanical Timer Switch is a heavy-duty, programmable time switch designed for controlling electrical loads up to 40 Amps. It is suitable for various applications including pumps, lighting, HVAC systems, and fans. This timer provides reliable 24-hour control with multiple ON/OFF operations daily.
Key Features:
- Double Pole, Single Throw (DPST): Built for heavy-duty use, this time switch controls both lines of a 120V circuit with support for 40A resistive, inductive, and motor loads—ideal for pumps, HVAC units, and more.
- 24-Hour Mechanical Scheduling: Automate daily power cycles with up to 12 programmable ON/OFF events every 24 hours; analog control is ideal for lights, water features, fans, and industrial applications.
- Heavy-Duty Indoor Metal Housing: Built with an industrial-grade, Type 1 rated steel enclosure designed to mount securely in utility rooms, garages, and equipment closets for safe, long-term use.
- Includes Programmable Trippers: Ships with one ON and one OFF tripper for quick setup; expandable to 12 cycles/day with a minimum 1-hour interval between scheduled events.
- High-Load Capacity & Certified Safe: Rated for up to 2 HP motors and compatible with LED, HID, resistive, and ballast loads; UL and CSA listed for use in residential, commercial, and energy-efficient systems.
Important Safety Information
WARNING: Risk of Fire or Electric Shock
- Installation and/or wiring must be in accordance with national and local electrical code requirements.
- Do not connect aluminum wires to switch terminals.
- Replace plastic insulator and screw exercising terminal after wiring.
- Turn power OFF at main panel before servicing this switch or the equipment it controls.
- Keep door closed at ALL TIMES when not servicing.
Always consult a qualified electrician for installation and maintenance to ensure safety and compliance with local regulations.
Setup and Installation
The Intermatic T103 timer is designed for indoor use and surface mounting. Ensure the mounting location is secure and provides adequate space for wiring and operation.
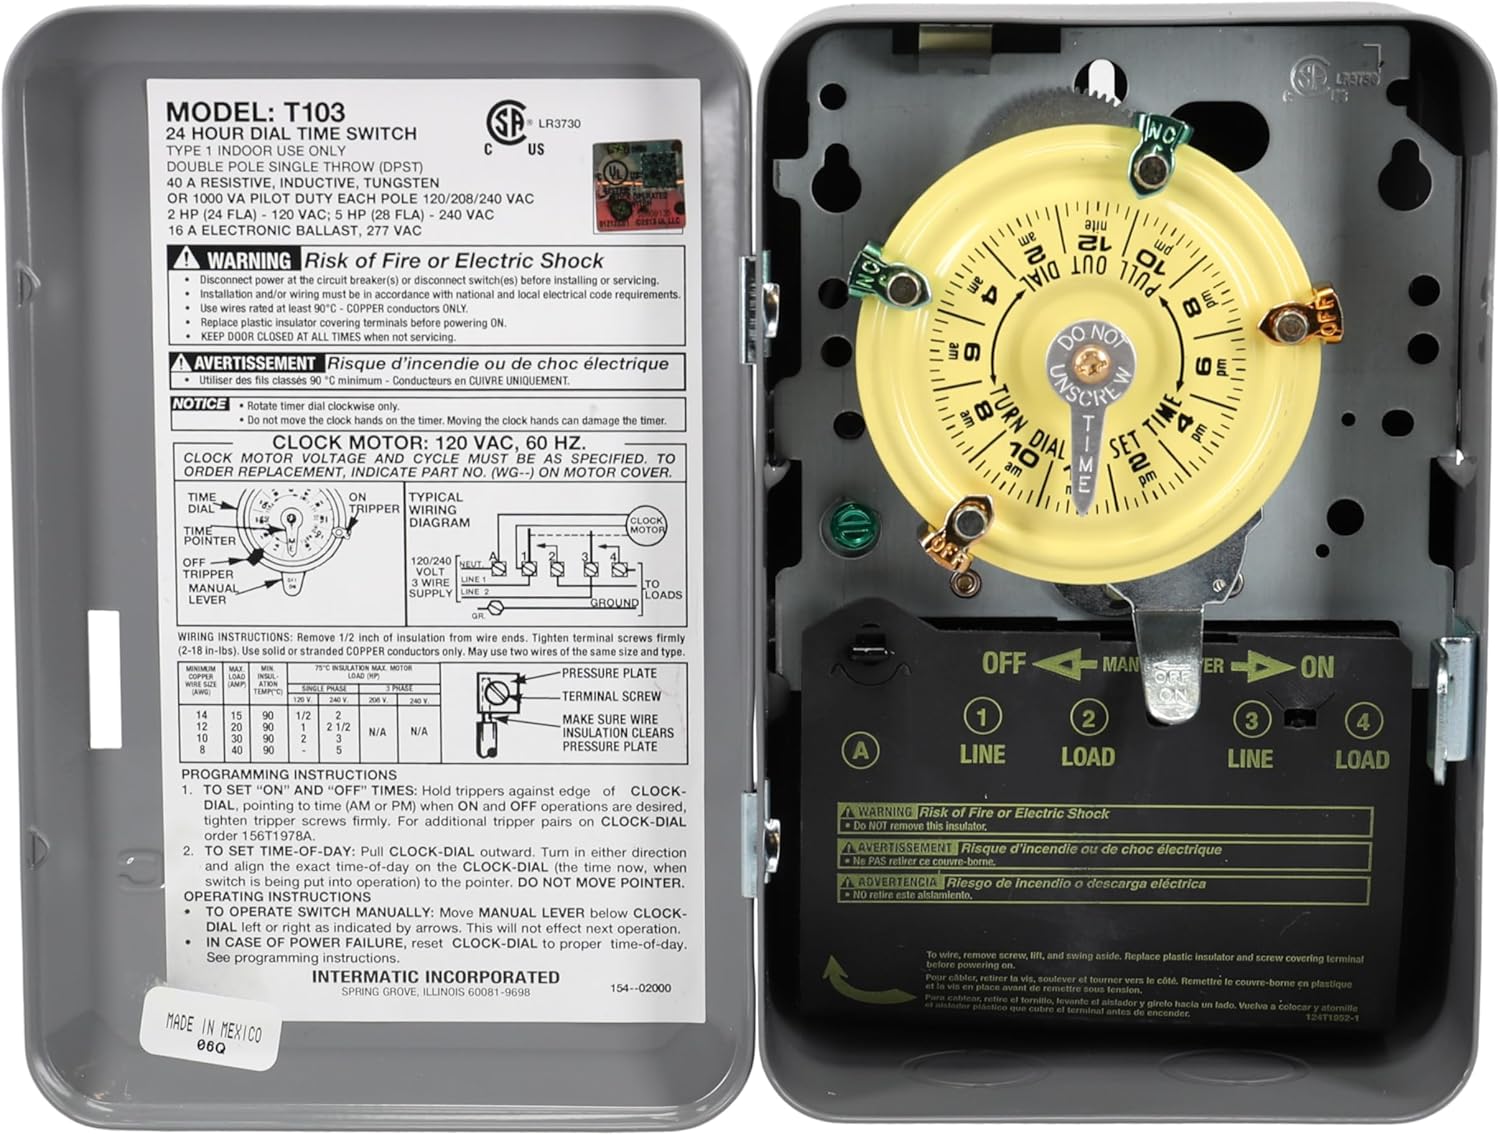
Figure 1: Front view of the Intermatic T103 timer with its protective cover open, revealing the internal dial, trippers, and wiring terminals. A detailed wiring diagram is visible on the inside of the cover.
Mounting:
- Select a suitable indoor location for surface mounting, such as a utility room, garage, or equipment closet.
- Ensure the surface is flat and stable.
- Use appropriate screws to securely fasten the timer's metal enclosure to the wall.
Wiring Instructions:
Before beginning any wiring, ensure power is turned OFF at the main electrical panel.
- Remove approximately 1/2 inch of insulation from wire ends.
- Tighten terminal screws firmly (18-18 lbs. in.) for solid or stranded copper conductors only. Do not connect aluminum wires.
- The timer is a Double Pole, Single Throw (DPST) switch. It controls two separate lines (Line 1 and Line 2) and two loads (Load 1 and Load 2).
- Refer to the wiring diagram located inside the timer's cover for specific connections. The diagram typically shows connections for 120V, 240V, and 277V applications.
- After wiring, replace the plastic insulator and screw exercising terminal.
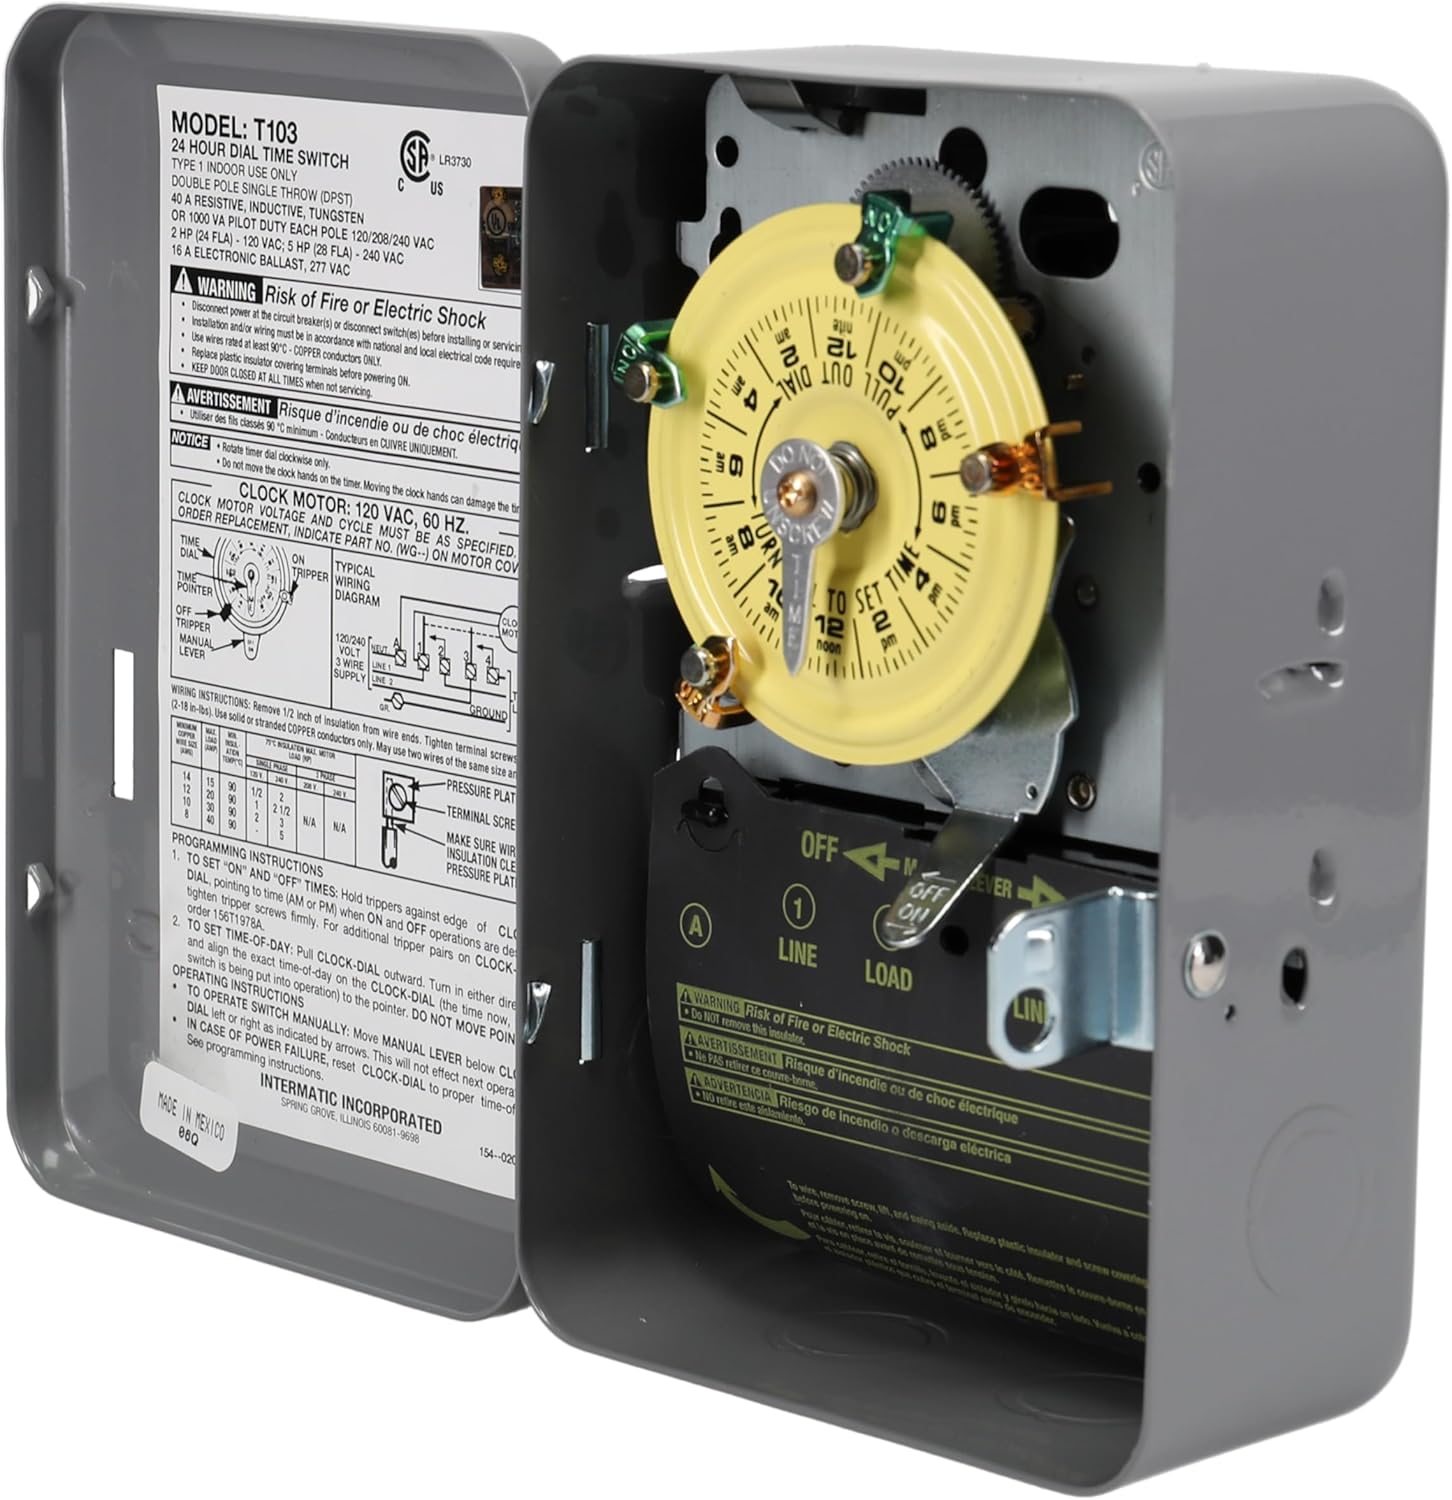
Figure 2: Angled view of the timer, highlighting the robust metal enclosure and the accessible wiring terminals at the bottom.
Operating Instructions
The T103 timer allows for precise 24-hour scheduling of your electrical devices.

Figure 3: Detailed view of the timer's 24-hour dial, indicating the current time and the placement of ON/OFF trippers.
1. Setting the Current Time:
- Locate the small knob in the center of the yellow dial labeled "PULL OUT TO SET TIME".
- Gently pull this knob outwards.
- Rotate the dial until the current time aligns with the "TIME" pointer (the small arrow at the top of the dial).
- Push the knob back in to lock the time setting.
2. Setting ON/OFF Operations:
- The timer comes with one "ON" tripper and one "OFF" tripper. These are small metal pins that attach to the outer edge of the yellow dial.
- To set an "ON" time, slide the "ON" tripper onto the dial at the desired time. Ensure it is firmly seated.
- To set an "OFF" time, slide the "OFF" tripper onto the dial at the desired time. Ensure it is firmly seated.
- You can add additional trippers (sold separately) for up to 12 ON/OFF operations per day. Ensure a minimum 1-hour interval between scheduled events.
3. Manual Override:
- A manual override switch is located below the dial, labeled "OFF" and "ON".
- To manually turn the connected device ON or OFF, slide this lever to the desired position.
- The manual override will remain active until the next scheduled ON or OFF event, at which point the timer will resume its programmed schedule.
Maintenance
The Intermatic T103 timer is designed for durability and requires minimal maintenance. However, periodic checks can ensure its longevity and proper function.
- Cleaning: Periodically wipe the exterior of the enclosure with a dry, clean cloth to remove dust and debris. Do not use liquid cleaners inside the unit.
- Connections: Annually, with power OFF at the main panel, inspect all wiring connections to ensure they remain tight and secure.
- Trippers: Ensure the ON/OFF trippers are securely attached to the dial and move freely.
- Enclosure: Keep the enclosure door closed at all times to protect internal components from dust and moisture.
Troubleshooting
If you encounter issues with your Intermatic T103 timer, refer to the following common problems and solutions:
| Problem | Possible Cause | Solution |
|---|---|---|
| Device does not turn ON/OFF at programmed times. |
|
|
| Timer dial is not moving. |
|
|
| Timer makes unusual noise. |
|
|
For issues not listed here or if solutions do not resolve the problem, please contact Intermatic customer support or a certified electrician.
Specifications
| Attribute | Value |
|---|---|
| Model Number | T103 |
| Brand | Intermatic |
| Voltage | 120 Volts |
| Wattage | 5000 watts |
| Amperage Capacity | 40 Amps |
| Switch Type | DPST (Double Pole, Single Throw) |
| Number of Settings | 12 ON/OFF operations per day |
| Material | Plastic (internal components), Metal (enclosure) |
| Product Dimensions | 6"D x 9"W x 4"H |
| Item Weight | 1 pounds (approx. 16 ounces) |
| Mounting Type | Surface Mount |
| Certifications | UL and CSA listed |
Figure 4: The Intermatic T103 timer in its closed, ready-to-mount state.
Warranty and Support
Warranty Information:
The Intermatic T103 Mechanical Time Switch comes with a 1-year warranty from the date of purchase. This warranty covers defects in materials and workmanship under normal use.
For warranty claims or detailed warranty terms, please refer to the official Intermatic website or contact their customer service.
Customer Support:
If you require further assistance, have questions about installation, operation, or troubleshooting, please contact Intermatic customer support.
You can also refer to the official User Manual (PDF) for comprehensive details:
Related documentsT103


Ask a question about this manual
Ask about setup, troubleshooting, compatibility, parts, safety, or missing instructions. Manuals+ will review the question and use this page’s manual context to help answer it.