
Dodge FBA_4686481
Dodge Keyless Entry Remote Fob Clicker User Manual
Model: FBA_4686481
Product Overview
This manual provides instructions for the Dodge Keyless Entry Remote Fob Clicker, designed for specific Dodge, Chrysler, and Plymouth vehicles. This remote allows for convenient locking and unlocking of your vehicle and includes a panic function. It is self-programmable, provided you have one existing working remote.
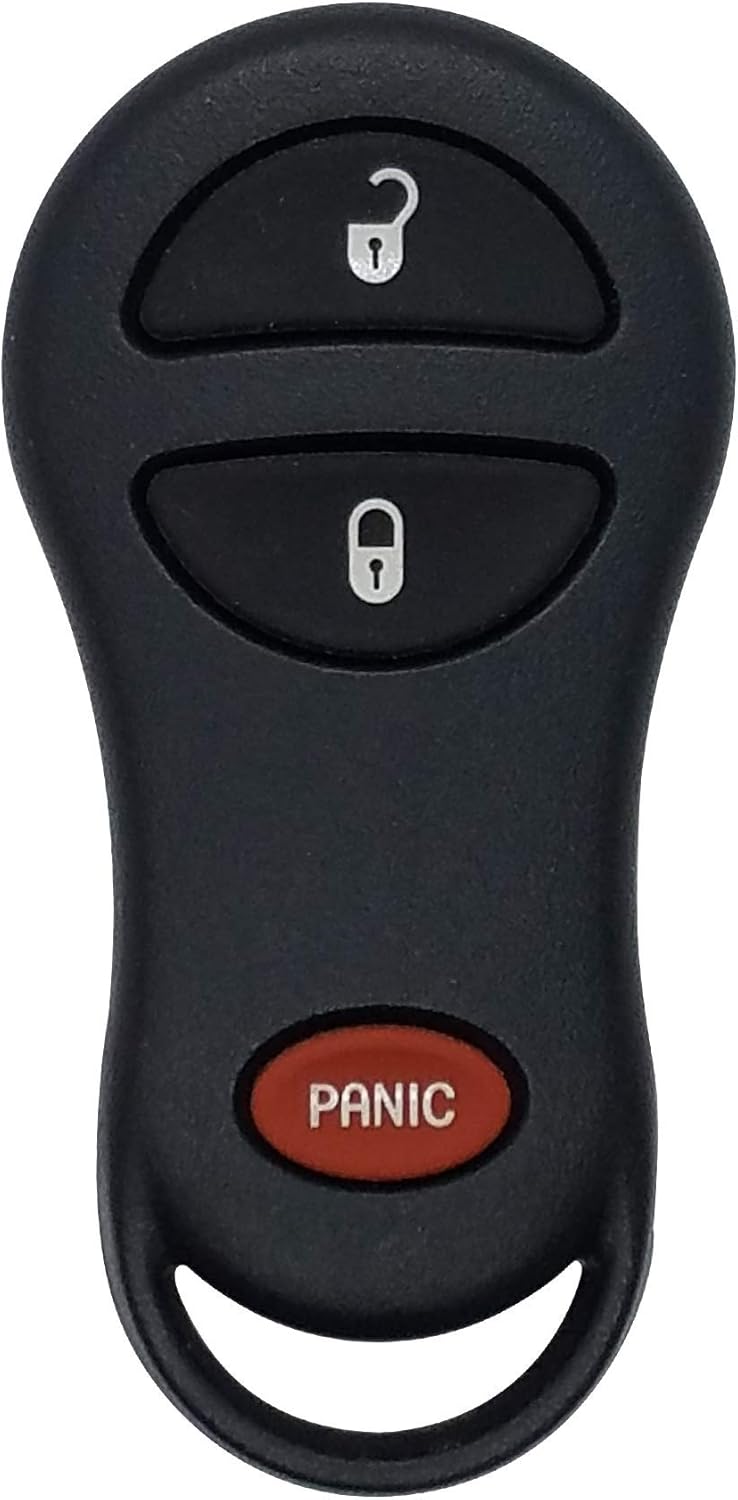
Image: Front view of the keyless entry remote, showing unlock, lock, and panic buttons.
Compatibility and Verification
Before attempting to program or use the remote, it is essential to verify its compatibility with your vehicle. This remote is compatible with vehicles that match the FCC ID number GQ43VT17T and part numbers 04686481AC or 04686481AF.
Compatible vehicles include:
- Plymouth Prowler (2000-2001)
- Grand Voyager (1999-2000)
- Voyager (1999-2000)
- Dodge Dakota (2001-2004)
- Dodge Caravan (2001-2003)
- Dodge Durango (2001-2003)
- Dodge Ram (2002-2005)
- Chrysler Town & Country (2001-2003)
- Chrysler Voyager (2001-2003)
- Chrysler Caravan (1999-2000)
- Chrysler Prowler (2001-2002)
Ensure that your original remote has the same button configuration as this replacement. If you do not have an existing remote, programming may require assistance from a dealership or locksmith professional.

Image: A graphic emphasizing the importance of matching FCC and Part Numbers for compatibility.
Setup: Do-It-Yourself Programming
This remote can be self-programmed if you possess at least one working keyless entry remote for your vehicle. Follow these steps carefully:
- Prepare the Vehicle: Insert your vehicle key into the ignition switch. Turn the ignition to the RUN position (as far as it will go without cranking the engine). Wait for the ignition chimes to stop.
- Initiate Programming Mode (Using Working Remote): Using your existing, working remote, press and hold the UNLOCK button for 4 to 10 seconds.
- Activate Panic and Release: While still holding the UNLOCK button (within the 4 to 10 second window), press the PANIC button on the programmed remote for 1 second. Release both buttons simultaneously. A chime will sound within 3 seconds, indicating that the remote programming mode has been entered.
- Program New Remote: Within 30 seconds of the chime, take your new remote. Press and release the LOCK and UNLOCK buttons simultaneously. Immediately after, press and release only the UNLOCK button on the new remote. A chime will sound, confirming the new remote has been programmed.
- Program Additional Remotes (Optional): If you have more new remotes to program, repeat step 4 for each additional remote. The vehicle's locks will cycle after each successful programming.
- Exit Programming Mode: Turn the ignition OFF and remove the key.
- Test Remotes: Test all programmed remotes to ensure full functionality. There may be a brief delay (e.g., 10 seconds) before all remotes become fully active.
If you encounter difficulties, refer to the Troubleshooting section or seek professional assistance.
Operating the Remote
Once programmed, your keyless entry remote provides convenient control over your vehicle's locking system:
- Unlock Button: Press the UNLOCK button once to unlock the driver's door. Press it a second time within five seconds to unlock all other doors.
- Lock Button: Press the LOCK button once to lock all doors.
- Panic Button: Press the PANIC button (red oval button) to activate the vehicle's alarm system and horn. Press it again to deactivate.


Image: Angled and side views of the keyless entry remote, showing its ergonomic design.
Maintenance
Battery Replacement
Your remote comes equipped with a new Duracell battery for extended life. When the remote's range decreases or it stops responding, the battery may need replacement. The remote typically uses a standard coin cell battery.
To replace the battery:
- Carefully open the remote casing. This usually involves prying it open along the seam with a small flat-head screwdriver or a plastic prying tool.
- Note the orientation of the existing battery.
- Remove the old battery.
- Insert the new battery, ensuring correct polarity.
- Snap the remote casing back together securely.
After battery replacement, the remote should not require re-programming.
Image: Back view of the keyless entry remote, showing the smooth, unadorned surface.
Troubleshooting
| Problem | Possible Cause | Solution |
|---|---|---|
| Remote does not program successfully. | Incorrect timing during programming steps; no working remote available; incompatible remote. | Review the "Setup: Do-It-Yourself Programming" section carefully and repeat the steps, paying close attention to timing. Ensure you have a working remote if attempting self-programming. Verify FCC ID and part numbers for compatibility. If issues persist, consult a professional locksmith or dealership. |
| Remote range is poor or intermittent. | Low battery; signal interference. | Replace the battery (refer to Maintenance section). Ensure no large metal objects or strong electronic signals are interfering with the remote's operation. |
| Remote buttons do not respond. | Dead battery; internal damage. | Replace the battery. If the issue persists, the remote may be damaged and require replacement. |
Specifications
- Brand: Dodge
- Model: FBA_4686481
- Item Weight: 0.353 ounces
- Product Dimensions: 5 x 3.7 x 1.6 inches
- Manufacturer Part Number: FBA_4686481
- Special Features: Ergonomic design
- FCC ID: GQ43VT17T
- Part Numbers: 04686481AC, 04686481AF
Support and Further Assistance
For additional support or if you require professional programming services, please consider the following options:
- Included Information Card: The product package includes an information card with details on programming instruction websites.
- Dealership or Locksmith: If you do not have a working remote for self-programming, a local dealership or automotive locksmith can program the new remote for you.
- Manufacturer Information: For general inquiries about Dodge products, you may visit the official Dodge store online.
Note: Warranty information is not explicitly provided in the product details. Please refer to the seller's return policy or contact the seller directly for warranty inquiries.
Ask a question about this manual
Ask about setup, troubleshooting, compatibility, parts, safety, or missing instructions. Manuals+ will review the question and use this page’s manual context to help answer it.