1. Introduction
This manual provides essential information for the Dorman 520-203 Front Driver Side Lower Suspension Control Arm and Ball Joint Assembly. This component is designed as a direct replacement for original equipment on specific vehicle applications, ensuring proper fit and function. Please read all instructions carefully before installation.
2. Product Overview
The Dorman 520-203 control arm assembly is engineered to restore the vehicle's suspension performance. It includes pre-installed ball joints and bushings for a complete repair solution.
- Trustworthy Replacement: Directly replaces the original assembly on specific vehicle applications.
- Complete Repair: Each assembly includes pre-installed ball joint and bushings, saving time and labor.
- Quality Engineering: Underwent industry-leading testing to ensure a smooth, stable, and safe ride.
- Durably Designed: Additional coatings offer long-lasting rust and corrosion resistance.

Figure 2.1: Dorman 520-203 Control Arm Assembly, main view. This image shows the complete control arm with its integrated ball joint and bushings.
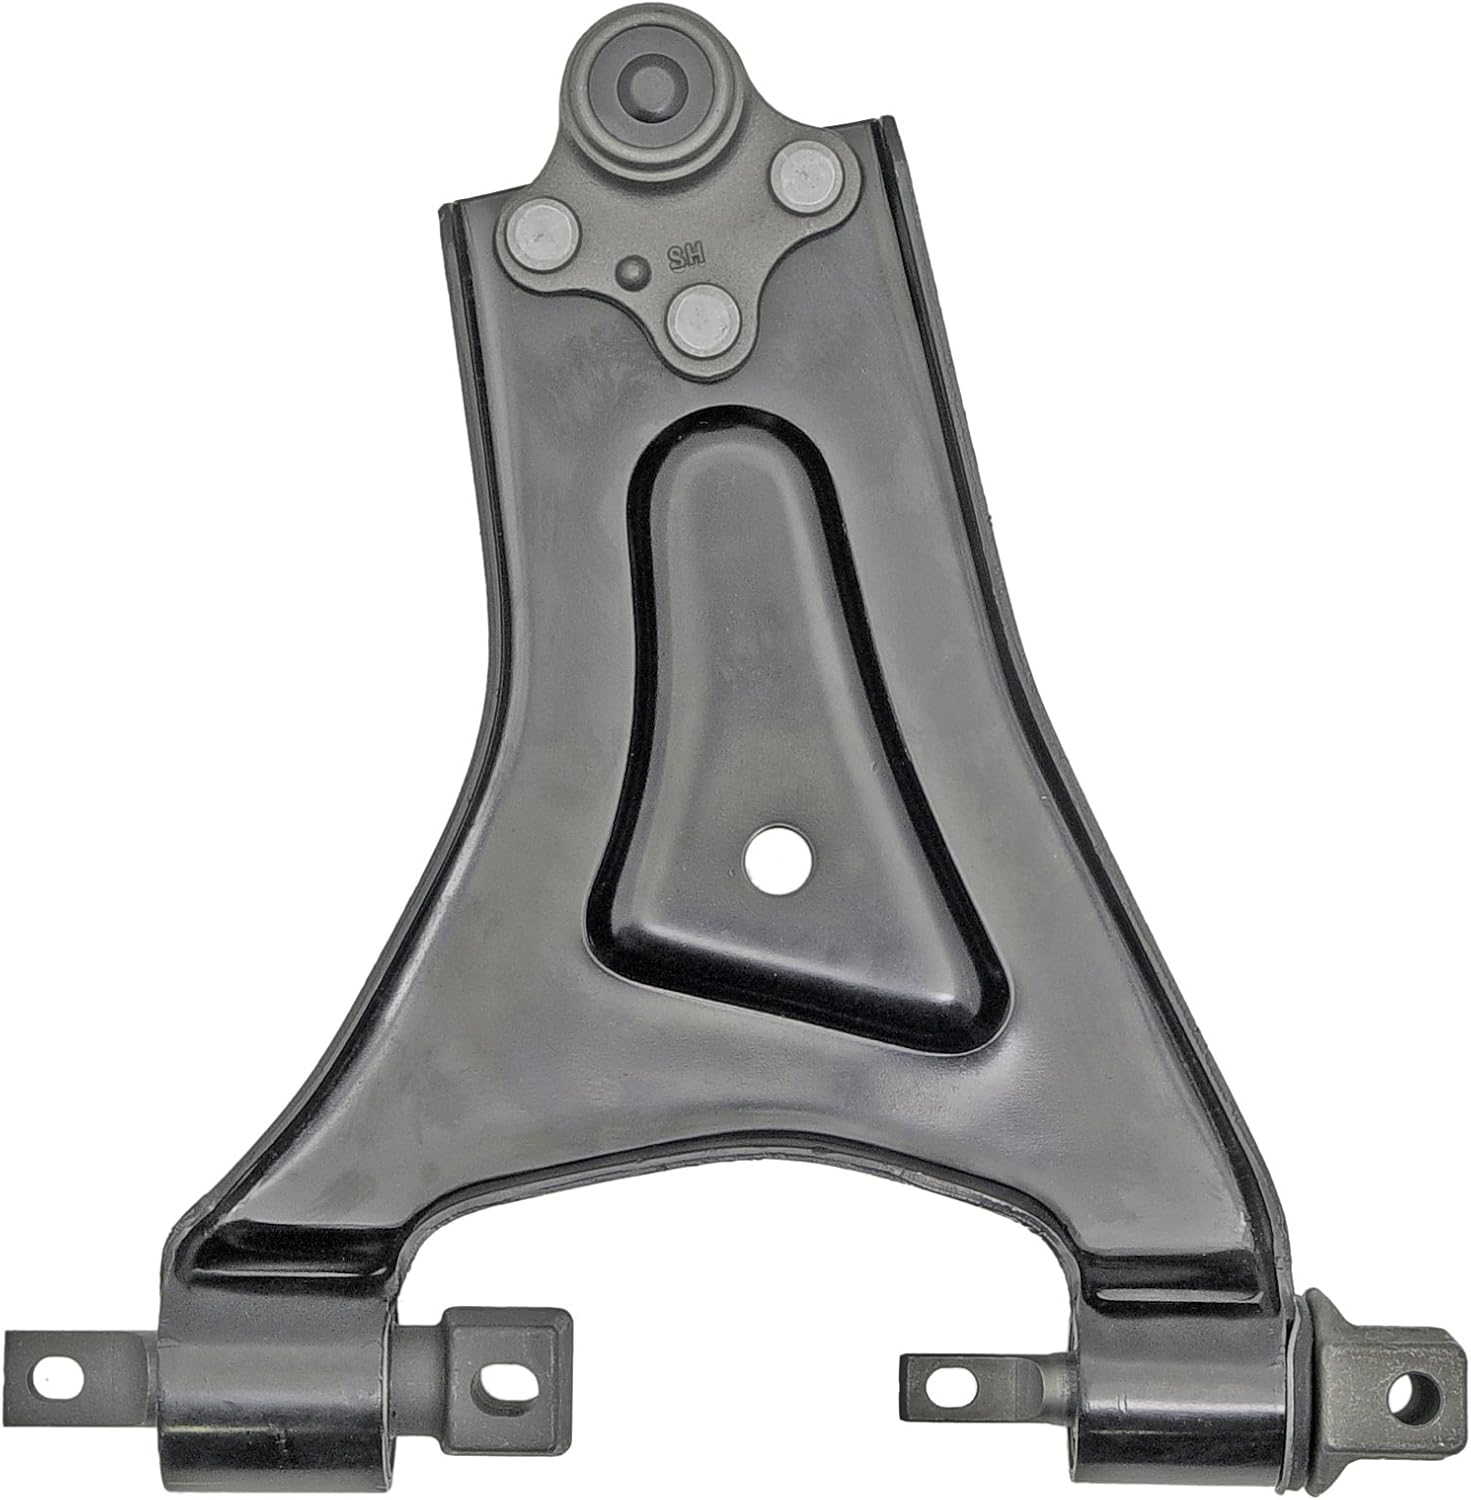
Figure 2.2: Dorman 520-203 Control Arm Assembly, alternate angle. This view highlights the structural design and attachment points of the control arm.
3. Vehicle Compatibility
This control arm and ball joint assembly is compatible with the following vehicles. Always verify fitment using your vehicle's make, model, and trim level before purchase and installation.
- Ford Contour: 1995, 1996, 1997, 1998
- Ford Mystique: 1995, 1996, 1997, 1998
- Mercury Cougar: 1999, 2000, 2001, 2002
- Mercury Mystique: 1995, 1996, 1997, 1998
4. Installation Guidelines
Installation of suspension components requires specialized tools and knowledge. It is highly recommended that this procedure be performed by a qualified automotive technician. Refer to your vehicle's specific service manual for detailed instructions and torque specifications.
4.1 Safety Precautions
- Always wear appropriate personal protective equipment (PPE), including safety glasses and gloves.
- Ensure the vehicle is securely supported on jack stands or a lift before beginning work. Never rely solely on a jack.
- Disconnect the battery if working near electrical components.
- Be aware of spring compression and other stored energy in suspension systems.
4.2 General Installation Steps (Consult Service Manual for Details)
- Safely lift and support the vehicle. Remove the wheel.
- Loosen and remove the fasteners securing the original control arm to the chassis and steering knuckle.
- Carefully remove the old control arm assembly.
- Position the new Dorman 520-203 control arm assembly into place.
- Install and hand-tighten all fasteners.
- Lower the vehicle partially to load the suspension before final tightening of fasteners to specified torque values. This helps prevent premature bushing wear.
- Reinstall the wheel and lower the vehicle completely.
- Perform a wheel alignment after installation to ensure proper vehicle handling and tire wear.
5. Function and Performance
The lower control arm is a critical component of your vehicle's suspension system. It connects the steering knuckle to the vehicle frame, allowing for vertical movement of the wheel while maintaining proper alignment. The integrated ball joint facilitates steering and suspension articulation. A properly functioning control arm ensures:
- Smooth ride quality
- Precise steering response
- Directional stability
- Even tire wear
6. Maintenance and Inspection
Regular inspection of suspension components is crucial for vehicle safety and performance. It is recommended to have your control arms and ball joints inspected during routine vehicle maintenance, typically every 10,000 to 15,000 miles or as recommended by your vehicle manufacturer.
6.1 Inspection Points
- Ball Joint Boots: Check for tears, cracks, or signs of grease leakage. Damaged boots can lead to contamination and premature wear.
- Bushings: Inspect for cracks, tears, or excessive play. Worn bushings can cause clunking noises and poor handling.
- Control Arm Structure: Look for any signs of bending, cracks, or corrosion on the metal arm itself.
- Fasteners: Ensure all bolts and nuts are tight and free from corrosion.
7. Specifications
| Feature | Specification |
|---|---|
| Brand | Dorman |
| Model Number | 520-203 |
| Auto Part Position | Front Driver Side Lower |
| Material | Steel, Rubber |
| Fit Type | Vehicle Specific Fit |
| Item Weight | 8.8 pounds |
| Product Dimensions | 18.1 x 14.7 x 5.5 inches |
| UPC | 019495080671 |
| OEM Part Numbers | 2605500; 4CB40045; 623.61067; CB40045; CMK80388; F5R2307913; F5RZ-3079-B; F5RZ3079B; FA4396; GK80388; JTC1565; K80386; RK80388; SK80388; SRK80390; TC7676; 97BG 3051-BA; F5RZ 3079-B |
8. Warranty and Support
Dorman is committed to providing quality replacement parts. For specific warranty information, please refer to the documentation included with your product or visit the official Dorman website. Dorman offers:
- Installation and repair training resources.
- ASE Blue Seal certified technical support.
- Over 100 years of innovative history in the automotive aftermarket.
For technical assistance or inquiries, please contact Dorman customer support through their official channels.