Introduction
This manual provides comprehensive instructions for the installation, operation, and maintenance of the Intermatic WG1570 Replacement Time Clock Motor. This motor is designed for use with Intermatic T101, T103, and T105 series time switches, ensuring reliable timing functionality.
Safety Information
WARNING: Risk of electric shock. Disconnect power at the circuit breaker or fuse box before installing or servicing the timer motor. All electrical work should be performed by a qualified electrician or in accordance with local electrical codes.
- Ensure power is completely off before beginning any work.
- Verify voltage and frequency (125V, 60Hz) match your existing timer system.
- Do not operate the motor if it appears damaged.
Product Overview
The Intermatic WG1570 is a genuine replacement motor for various Intermatic mechanical time switches. It is engineered for durability and precise timing, featuring fixed tab connectors for straightforward installation.
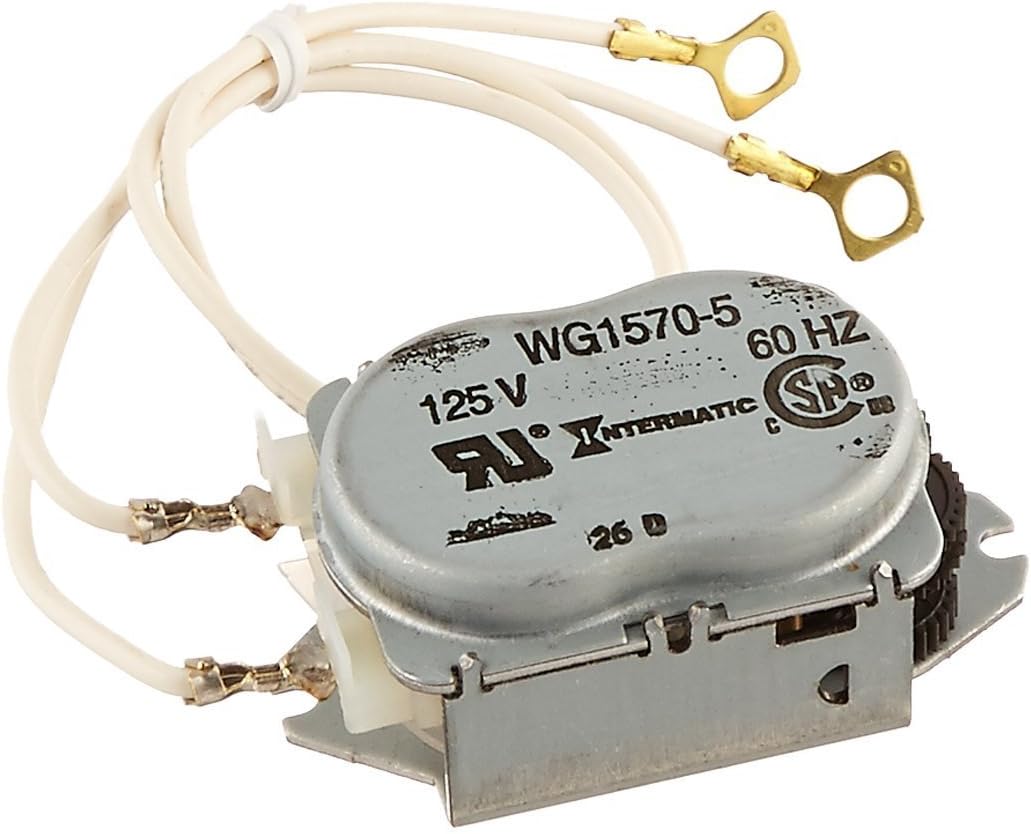
Figure 1: Intermatic WG1570 Replacement Time Clock Motor. This image displays the compact motor unit with its metal casing, integrated gear, and two white wires terminating in ring terminals for electrical connection. The model number WG1570-5, voltage 125V, and frequency 60Hz are visible on the casing.
Specifications
| Feature | Detail |
|---|---|
| Model Number | WG1570 |
| Voltage | 125 Volts |
| Frequency | 60 Hz |
| Compatibility | Intermatic T101, T103, T105 Time Switches |
| Material | Metal |
| Dimensions | 2.25 x 1.44 x 3.06 inches |
| Weight | 2.89 ounces |
| Special Features | Shock and vibration resistant |
Installation Instructions
This section outlines the steps for replacing the time clock motor in compatible Intermatic time switches. It is recommended to consult the original timer's manual for specific enclosure access procedures.
- Power Disconnection: Locate the circuit breaker or fuse controlling the time switch and turn off the power completely. Verify power is off using a voltage tester.
- Access Timer Enclosure: Open the time switch enclosure. This typically involves unscrewing a cover or latch.
- Identify Old Motor: Locate the existing time clock motor. It will be a small, usually metal, unit with wires connected to the timer's terminals and a gear mechanism engaging with the timer dial.
- Disconnect Wires: Carefully disconnect the wires from the old motor. Note their original connection points for correct re-installation. The WG1570 features fixed tab connectors that easily slip over the timer connection poles.
- Remove Old Motor: Unscrew or unclip the old motor from its mounting bracket. There are typically a couple of screws holding it in place.
- Install New Motor: Position the new Intermatic WG1570 motor in the same location as the old one. Secure it with the mounting screws. Ensure the motor's gear properly engages with the timer's main gear.
- Connect Wires: Reconnect the motor wires to the appropriate terminals on the time switch. Ensure connections are secure.
- Close Enclosure: Close and secure the time switch enclosure.
- Restore Power: Turn the power back on at the circuit breaker or fuse box.
- Test Operation: Observe the timer's operation to ensure the motor is functioning correctly and the clock is advancing.
Operating Instructions
The Intermatic WG1570 motor is an internal component responsible for driving the time-keeping mechanism of your Intermatic T101, T103, or T105 time switch. Once installed, its operation is integrated with the overall function of the time switch. Refer to your specific time switch's user manual for instructions on setting the time, programming ON/OFF cycles, and adjusting timer pins.
The motor continuously rotates the timer's clock dial at a rate of 60 Hz, ensuring accurate timekeeping for your programmed events.
Maintenance
The Intermatic WG1570 motor is designed for long-term, maintenance-free operation. No routine lubrication or adjustment is required.
- Periodically inspect the time switch enclosure for dust, debris, or moisture. Keep the area clean and dry.
- Ensure all electrical connections remain secure.
- If the motor or timer exhibits unusual noise or erratic behavior, refer to the troubleshooting section.
Troubleshooting
| Problem | Possible Cause | Solution |
|---|---|---|
| Timer clock not advancing | No power to the timer; Motor failure; Main timer gear damage. | Check circuit breaker/fuse. Verify motor connections. If motor is new and still not advancing, inspect the main gear of the timer for broken teeth. |
| Motor making unusual noise | Motor malfunction; Gear misalignment. | Ensure motor gear is properly aligned with the timer's main gear. If noise persists, the motor may need replacement. |
| Timer not switching ON/OFF at programmed times | Incorrect timer programming; Motor not keeping accurate time. | Verify timer pin settings and current time. If the clock is not advancing accurately, the motor may be faulty. |
Warranty Information
The Intermatic WG1570 Replacement Time Clock Motor comes with a 1-year limited warranty from the date of purchase. This warranty covers defects in materials and workmanship under normal use. For warranty claims or detailed terms, please contact Intermatic customer support.
Support
For technical assistance, replacement parts, or further inquiries regarding your Intermatic WG1570 motor or compatible time switches, please visit the official Intermatic website or contact their customer service department. Have your product model number (WG1570) and any relevant timer model numbers (T101, T103, T105) ready when contacting support.


