
Introduction
The Sperry Instruments CS550A Circuit Breaker Finder is designed to quickly and accurately identify individual branch circuits or fuses at the electrical panel without interrupting power. This tool consists of a plug-style transmitter and an auto-sensing receiver, providing both audible and visual indications for precise circuit identification. It is suitable for operation at 120V AC, 50-60Hz.

Image: The Sperry Instruments CS550A Circuit Breaker Finder, featuring its distinct yellow transmitter and receiver components.
Safety Information
Always prioritize safety when working with electrical systems. Read and understand all instructions before using this device. This product is designed for use by individuals familiar with electrical safety practices.
- Do not use the device if it appears damaged.
- Ensure the transmitter is securely plugged into a properly wired 120V AC outlet.
- Avoid contact with live electrical components.
- This product contains chemicals known to the State of California to cause cancer and birth defects or other reproductive harm. Always wash hands after handling.
- For detailed safety guidelines, refer to the official Safety Information PDF.
What's in the Box
The Sperry Instruments CS550A Circuit Breaker Finder package includes:
- One (1) Sperry Instruments CS550A Plug Style Transmitter
- One (1) Sperry Instruments CS550A Auto-Sensing Receiver
- One (1) 9-volt battery (for the receiver)
Setup
- Install Battery: Open the battery compartment on the receiver unit and insert the provided 9-volt battery, observing correct polarity. Close the compartment securely.
- Connect Transmitter: Plug the transmitter unit into the electrical outlet or light socket (using an appropriate adapter, if necessary) of the circuit you wish to identify. Ensure the transmitter is fully seated in the outlet.

Image: The transmitter unit being plugged into a standard electrical wall outlet.
Operating Instructions
Follow these steps carefully to accurately locate circuit breakers or fuses:
- Prepare for Scan: With the transmitter plugged into the desired AC outlet, go to the circuit breaker panel. Ensure the panel cover is open for access to the breakers.
- Initial Calibration Scan:
- Turn on the receiver unit.
- Firmly press and hold the trigger (calibration switch) on the receiver.
- Slowly pass the receiver's tip over the center of each circuit breaker, moving from top to bottom, then across columns (e.g., left column, then right).
- Continue scanning until the receiver stops beeping for all breakers. This may require one to three passes. The goal is to calibrate the receiver to the ambient electrical signals in the panel, so it only responds to the specific circuit.
- Final Identification Scan:
- Release the trigger (calibration switch). Do not press the trigger during this scan.
- Slowly scan over the center of the circuit breakers again, one by one.
- The receiver will now produce a distinct audible beep and/or visual indication (LED) only when it is directly over the correct circuit breaker. The black arrow on the receiver will point to the identified breaker.
- Verify the Circuit:
- While holding the receiver over the identified breaker, turn that breaker OFF.
- The receiver should cease producing a response (no beep, no LED). This confirms that power to the transmitter has been removed, verifying the correct breaker.
- Turn the breaker back ON after verification.
- Reset for Next Scan: To locate another circuit, turn the receiver OFF, then ON again to reset its calibration circuit. Move the transmitter to the new outlet and repeat the operating instructions from step 2.
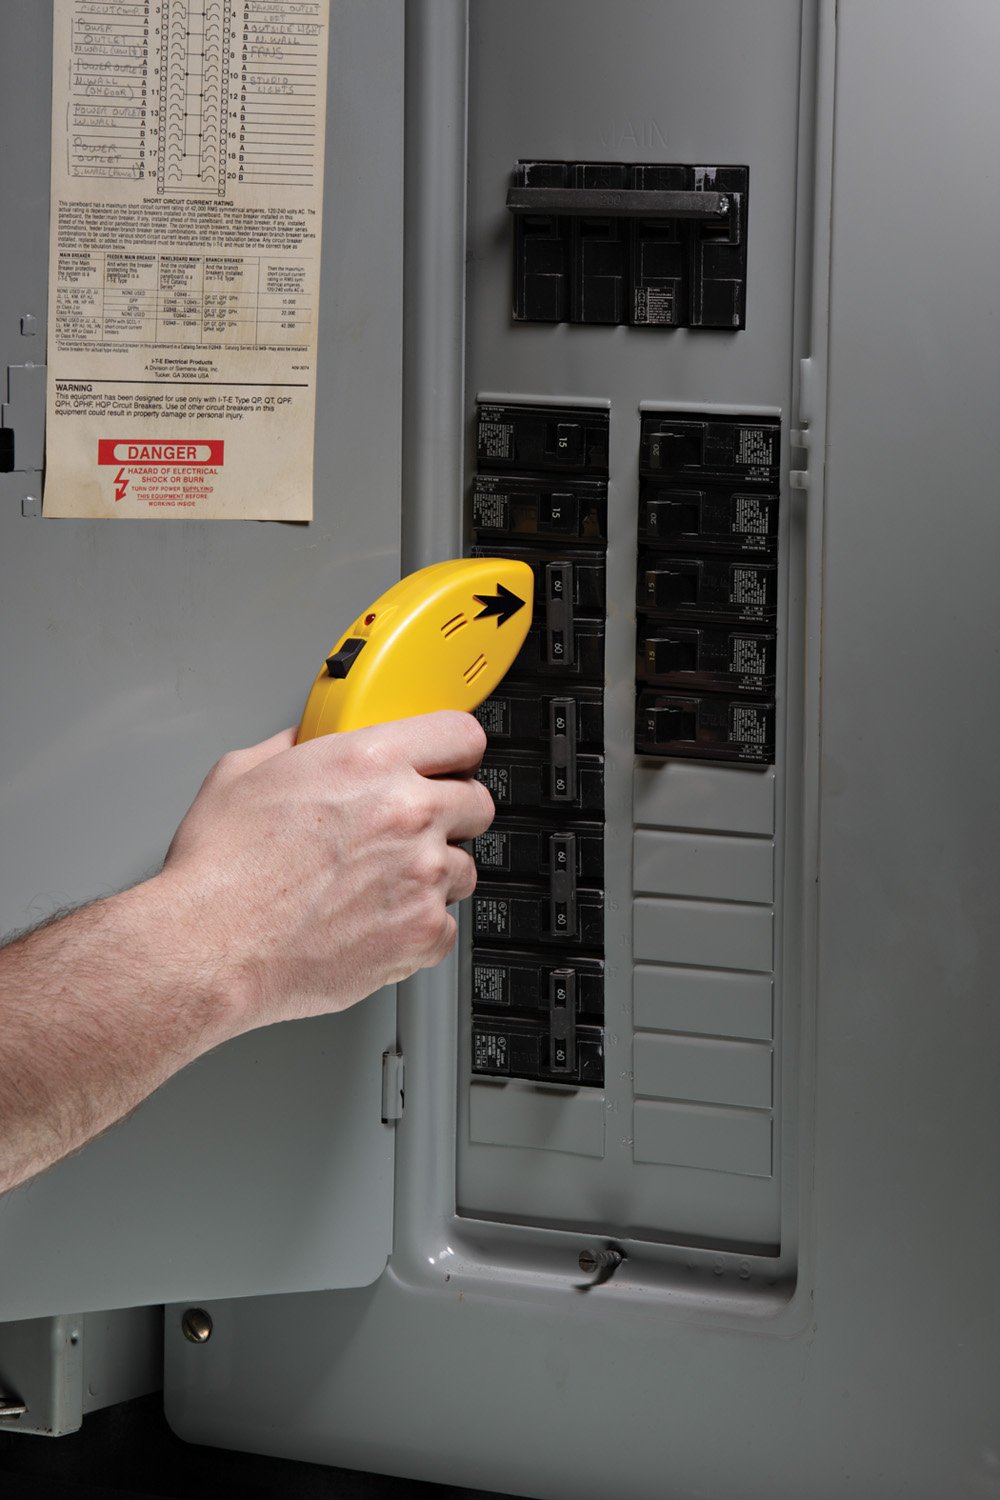
Image: The receiver unit being used to scan circuit breakers within an electrical panel.

Image: A close-up view of the receiver indicating the correct circuit breaker with its LED light.
Important Operating Notes:
- Heavily Loaded Circuits: The tool may have difficulty identifying circuits with heavy loads (e.g., fans, heaters, hair dryers). Unplug or turn off such appliances on the circuit being tested for more accurate results.
- Calibration Memory: The receiver retains its previous calibration setting. Always turn the receiver OFF and then ON to clear the calibration before testing a new circuit or moving the transmitter.
- Accuracy: For best accuracy, ensure the receiver's tip is firmly against the circuit breaker during scanning.
Maintenance
Proper maintenance ensures the longevity and accuracy of your circuit breaker finder:
- Cleaning: Wipe the units with a dry, soft cloth. Do not use abrasive cleaners or solvents.
- Battery Replacement: Replace the 9-volt battery in the receiver when the indicator light dims or the unit fails to respond consistently. Always remove the battery if the unit will not be used for an extended period to prevent leakage.
- Storage: Store the circuit breaker finder in a cool, dry place away from direct sunlight and extreme temperatures.
Troubleshooting
| Problem | Possible Cause | Solution |
|---|---|---|
| Receiver does not respond or gives inconsistent readings. |
|
|
| Receiver beeps for multiple breakers during final scan. |
|
|
| No response from receiver. |
|
|
Specifications
| Model Number | CS550A |
| Operating Voltage | 120V AC |
| Frequency | 50-60Hz |
| Receiver Power Source | One (1) 9V Battery |
| Product Dimensions (Receiver) | 6.3 x 3.4 x 1.3 inches (16 x 8.6 x 3.3 cm) |
| Product Weight | Approximately 3.68 ounces (104 grams) |
| Certifications | UL Listed to US and Canadian standards |
Warranty
For detailed warranty information regarding the Sperry Instruments CS550A Circuit Breaker Finder, please refer to the product packaging or visit the official Sperry Instruments website. Warranty terms typically cover manufacturing defects for a specified period from the date of purchase.
Support
For further assistance, technical support, or inquiries about your Sperry Instruments CS550A Circuit Breaker Finder, please contact the manufacturer directly.
- Manufacturer: A.W. Sperry
- Online Store: Visit the official SPERRY Store on Amazon for more products and information.


