
1. Introduction
This manual provides instructions for the Danco 88103 Cartridge Repair Kit, designed to repair leaky Delta and Peerless single-handle faucets. By replacing worn components, this kit helps restore proper faucet function and prevent water waste.
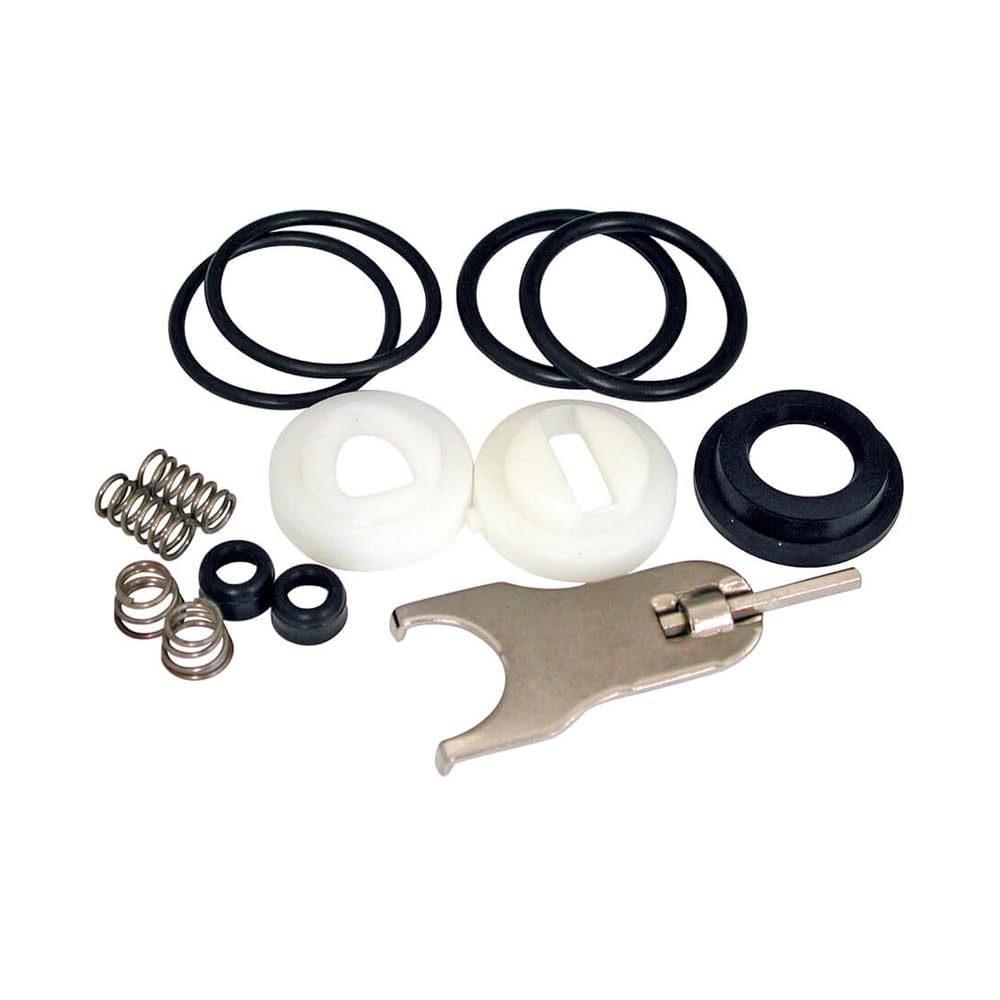
Image 1.1: Danco 88103 Cartridge Repair Kit, showing various components for faucet repair.
2. Safety Information
WARNING: Proposition 65 Warning. This product may contain chemicals known to the State of California to cause cancer and birth defects or other reproductive harm.
Always turn off the main water supply to the faucet before beginning any repair work. Wear appropriate personal protective equipment, such as safety glasses, to prevent injury. Ensure the work area is well-lit and clear of obstructions.
3. Parts Included
The Danco 88103 Cartridge Repair Kit includes the following components:
- 2 x Short Seats
- 2 x Long Springs
- 2 x Conical Springs
- 2 x Cams
- 1 x Cam Packing
- 2 x O-rings (1-1/2 x 1-1/4 x 1/8 inches)
- 2 x O-rings (1-1/2 x 1-5/16 x 3/32 inches)
- 1 x Hex Wrench
4. Compatibility
This repair kit is designed for use with single-handle faucets. It is compatible with most Delta single-handle faucets, including both old-style and new-style models. The kit repairs both #70 and #212 ball faucets and replaces Delta part #RP3614. It is suitable for kitchen, lavatory, and tub/shower faucet applications, handling both hot and cold water.
5. Setup and Preparation
Before beginning the repair, ensure you have the necessary tools and prepare your workspace:
- Gather Tools: You will need an adjustable wrench, screwdriver, pliers (or channel locks), a strap wrench (recommended for cap removal), plumber's grease (silicone-based), and a rag.
- Turn Off Water Supply: Locate and turn off the hot and cold water supply valves to the faucet you are repairing. If individual shut-off valves are not present, turn off the main water supply to your home.
- Prepare Sink/Tub: Close the drain or place a rag over it to prevent small parts from falling into the drain.
- Remove Faucet Handle: Use a screwdriver to remove the screw securing the faucet handle, then lift the handle off.
- Remove Cap and Cam Assembly: Carefully remove the decorative cap and then the retaining nut or cap that holds the cam assembly in place. A strap wrench can be very helpful here to avoid damaging the finish.
6. Installation Instructions
Follow these steps to install the new cartridge repair kit components:
- Remove Old Components: Lift out the old cam assembly, including the cam packing. Then, use a small screwdriver or pick to remove the old seats and springs from the faucet body. Also, remove any O-rings from the spout base if applicable.
- Clean Faucet Body: Thoroughly clean any mineral deposits or debris from the inside of the faucet body and around the ball valve. Vinegar can be used for gentle cleaning.
- Install New Seats and Springs: Place a new spring into each of the two holes in the faucet body, then place a new seat on top of each spring. Ensure they are seated correctly.
- Install New Cam Packing and O-rings: Apply a small amount of plumber's grease to the new cam packing and O-rings. Carefully place the cam packing onto the ball valve. If your faucet has O-rings on the spout base, replace them now, also applying plumber's grease.
- Reassemble Faucet: Place the ball valve back into the faucet body, ensuring it aligns with the slots. Position the cam assembly over the ball valve, aligning any tabs or notches. Reinstall the retaining nut or cap, tightening it with the hex wrench provided. Do not overtighten; adjust for smooth handle operation.
- Reinstall Handle: Place the faucet handle back onto the stem and secure it with its screw.
- Test for Leaks: Slowly turn the water supply back on. Before reinstalling the aerator, run both hot and cold water through the faucet to flush out any debris. Check for any leaks around the faucet base and spout.
7. Maintenance
To ensure the longevity of your faucet repair:
- Regular Inspection: Periodically check your faucet for any signs of new leaks or drips.
- Lubrication: If future repairs are needed, always apply plumber's grease to O-rings and moving parts to ensure smooth operation and a good seal.
- Cleaning: Clean the faucet aerator regularly to maintain good water flow and prevent mineral buildup.
8. Troubleshooting
If you encounter issues after installation, consider the following:
- Faucet Leaks After Repair:
- Ensure all O-rings, seats, and springs are correctly positioned and not pinched.
- Verify the cam packing is properly seated and not twisted.
- Check the tightness of the retaining nut/cap. It should be snug but allow for smooth handle movement.
- Faucet Handle is Too Stiff or Too Loose:
- Adjust the tightness of the retaining nut/cap using the hex wrench. A slight adjustment can significantly impact handle feel.
- Ensure springs are not too long; if the Danco springs feel too long, consider reusing original springs if they are in good condition.
- Reduced Water Flow:
- Remove and clean the faucet aerator, as it may be clogged with debris.
- Flush the water lines by running the faucet without the aerator for a short period.
9. Specifications
| Brand | Danco |
| Model Number | 88103 |
| Material | Plastic, Rubber, Stainless Steel |
| Item Weight | 22.68 g |
| UPC | 037155881031 |
| Manufacturer | Danco, Inc. |
10. Warranty and Support
The Danco 88103 Cartridge Repair Kit comes with a Limited 1 Year Manufacturer Warranty. For warranty claims, technical assistance, or additional support, please contact Danco customer service directly. Refer to the product packaging or Danco's official website for the most current contact information.


