
1. Introduction
Thank you for choosing the Lincoln 1013 Heavy Duty Grease Gun. This manual provides essential information for the safe and effective operation, maintenance, and troubleshooting of your new grease gun. Please read these instructions thoroughly before use to ensure proper function and to prevent injury or damage to the equipment.
The Lincoln 1013 is designed for heavy-duty lubrication tasks, featuring a rugged cast pump head for strength and durability. It is suitable for various automotive, industrial, and agricultural applications.
2. Safety Information
Always observe the following safety precautions when using the grease gun:
- Wear appropriate personal protective equipment (PPE), including safety glasses and gloves, to protect against grease splashes and potential injury.
- Do not point the grease gun nozzle at yourself or others. High-pressure grease injection can cause serious injury.
- Ensure the grease gun is clean and free from debris before and after use to prevent contamination of lubricants and damage to the tool.
- Use only recommended lubricants. Using incorrect grease can damage equipment or the grease gun itself.
- Store the grease gun in a clean, dry place away from extreme temperatures and direct sunlight.
- Keep out of reach of children.
3. Product Overview and Components
The Lincoln 1013 Heavy Duty Grease Gun consists of several key components designed for efficient grease application.
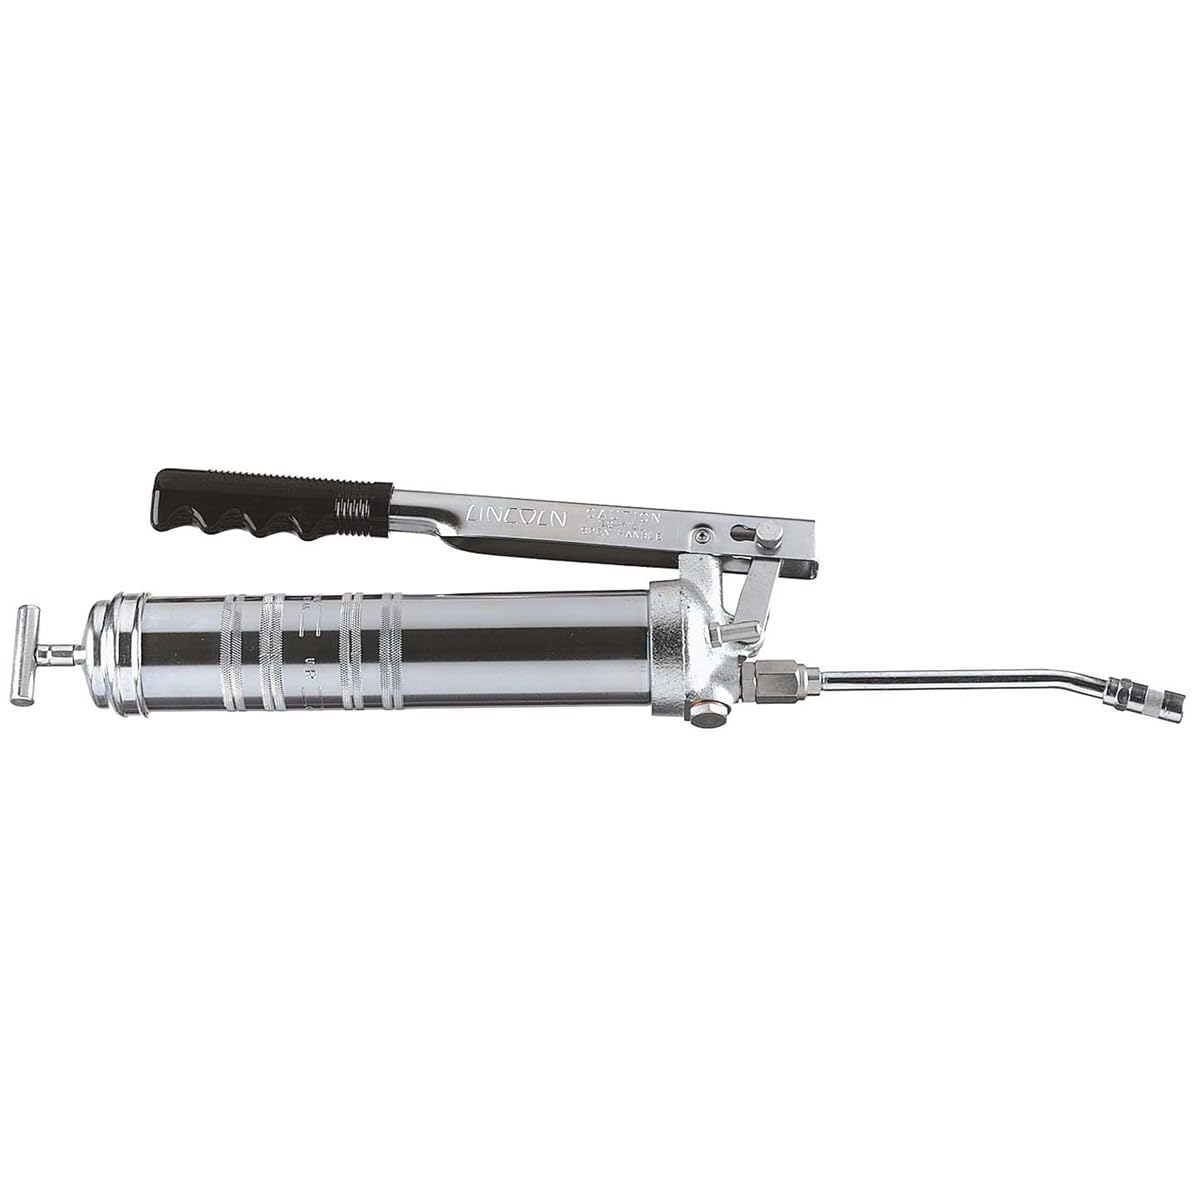
Image: The Lincoln 1013 Heavy Duty Grease Gun, showing the main body, pump handle, and nozzle.
Key components typically include:
- Pump Head: Contains the pumping mechanism and discharge valve.
- Barrel: Holds the grease cartridge or bulk grease.
- Plunger Rod and Handle: Used to compress the grease in the barrel.
- Lever Handle: Operates the pump to dispense grease.
- Hose/Coupler: Connects to the grease fitting on the equipment being lubricated.
4. Setup
Before using your grease gun, it must be loaded with grease. The Lincoln 1013 can be loaded using standard grease cartridges or bulk grease.
4.1 Loading a Grease Cartridge
- Unscrew the pump head from the barrel.
- Pull the plunger rod all the way back and lock it into place using the catch mechanism.
- Remove both ends of the grease cartridge. Ensure the foil or plastic seal is completely removed from the open end.
- Insert the cartridge into the barrel with the open end facing the pump head.
- Screw the pump head back onto the barrel securely.
- Release the plunger rod from its locked position.
- Prime the gun: Pump the lever handle several times while holding the nozzle away from any surfaces until grease begins to flow. If no grease flows, loosen the pump head slightly to release any trapped air, then retighten and pump again.
4.2 Bulk Loading
- Unscrew the pump head from the barrel.
- Pull the plunger rod all the way back and lock it into place.
- Submerge the open end of the barrel into the bulk grease container.
- Release the plunger rod lock and slowly push the plunger rod into the barrel, drawing grease into the gun.
- Wipe off any excess grease from the barrel threads.
- Screw the pump head back onto the barrel securely.
- Prime the gun: Pump the lever handle several times until grease begins to flow.
5. Operating Instructions
Once the grease gun is loaded and primed, it is ready for use.
- Clean the grease fitting on the component to be lubricated. This prevents dirt and contaminants from being forced into the bearing.
- Attach the coupler firmly to the grease fitting. You should feel it snap into place.
- Pump the lever handle to dispense grease. Apply grease until resistance is felt or until the manufacturer's recommended amount is dispensed. Avoid over-greasing, which can damage seals.
- Remove the coupler by tilting it slightly and pulling it straight off the fitting.
- Wipe off any excess grease from the fitting and the coupler.
6. Maintenance
Regular maintenance ensures the longevity and reliable performance of your grease gun.
- Cleaning: After each use, wipe down the exterior of the grease gun to remove any grease or dirt. Keep the coupler clean to ensure a good seal with fittings.
- Storage: Store the grease gun in a clean, dry environment. If storing for an extended period, ensure it is loaded with grease to prevent seals from drying out.
- Inspection: Periodically inspect the hose, coupler, and pump head for signs of wear, damage, or leaks. Replace worn components as needed.
- Air Bleeding: If the gun stops dispensing grease, it may have an air lock. Loosen the pump head slightly or use the air bleed valve (if present) to release trapped air, then retighten and pump.
7. Troubleshooting
| Problem | Possible Cause | Solution |
|---|---|---|
| Grease gun will not dispense grease. | Air pocket in the gun. | Loosen the pump head slightly, pump the lever a few times to release air, then retighten. Alternatively, use the air bleed valve if available. |
| Grease cartridge does not fit or feed properly. | Incorrect cartridge size or plunger rod not fully retracted. | Ensure you are using a standard 14 oz (400g) grease cartridge. Verify the plunger rod is pulled back and locked before inserting the cartridge. Some cartridges may have slightly thicker walls; ensure the plunger can move freely. |
| Grease leaks from the pump head or connections. | Loose connections or worn seals. | Tighten all connections. Inspect O-rings and seals for wear and replace if necessary. |
| Coupler does not attach firmly to fitting. | Worn coupler jaws or damaged grease fitting. | Replace the coupler. Inspect the grease fitting on the equipment for damage and replace if needed. |
8. Specifications
- Model: 1013
- Brand: Lincoln
- Manufacturer: Lincoln
- Product Dimensions: 41.15 x 12.7 x 7.11 cm (16.2 x 5 x 2.8 inches)
- Item Weight: Approximately 454 g (1 lb)
- Pump Head Material: Rugged Cast
- Country of Origin: Made in China
9. Warranty Information
Lincoln products are manufactured to high-quality standards. For specific warranty terms and conditions, please refer to the warranty card included with your product or visit the official Lincoln website. Keep your purchase receipt as proof of purchase for any warranty claims.
10. Support
For technical assistance, replacement parts, or further inquiries, please contact Lincoln customer support. Contact information can typically be found on the product packaging or the official Lincoln website.
Online Resources: Visit the Lincoln Store on Amazon


