Introduction
The Strongarm 4648 Hatch Lift Support is a pressurized cylinder designed to provide reliable support for hoods, hatches, and rear window glass in various automotive applications. This manual provides essential information for the safe and effective installation, operation, and maintenance of your new lift support.
Each Strongarm lift support is custom engineered and manufactured to meet or exceed original equipment quality standards, ensuring smoother operation and longer-lasting performance. They are individually tested for performance and reliability.
Key Features:
- Exact fit original equipment design guarantees correct fit and function.
- No special installation tools required.
- Engineered and built to meet or exceed original equipment quality standards.
- Individually tested for performance and reliability.
Package Contents
Your Strongarm 4648 Hatch Lift Support package includes:
- 1 x Strongarm 4648 Hatch Lift Support

Image: Strongarm 4648 Hatch Lift Support and its retail packaging.
Safety Guidelines
WARNING: A hatch that will not stay open is considered a safety concern as it is very heavy and can seriously injure someone if it falls.
- Always have someone hold the hatch securely. It is unsafe to use a broomstick or prop rod.
- Only work on one lift support at a time.
- Always replace lift supports in pairs. If only one is replaced, the weaker old unit will cause premature failure of the new one.
- Take note of the orientation of the lift support you are removing and replace the new ones in the same direction.
Installation Instructions
The only tool required for this installation is a small flat-head screwdriver. The entire project should take less than 5 minutes per pair.
Step 1: Prepare for Removal
With the hatch held securely open by another person, identify the lift support to be replaced. Note its orientation.
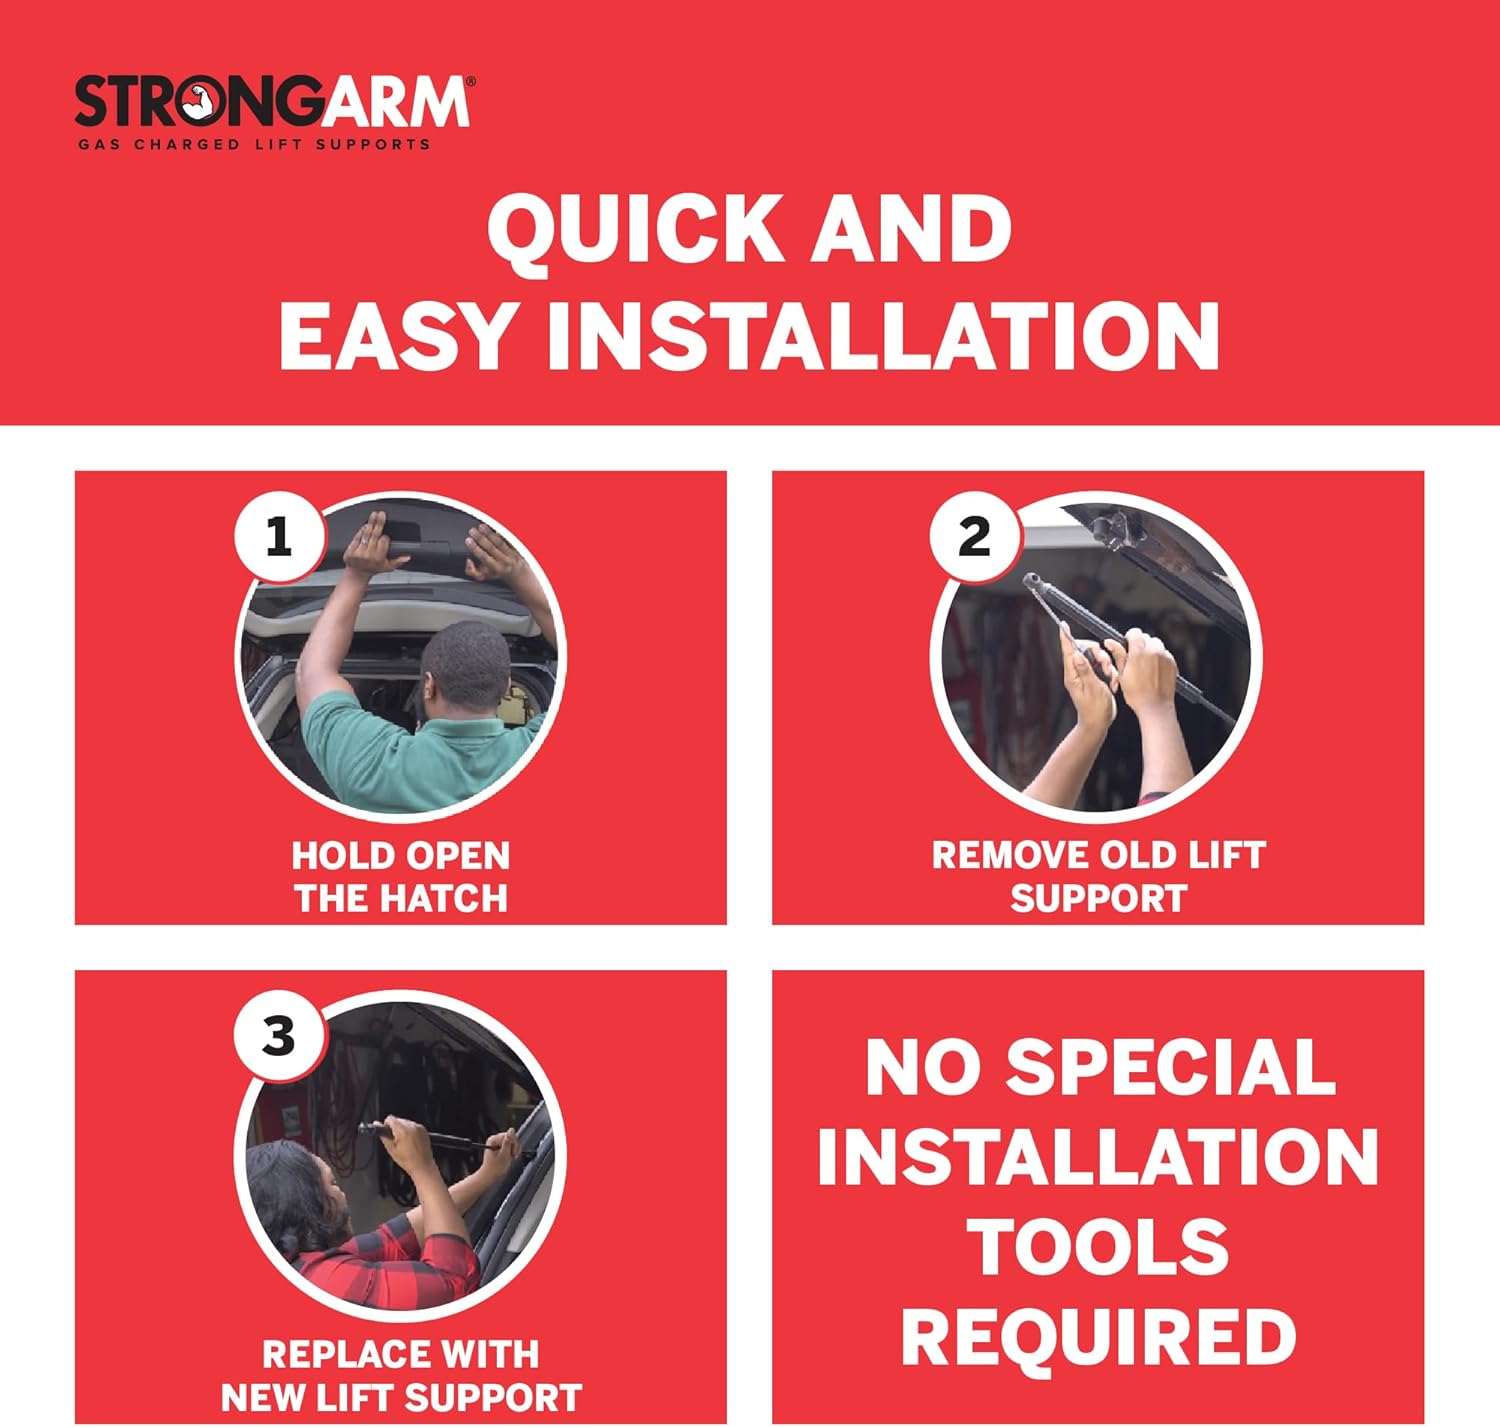
Image: Visual representation of holding the hatch, removing the old support, and replacing with a new one. No special tools are required.
Step 2: Remove the Old Lift Support
Using a small flat-head screwdriver, carefully slide it into the slot on the back of the connector at the lower end of the lift support. Gently pry the metal band back to release the connector from the ball stud. Repeat this process for the top connector. Once both ends are disconnected, remove the old lift support.
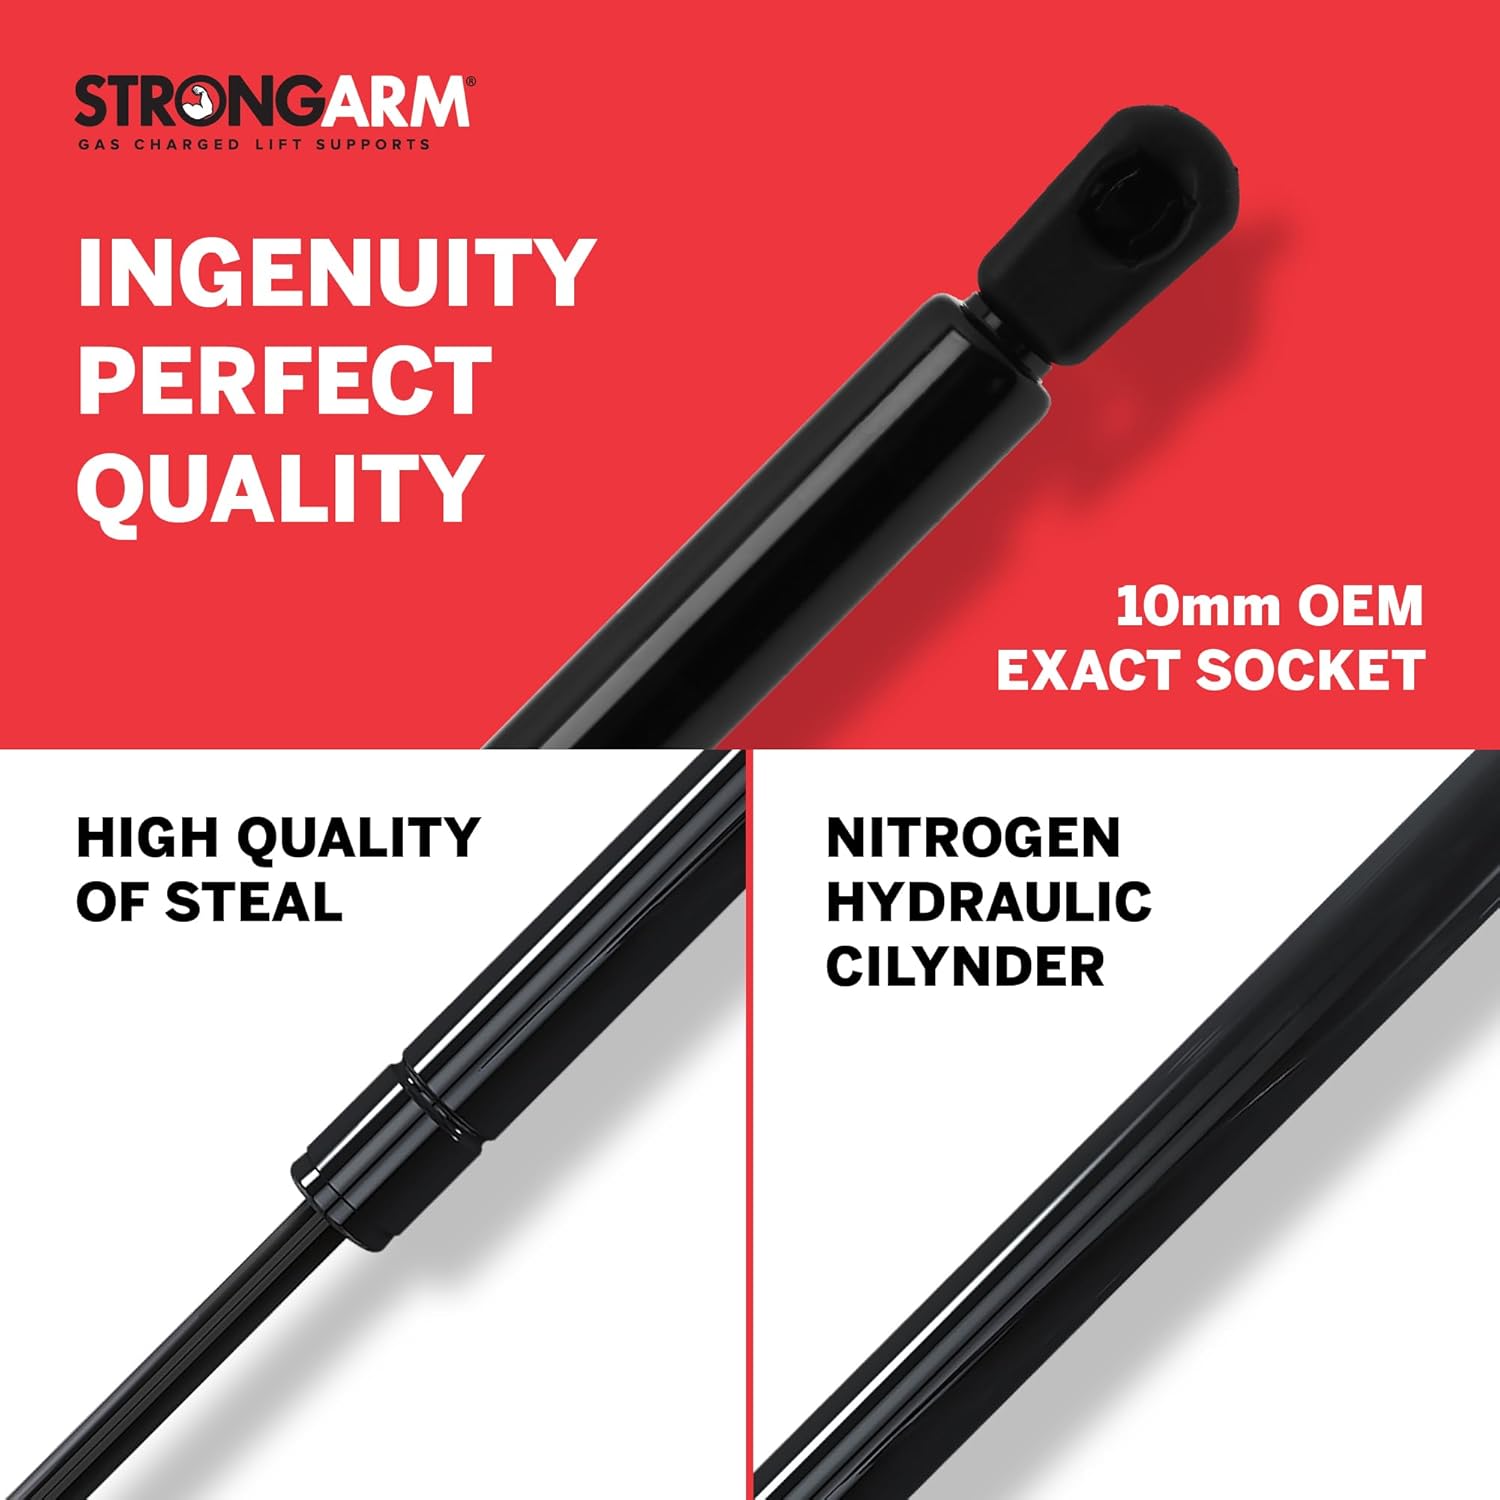
Image: Detail of the lift support connector, highlighting the 10mm OEM exact socket.
Step 3: Install the New Lift Support
Remove the new gas-charged lift support from its packaging. There is no need to pry back the metal band on the new unit. Simply push the connector over the ball stud on the lower end until it clicks into place. For the upper end, it may be necessary to align the connector with the ball stud by gently rotating the lift support clockwise until the connector is in line. Then, push the connector over the ball stud until it secures.

Image: Features of the Strongarm lift support, emphasizing smoother operation, longer lasting performance, and direct fit OEM replacement designs.
Step 4: Test the Installation
Once both new lift supports are installed, carefully close and reopen the hatch to cycle the lift supports and test the connections. Ensure the hatch stays open securely and operates smoothly.

Image: A person closing the rear hatch of an SUV, illustrating the proper function of the newly installed lift supports.
Operating Instructions
After successful installation, the Strongarm 4648 Hatch Lift Supports will assist in the smooth and controlled opening and closing of your vehicle's hatch, hood, or rear window glass. Simply lift the component to initiate the opening, and the lift supports will hold it in the open position. To close, gently pull down, and the supports will provide a controlled descent.

Image: Diagram illustrating the versatile application of Strongarm lift supports for hatches, rear glass, and hoods.
Maintenance
Strongarm lift supports are designed for maintenance-free operation. However, to ensure longevity and optimal performance:
- Keep the piston rod clean and free from dirt, grease, or paint.
- Avoid applying excessive side loads or bending the piston rod.
- Inspect the mounting points and connectors periodically for any signs of wear or damage.
- Replace both lift supports simultaneously if one begins to fail to prevent undue stress on the remaining unit.
Troubleshooting
If you experience issues with your lift supports after installation, consider the following:
- Hatch does not stay open: This indicates a loss of pressure in the lift supports. Ensure both supports were replaced, as a single failing unit can compromise the new one.
- Hatch is difficult to close: This might indicate that the new lift supports are too strong for the application, or that the hinges of the hatch are stiff. Lubricate hinges if necessary.
- Unusual noises during operation: Check that the connectors are securely attached to the ball studs and that there is no binding or obstruction in the movement path.
Specifications
| Attribute | Value |
|---|---|
| Brand | Strongarm |
| Model | 4648 |
| Item Weight | 8 ounces |
| Product Dimensions | 1 x 2 x 25.25 inches |
| Manufacturer Part Number | 4648 |
| OEM Part Number | Monroe 901274, Stabilus SG326007 |
| Color | Black |
| Material | Metal |
| Auto Part Position | Upper |
| UPC | 043645663315 |
Warranty and Support
For specific warranty information or technical support regarding your Strongarm 4648 Hatch Lift Support, please refer to the official Strongarm website or contact their customer service directly. A detailed installation manual in PDF format is also available for download: Installation Manual (PDF).


