Introduction
This manual provides detailed instructions for the installation, operation, and maintenance of your GTO 10W Solar Panel Kit, Model FM123. This kit is designed to charge the battery powering your GTO gate opener system, offering an ideal solution for installations where AC power is unavailable or preferred.
Please read these instructions thoroughly before proceeding with installation or operation to ensure proper function and longevity of your solar panel system.
Product Overview
The GTO 10W Solar Panel Kit (Model FM123) includes the solar panel, a tubular steel support, mounting hardware, wire connectors, and low-voltage wire for connection to your gate opener control board.

Figure 1: GTO 10W Solar Panel. This image shows the rectangular solar panel with multiple photovoltaic cells, encased in a silver frame with black corner protectors.
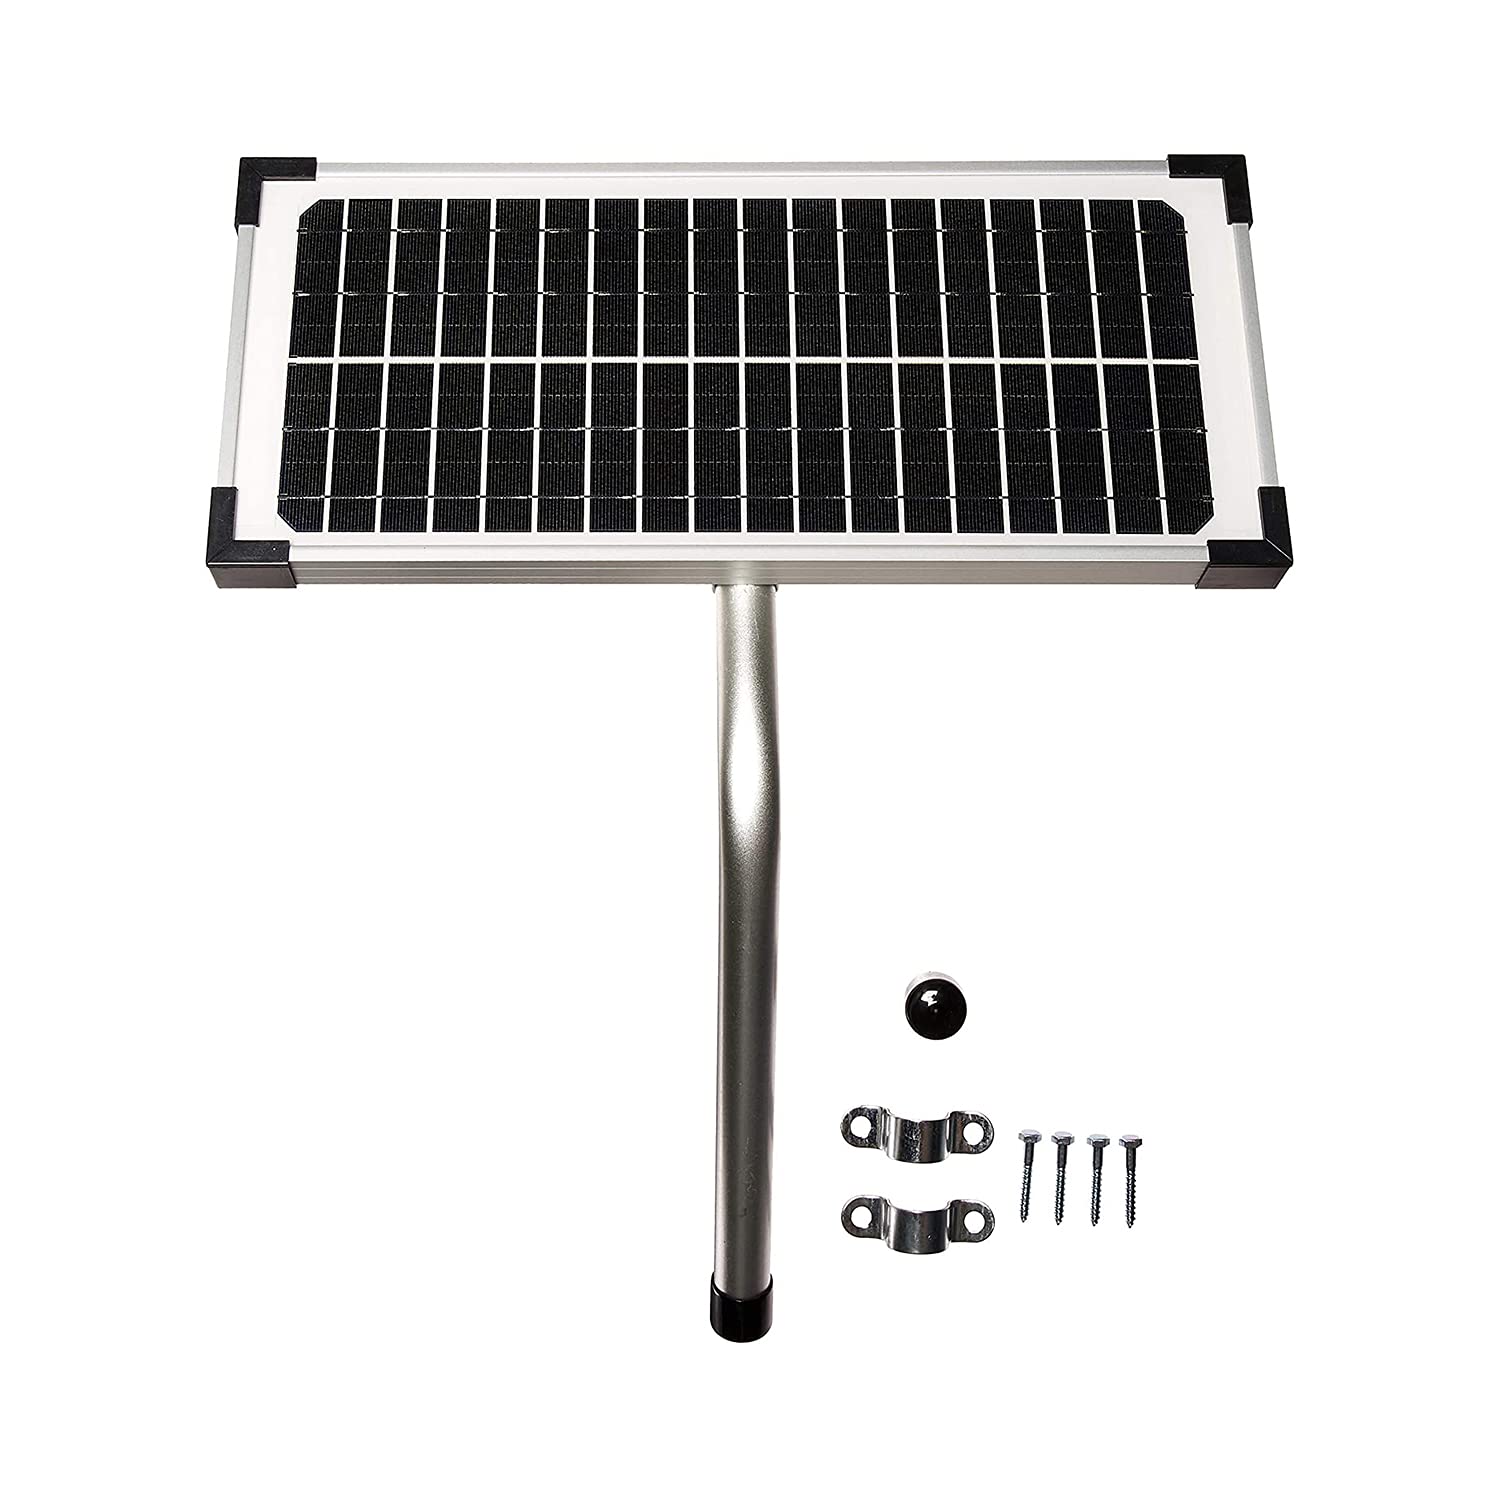
Figure 2: GTO 10W Solar Panel Kit Components. This image displays the solar panel, a tubular steel mounting post, two U-bolt clamps, and several screws, illustrating the complete kit contents.
Setup and Installation
Proper installation is crucial for optimal performance of your solar panel. Ensure the panel receives maximum direct sunlight throughout the day.
1. Site Selection
- Choose a location that is free from shadows cast by trees, buildings, or other obstructions.
- The panel should face south (in the Northern Hemisphere) for maximum sun exposure.
- Consider the distance from the gate opener control board; the kit includes low-voltage wire, but longer distances may require additional wiring (up to 200 ft. from the control box with additional wiring).
2. Mounting the Solar Panel
- Assemble the tubular steel support to the back of the solar panel using the provided hardware.
- Secure the assembled panel and support to a sturdy post or surface using the U-bolt clamps and screws. Ensure the panel is firmly attached and cannot be easily dislodged by wind.
- Adjust the angle of the solar panel to match your geographical latitude for optimal year-round sun exposure.

Figure 3: Solar Panel Installed. This image shows the GTO solar panel mounted on a post next to a gate opener, demonstrating a typical installation scenario.
3. Wiring Connections
- Connect the low-voltage wires from the solar panel to the designated solar input terminals on your GTO gate opener control board. Refer to your gate opener's manual for specific terminal locations.
- Ensure polarity is correct: positive (+) from the solar panel connects to the positive (+) terminal on the control board, and negative (-) to negative (-). Incorrect wiring can damage the system.
- Use the provided wire connectors to secure all connections.
Note: All dual gate opener applications require a minimum of 10 Watts. All Mighty Mule openers can handle up to 30 Watts of solar power.
Operation
Once installed and connected, the GTO 10W Solar Panel will automatically begin charging the 12V battery connected to your gate opener control board when exposed to sunlight. The panel converts solar energy into electrical energy, which is then used to maintain the battery charge.
Battery Charging
- The solar panel provides a trickle charge to the battery, ensuring it remains adequately powered for gate operation.
- The effectiveness of charging depends on sunlight intensity, duration, and panel cleanliness.

Figure 4: Solar Panel Application Charts. This image displays a map of the United States divided into three solar zones, accompanied by a table showing the estimated number of gate cycles per day based on gate type (single/dual swing) and solar panel wattage for each zone.
Refer to the "Solar Panel Application Charts" (Figure 4) to estimate the number of gate cycles your system can support based on your geographical location and gate type. These charts provide guidance on expected performance under typical conditions.
Maintenance
Regular maintenance ensures optimal performance and extends the lifespan of your solar panel kit.
- Cleaning: Periodically clean the surface of the solar panel with a soft, damp cloth to remove dust, dirt, leaves, or other debris that may obstruct sunlight. Do not use abrasive cleaners.
- Inspections: Regularly inspect the panel, mounting hardware, and wiring for any signs of damage, corrosion, or loose connections. Tighten any loose bolts or connections.
- Vegetation: Ensure no new vegetation growth (trees, bushes) begins to cast shadows on the panel. Trim as necessary.
- Battery Check: Periodically check the gate opener battery's charge level, especially during prolonged periods of cloudy weather or low sunlight.
Troubleshooting
If your gate opener battery is not charging or experiencing low power, consider the following:
- No Sunlight: Verify the solar panel is receiving direct, unobstructed sunlight for several hours each day. Check for shadows from trees, buildings, or other objects.
- Dirty Panel: Clean the solar panel surface thoroughly. Accumulation of dirt or debris can significantly reduce efficiency.
- Loose Connections: Inspect all wiring connections between the solar panel and the gate opener control board. Ensure they are secure and free from corrosion.
- Incorrect Polarity: Double-check that the positive (+) and negative (-) wires are connected correctly.
- Damaged Panel/Wiring: Look for any visible damage to the solar panel itself or the connecting wires.
- Battery Condition: The gate opener battery may be old or faulty and unable to hold a charge. Test the battery independently if possible.
- Insufficient Wattage: For dual gate openers or high-usage applications, a single 10W panel might be insufficient, especially in areas with less sun (refer to Figure 4). Consider adding another panel or a higher wattage option if available.
Specifications
| Feature | Detail |
|---|---|
| Model Number | FM123 |
| Maximum Power Output | 10 Watts |
| Efficiency | High Efficiency |
| Material | Steel, Silicon, Glass |
| Item Weight | 3 Pounds |
| Compatibility | Designed for GTO/Mighty Mule gate opener systems |
| Manufacturer | NORTEK SECURITY & CONTROL LLC |
Warranty Information
The GTO 10W Solar Panel Kit (Model FM123) typically comes with a one-year limited warranty. For specific details regarding your warranty coverage, including terms, conditions, and how to make a claim, please refer to the documentation included with your product or contact GTO customer support.
Customer Support
For technical assistance, replacement parts, or further inquiries regarding your GTO 10W Solar Panel Kit, please contact GTO customer support. Contact information can usually be found on the manufacturer's website or in the product packaging.
When contacting support, please have your product model number (FM123) and purchase date available.


