
Tamron 272EE
Tamron AF 90mm f/2.8 Di SP A/M 1:1 Macro Lens (Model 272EE) Instruction Manual
Brand: Tamron | Model: 272EE
Introduction
This manual provides comprehensive instructions for the Tamron AF 90mm f/2.8 Di SP A/M 1:1 Macro Lens (Model 272EE) designed for Canon Digital SLR Cameras. It covers essential information regarding the lens's features, setup, operation, maintenance, and specifications to help you achieve optimal performance and capture stunning macro and portrait photography.
The Tamron 90mm Macro lens, often referred to as "the portrait macro," is a versatile lens suitable for both film and digital photography. Its optical system is designed to meet the performance characteristics of digital SLR cameras, offering improved resolution, chromatic correction, and coatings.
Key Features
- Di (Digitally Integrated Design): Optical systems designed for digital SLR cameras.
- SP (Super Performance) Series: Ultra-high-performance lens designed for superior image quality.
- AF/MF Switch Mechanism: Allows quick switching between autofocus and manual focus by sliding the focus ring.
- 1:1 Macro Magnification: Capable of true life-size macro photography.
- Focal Length: 90mm, ideal for macro and portrait photography.
- Aperture: f/2.8, providing excellent low-light performance and shallow depth of field.
Product Overview
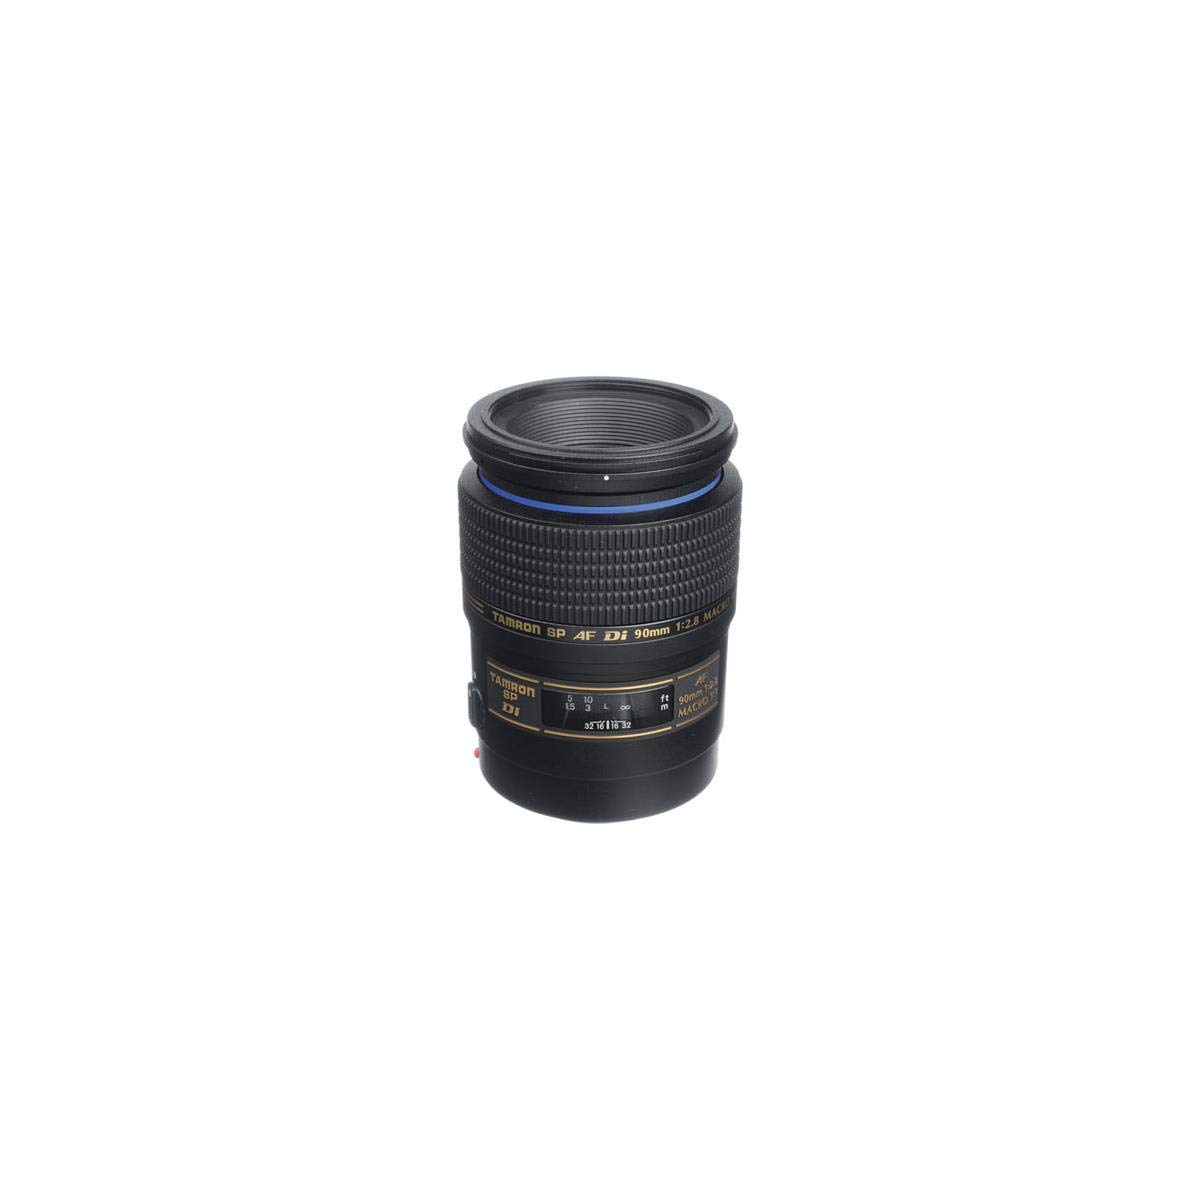
Front view of the Tamron AF 90mm f/2.8 Di SP A/M 1:1 Macro Lens (Model 272EE). The lens features a black barrel with gold lettering for 'Tamron SP AF Di 90mm 1:2.8 Macro' and a blue ring near the mount. The focus distance window shows measurements in feet and meters, along with aperture markings.

The Tamron AF 90mm f/2.8 Di SP A/M 1:1 Macro Lens (Model 272EE) shown with its included lens hood attached. The lens hood helps to reduce flare and protect the front element of the lens.
Setup
- Attaching the Lens: Align the mounting index on the lens with the corresponding index on your Canon Digital SLR camera body. Rotate the lens clockwise until it clicks securely into place.
- Removing the Lens: While pressing the lens release button on your camera body, rotate the lens counter-clockwise until it stops, then detach it.
- Lens Hood Attachment: Attach the included lens hood by aligning its mark with the mark on the front of the lens and twisting until it locks. The lens hood helps to prevent stray light from entering the lens and causing flare.
- AF/MF Switch: Locate the AF/MF switch on the lens barrel. Slide it to 'AF' for autofocus or 'MF' for manual focus. Ensure the camera's focus mode is also set appropriately (e.g., AF on the lens and AF on the camera).
Operating the Lens
Macro Photography Basics
Macro photography allows you to capture extreme close-ups of small subjects, revealing intricate details not visible to the naked eye. This lens offers a 1:1 magnification ratio, meaning the subject is projected onto the camera's sensor at its actual life size.
This video provides an introduction to macro photography, explaining concepts like magnification ratio and life-size imaging. It demonstrates the difference between quarter life-size and true 1:1 macro, showcasing the detailed results achievable with a dedicated macro lens.
Focus Modes (AF/MF)
The lens features an Auto-focus/Manual-focus (AF/MF) switch mechanism on the focus ring. This allows for quick transitions between focusing modes, which is particularly useful in various shooting scenarios.
- Autofocus (AF): For general photography, the AF mode provides convenient and fast focusing.
- Manual Focus (MF): In macro photography, precise focusing is critical due to the shallow depth of field. Manual focus offers greater control, allowing you to fine-tune the focus exactly where you need it.
This video explains the different autofocus modes available on your camera and how to select the appropriate focus point. It highlights the importance of choosing the correct focus mode for various photographic situations, including the use of single-shot and continuous autofocus.
Depth of Field and Aperture
When shooting close-up, the depth of field becomes very shallow. To increase the depth of field and ensure more of your subject is in focus, use a smaller aperture (higher f-number). This will require a slower shutter speed or increased ISO.
Stability and Shutter Speed
Close-up photography magnifies any camera movement, leading to blurry images. Using a sturdy tripod is highly recommended to maintain sharpness. If hand-holding, ensure sufficient light and a fast enough shutter speed to minimize blur.
Background Considerations
In macro photography, the background can significantly impact your image. A carefully chosen background can enhance your subject, while a distracting one can detract from it. Pay attention to colors, textures, and how they interact with your main subject.
Lighting
Adequate lighting is crucial for macro photography. Natural light can be effective, but artificial light sources like flash can provide more control and allow for smaller apertures. Consider using diffusers to soften harsh light.
This video discusses various aspects of flash photography, including how to use flash effectively to illuminate subjects and control exposure. It covers techniques that can be applied to macro photography for better lighting.
This video offers tips and techniques for night photography, emphasizing the importance of a tripod and manual focus in low-light conditions. While not exclusively macro, the principles of stability and manual control are relevant.
White Balance
White balance ensures that colors in your photos are accurately represented, regardless of the light source. Your camera has automatic white balance and various presets (e.g., Daylight, Cloudy, Tungsten, Fluorescent) to match different lighting conditions.
This video explains the concept of white balance and its importance in achieving accurate colors in your photographs. It demonstrates how different light sources have varying color temperatures and how to use your camera's white balance settings to compensate.
Maintenance
- Cleaning the Lens: Use a soft, lint-free microfiber cloth to gently wipe dust and smudges from the lens elements. For stubborn marks, use a specialized lens cleaning solution applied to the cloth, not directly to the lens.
- Cleaning the Lens Barrel: Wipe the exterior of the lens with a clean, dry cloth. Avoid using harsh chemicals or solvents.
- Storage: When not in use, store the lens with both front and rear caps attached in a dry, cool place away from direct sunlight and extreme temperatures. Using a desiccant pack can help prevent mold and mildew in humid environments.
- Avoid Impact: Protect the lens from drops and impacts, which can damage the optical elements or internal mechanisms.
Troubleshooting
- Blurry Images:
- Check focus mode (AF/MF). Ensure it matches your intent.
- Verify shutter speed is fast enough to prevent camera shake, especially when hand-holding. Use a tripod for critical sharpness.
- Increase aperture (higher f-number) to gain more depth of field in macro shots.
- Autofocus Not Working:
- Ensure the AF/MF switch on the lens is set to 'AF'.
- Check the camera body's focus mode setting.
- Clean the lens and camera contacts.
- In very low light or with low-contrast subjects, autofocus may struggle. Switch to manual focus.
- Dust on Sensor/Lens:
- Use a blower brush to remove dust from the lens elements.
- If dust appears in photos, it might be on the camera sensor. Refer to your camera manual for sensor cleaning procedures or consult a professional.
Specifications
| Specification | Detail |
|---|---|
| Product Dimensions | 3.82 x 2.83 x 2.83 inches |
| Item Weight | 14.3 ounces |
| ASIN | B00021EEA4 |
| Item Model Number | 272EE |
| Batteries Required | 1 9V batteries required (for camera, not lens itself) |
| Date First Available | April 13, 2006 |
| Manufacturer | Tamron |
| Brand | Tamron |
| Focal Length Description | 90 mm |
| Lens Type | Macro |
| Compatible Mountings | Canon EF |
| Camera Lens Description | Tamron AF 90mm f/2.8 Di SP A/M 1:1 Macro Lens for Canon Digital SLR Cameras (Model 272EE) |
Warranty and Support
For warranty information and technical support, please refer to the official Tamron website or contact Tamron customer service directly. Keep your purchase receipt as proof of purchase for any warranty claims.
You can visit the Tamron Store on Amazon for additional product information and resources.
Ask a question about this manual
Ask about setup, troubleshooting, compatibility, parts, safety, or missing instructions. Manuals+ will review the question and use this page’s manual context to help answer it.