
Olympus VN-480PC
Olympus VN-480PC Digital Voice Recorder User Manual
Model: VN-480PC
1. Introduction
This manual provides detailed instructions for the proper use and maintenance of your Olympus VN-480PC Digital Voice Recorder. Please read this manual thoroughly before using the device to ensure optimal performance and longevity.
The Olympus VN-480PC is a compact digital voice recorder featuring 64 MB of built-in flash memory, offering up to 8 hours of recording time. It includes convenient PC connectivity for file transfer, voice activation, and simple thumb-pad navigation.
2. Package Contents
Verify that all items are present in the package:
- Olympus VN-480PC Digital Voice Recorder
- 2 x AAA Batteries
- USB Cable
- Digital Wave Player Software (CD-ROM)
- Instruction Manual (this document)
3. Product Overview
Familiarize yourself with the components and controls of your VN-480PC recorder.
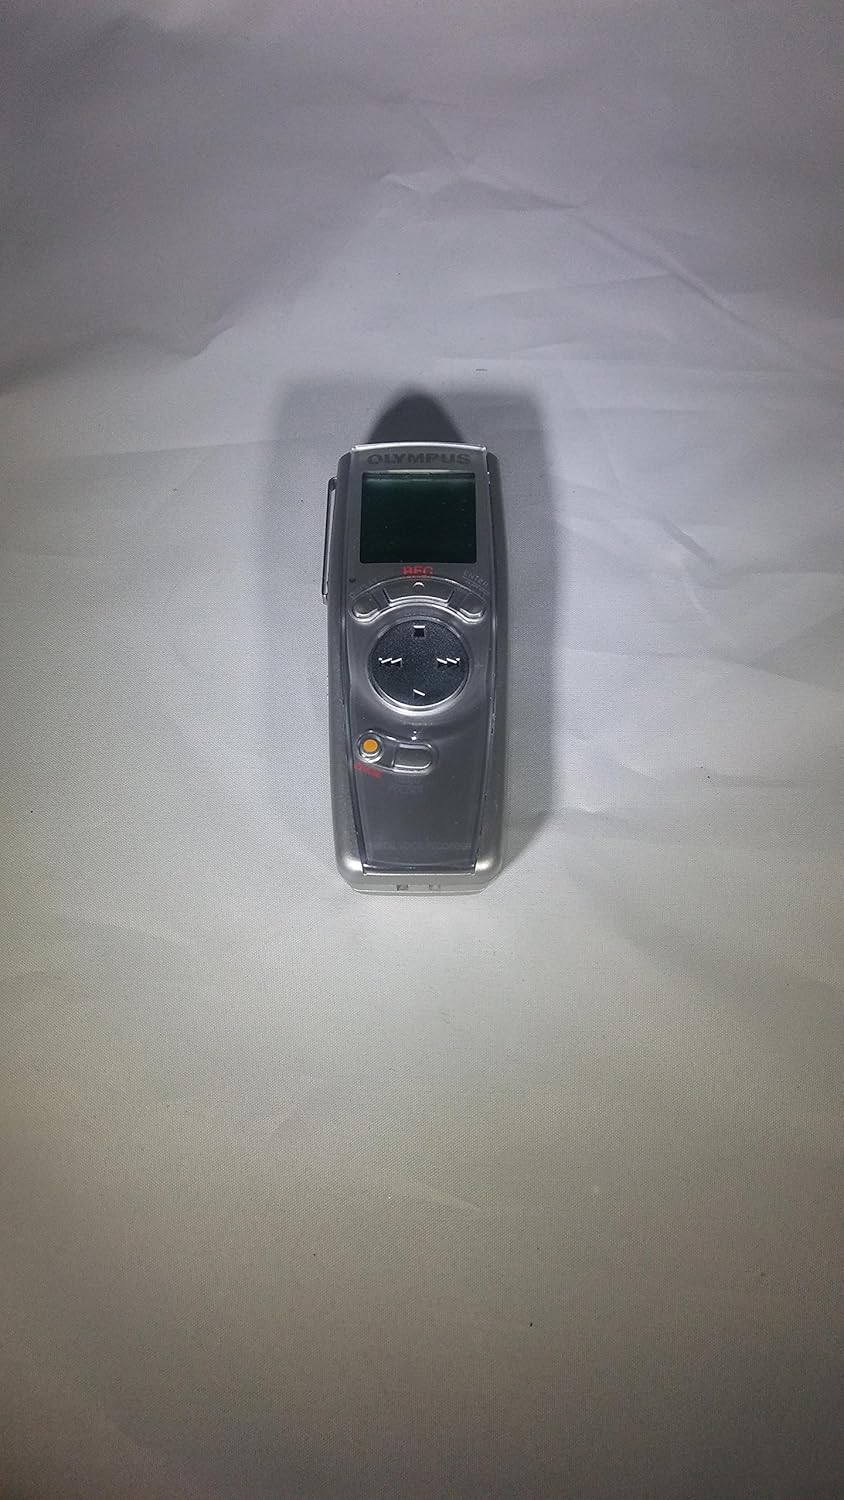
Figure 3.1: Front View of VN-480PC. This image displays the front of the Olympus VN-480PC digital voice recorder, showing the LCD screen, navigation thumb-pad, and recording/playback buttons. The device is silver-colored with a dark screen and black controls.

Figure 3.2: Rear View of VN-480PC. This image shows the back of the Olympus VN-480PC digital voice recorder, highlighting the built-in speaker grille, battery compartment cover, and regulatory markings. The device is silver with a textured speaker area.
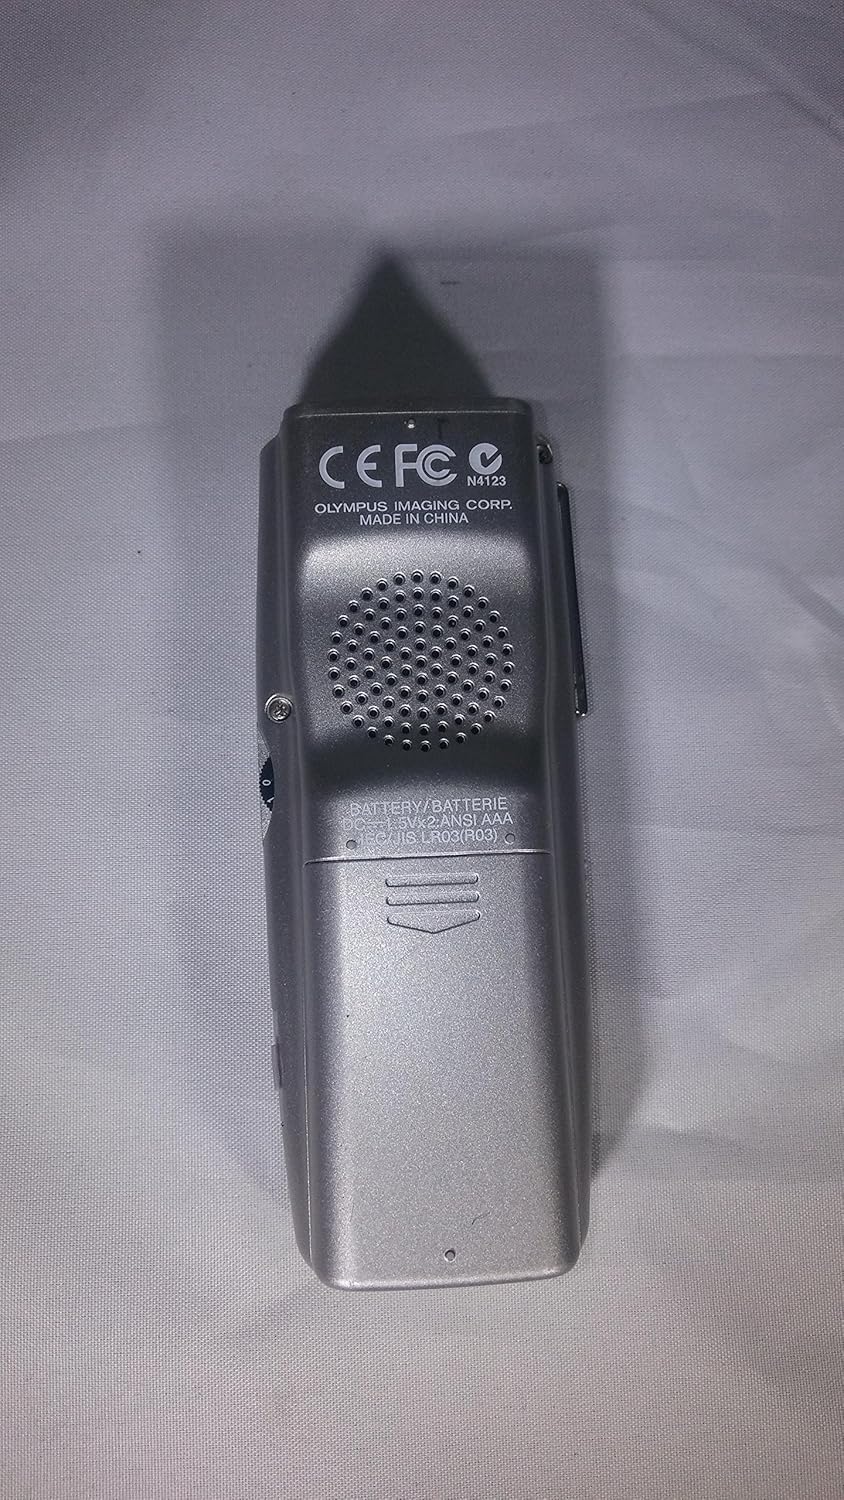
Figure 3.3: Rear View of VN-480PC (Alternative Angle). Similar to Figure 3.2, this image provides another angle of the rear of the Olympus VN-480PC, emphasizing the battery compartment and the metal clip for hands-free recording. The silver finish and speaker details are clearly visible.
3.1. Controls and Indicators
- LCD Display: Shows recording mode, time, battery life, and file information.
- Thumb-pad Navigation: Used for menu navigation and file selection.
- Record Button: Initiates recording.
- Play/Stop Button: Starts or stops playback.
- Erase Button: Deletes selected files.
- Folder Button: Switches between file folders (A, B, C, D).
- Microphone Jack: For connecting an external microphone.
- Earphone Jack: For connecting headphones.
- USB Port: For connecting to a PC.
- Built-in Microphone: Captures audio.
- Built-in Speaker: For audio playback.
- Battery Compartment: Holds 2 AAA batteries.
4. Setup
4.1. Installing Batteries
- Locate the battery compartment cover on the back of the recorder.
- Slide the cover in the direction indicated by the arrow to open it.
- Insert two AAA batteries, ensuring correct polarity (+/-) as marked inside the compartment.
- Close the battery compartment cover until it clicks securely into place.
Note: The device operates for approximately 25 hours on new AAA batteries. Replace batteries when the low battery indicator appears on the LCD.
4.2. Initial Power On and Date/Time Setting
- Press and hold the POWER button (if present, otherwise assume power on by inserting batteries or first button press).
- The LCD display will light up. If this is the first use, you may be prompted to set the date and time.
- Use the thumb-pad navigation buttons (Up/Down/Left/Right) to adjust the year, month, day, hour, and minute.
- Press the OK or SET button (usually the center of the thumb-pad) to confirm each setting.
4.3. Installing Digital Wave Player Software
The included CD-ROM contains the Digital Wave Player software, which is necessary for transferring and managing audio files on your PC.
- Insert the Digital Wave Player CD-ROM into your computer's CD/DVD drive.
- Follow the on-screen instructions to install the software. If the installer does not launch automatically, navigate to the CD-ROM drive in "My Computer" or "This PC" and run the "setup.exe" file.
- Once installation is complete, restart your computer if prompted.
Note: Ensure your PC meets the minimum system requirements for the software. Refer to the software's documentation for details.
5. Operating Instructions
5.1. Recording Audio
- Select a Folder: Press the FOLDER button to choose one of the four available folders (A, B, C, D) for your recording.
- Select Recording Mode: Press the MENU button (or similar, assuming a menu button for settings) and navigate to "REC MODE" to select your desired recording quality:
- HQ (High Quality): Approximately 2 hours recording time.
- SP (Standard Play): Approximately 4 hours recording time.
- LP (Long Play): Approximately 8 hours recording time.
- Start Recording: Press the REC (Record) button. The recording indicator will light up, and the recording time will begin counting on the LCD.
- Pause Recording: Press the REC button again during recording to pause. Press it once more to resume.
- Stop Recording: Press the STOP button. The recorded file will be saved in the selected folder.
5.2. Voice Activation Recording (VCVA)
The Voice Control Voice Actuator (VCVA) function allows the recorder to start and stop recording automatically in response to sound, conserving memory and battery life.
- While in stop mode, press the MENU button.
- Navigate to "VCVA" and select "ON".
- Press the REC button. The recorder will now only record when sound is detected above a certain threshold.
- To exit VCVA mode, press the STOP button, then turn VCVA "OFF" in the menu.
5.3. Playback
- Select a Folder: Press the FOLDER button to navigate to the folder containing the desired file.
- Select a File: Use the FORWARD (►►) or REWIND (◄◄) buttons on the thumb-pad to select the file you wish to play.
- Start Playback: Press the PLAY (►) button.
- Adjust Volume: Use the VOLUME + and VOLUME - buttons (or Up/Down on thumb-pad) during playback.
- Stop Playback: Press the STOP button.
5.4. Erasing Files
- In stop mode, select the file you wish to erase using the FORWARD or REWIND buttons.
- Press the ERASE button.
- The display will show "ERASE?". Use the thumb-pad to select "YES" and press the OK button to confirm.
5.5. Connecting to a PC
The VN-480PC can be connected to a computer to transfer and manage recorded audio files using the Digital Wave Player software.
- Ensure the Digital Wave Player software is installed on your PC.
- Connect the smaller end of the supplied USB cable to the USB port on the side of the VN-480PC.
- Connect the larger end of the USB cable to an available USB port on your computer.
- The recorder's display will indicate "PC LINK" or similar, and your computer should recognize the device.
- Launch the Digital Wave Player software on your PC to access and transfer files.
For detailed instructions on using the Digital Wave Player software, refer to the software's help documentation.
6. Maintenance
- Cleaning: Wipe the recorder's exterior with a soft, dry cloth. Do not use liquid cleaners or solvents.
- Battery Care: Remove batteries if the recorder will not be used for an extended period to prevent leakage.
- Storage: Store the device in a cool, dry place away from direct sunlight, extreme temperatures, and high humidity.
- Avoid Impact: Protect the device from strong impacts or drops, which can damage internal components.
7. Troubleshooting
| Problem | Possible Cause | Solution |
|---|---|---|
| Recorder does not power on. | Batteries are dead or inserted incorrectly. | Replace batteries with new ones, ensuring correct polarity. |
| No sound during playback. | Volume is too low; headphones are connected; speaker is damaged. | Increase volume. Disconnect headphones. If speaker is damaged, use headphones or connect to PC. |
| Cannot transfer files to PC. | USB cable is not connected properly; Digital Wave Player software is not installed or running; PC USB port issue. | Ensure USB cable is securely connected. Install/reinstall Digital Wave Player software. Try a different USB port on your PC. |
| Recording time is shorter than expected. | Recording in HQ mode; low battery; memory is full. | Switch to SP or LP mode for longer recording. Replace batteries. Transfer files to PC and erase from recorder to free up memory. |
8. Specifications
- Model: VN-480PC
- Recording Medium: Built-in Flash Memory (64 MB)
- Recording Time:
- HQ Mode: Approx. 2 hours
- SP Mode: Approx. 4 hours
- LP Mode: Approx. 8 hours
- Power Source: 2 x AAA Batteries
- Battery Life: Approx. 25 hours (continuous operation)
- Dimensions (W x H x D): 1.54 x 3.9 x 0.85 inches (39.1 x 99.1 x 21.6 mm)
- Weight: 2.4 ounces (68 grams) (including batteries)
- PC Connectivity: USB
- Jacks: Microphone In (3.5mm), Earphone Out (3.5mm)
- Display: LCD
- Folders: 4 (A, B, C, D)
- Voice Activation: Yes (VCVA)
- Included Software: Digital Wave Player (CD-ROM)
9. Warranty and Support
For warranty information and technical support, please refer to the warranty card included with your product or visit the official Olympus support website. Keep your purchase receipt as proof of purchase for warranty claims.
Online Support: www.olympus-imaging.com/support (Example link, actual link may vary)
Contact Information: Refer to your regional Olympus contact details for phone or email support.
Related documentsVN-480PC


Ask a question about this manual
Ask about setup, troubleshooting, compatibility, parts, safety, or missing instructions. Manuals+ will review the question and use this page’s manual context to help answer it.