
Introduction
Welcome to your Sharper Image Travel Soother 20 Radio/Alarm Clock. This manual provides detailed instructions for the proper setup, operation, and maintenance of your device. Please read this manual thoroughly before use and retain it for future reference.
Safety Information
- Do not expose the unit to extreme temperatures, direct sunlight, or high humidity.
- Avoid dropping the unit or subjecting it to strong impacts.
- Do not disassemble the unit. Refer all servicing to qualified personnel.
- Use only the specified power adapter (DC 6V) or batteries (4x AA 1.5V).
- Keep the unit away from water or other liquids.
Package Contents
- Sharper Image Travel Soother 20 Unit
- User Manual
Product Overview
Familiarize yourself with the various parts of your Travel Soother 20 unit.
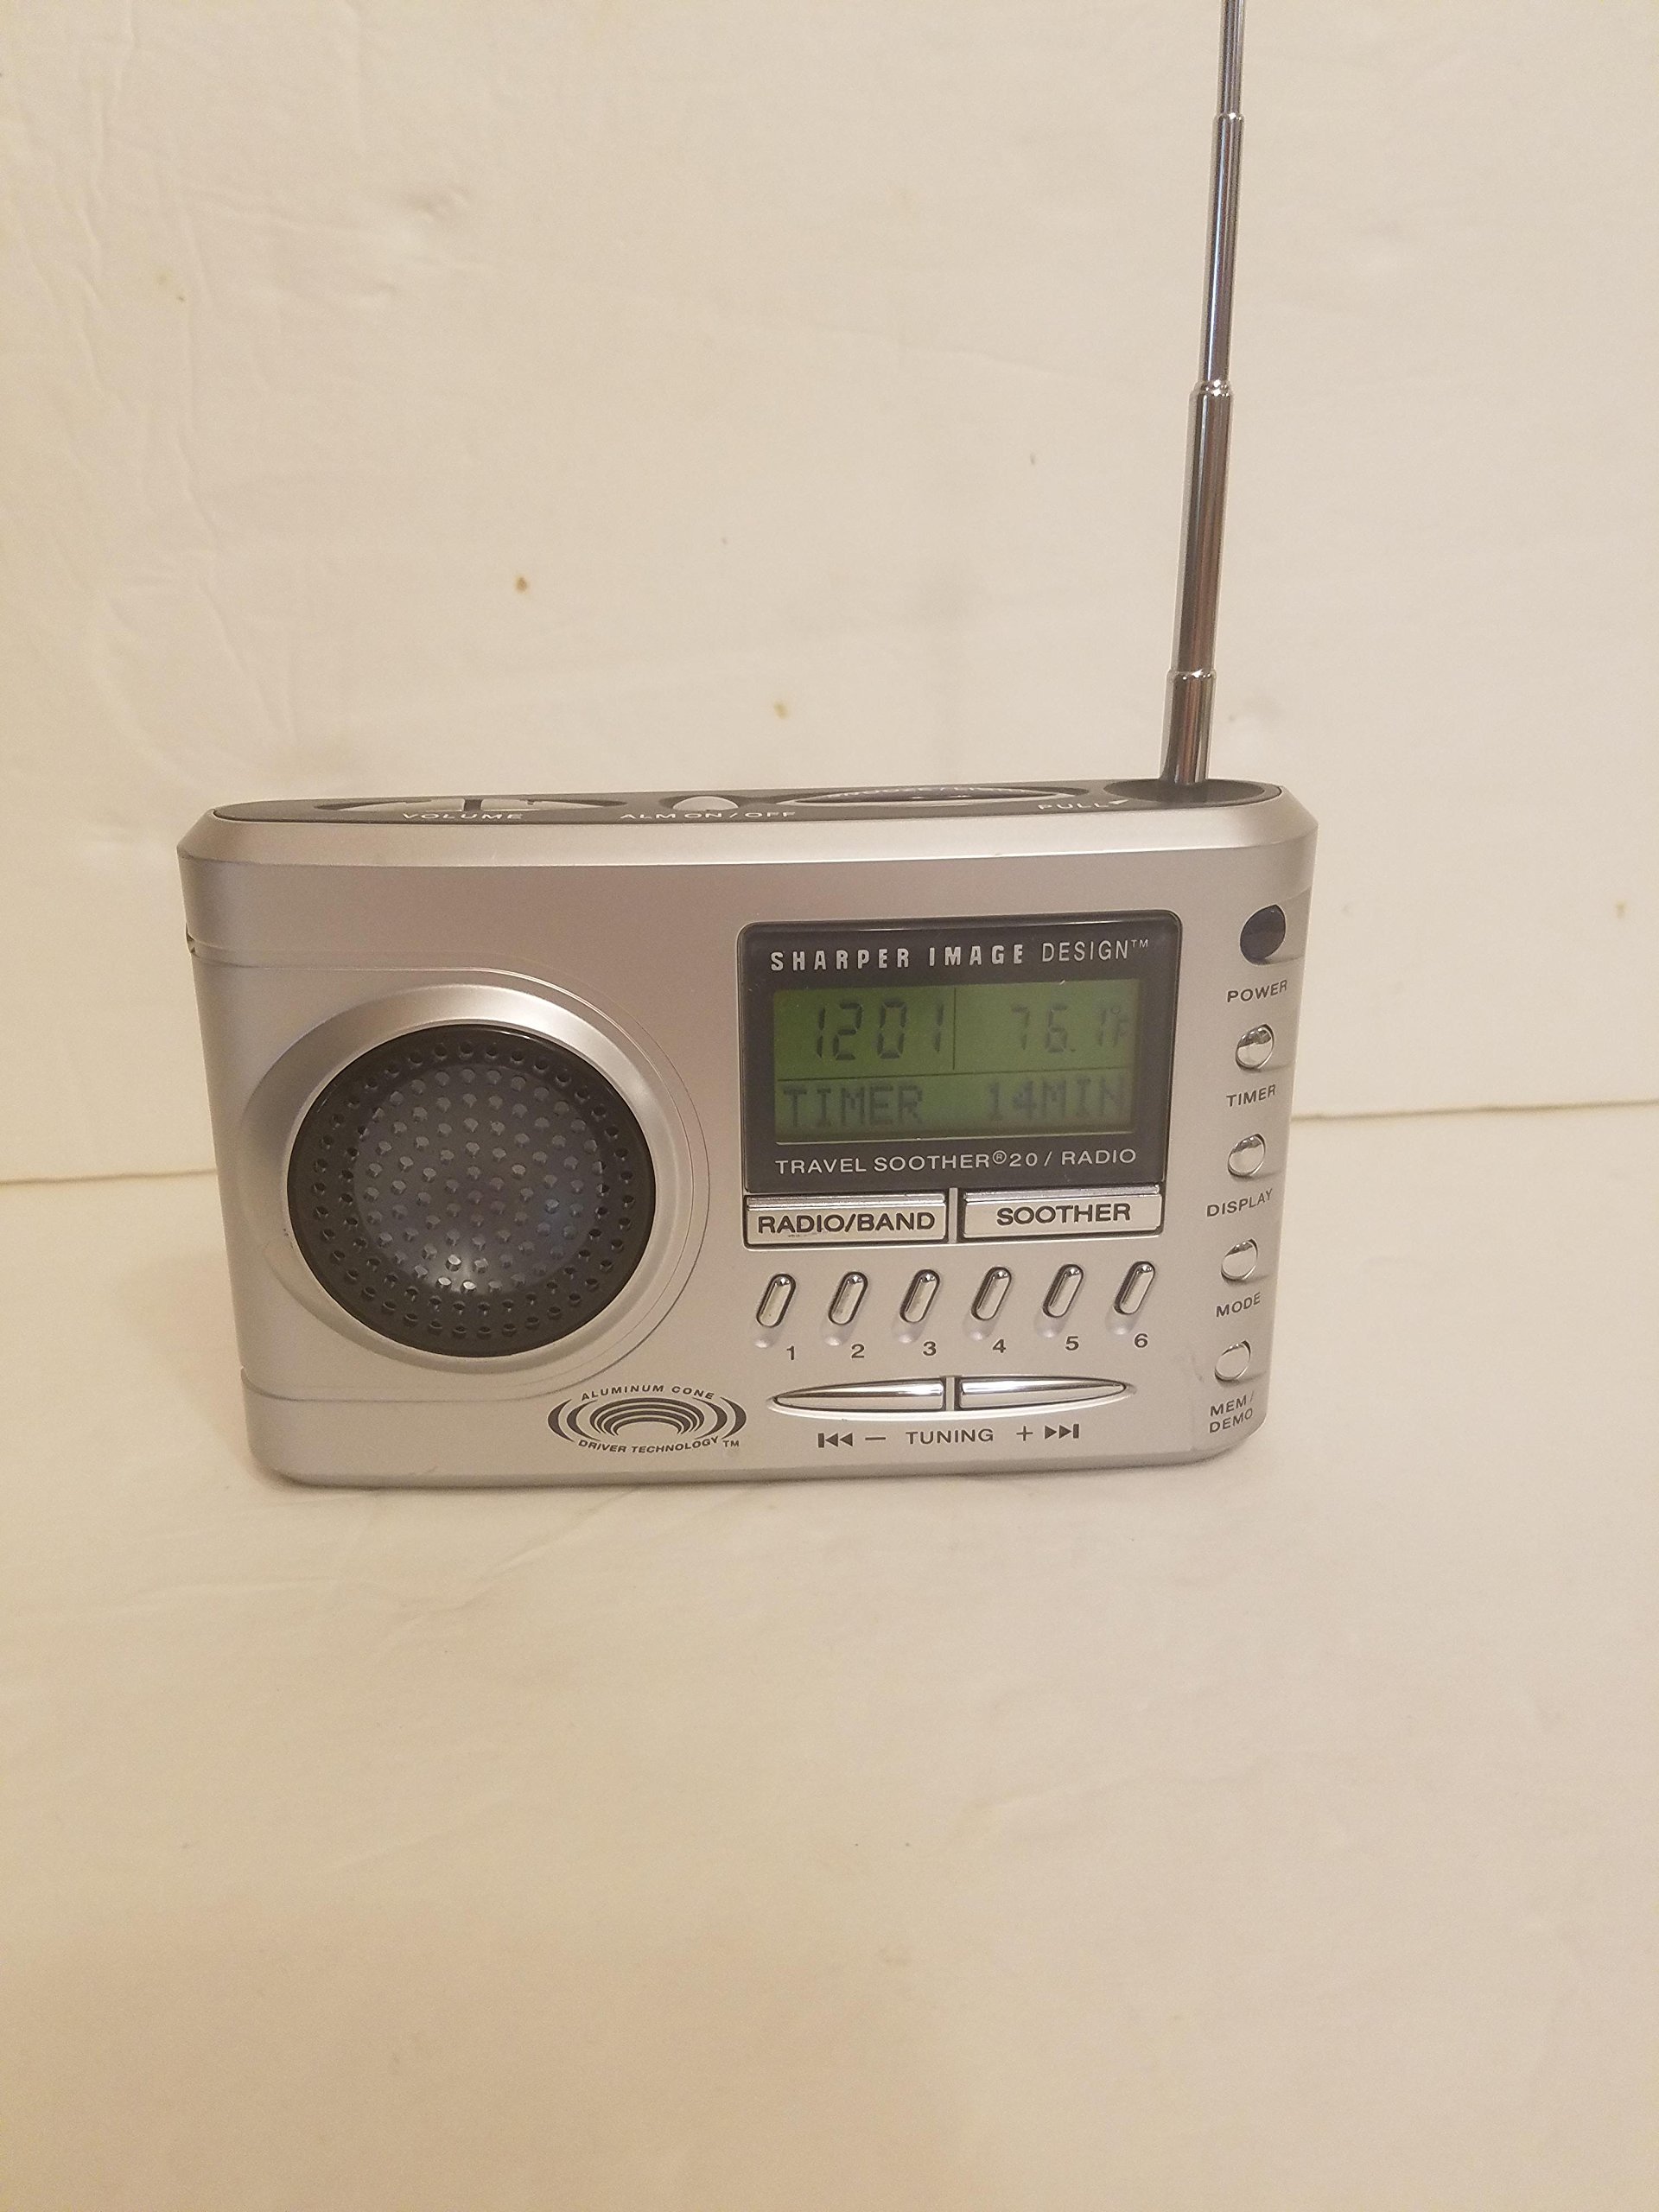
Image: Front view of the Sharper Image Travel Soother 20 Radio/Alarm Clock. This shows the display, speakers, and control buttons.
The back panel of the unit features the battery compartment, power input, and regulatory information. Specifically, it indicates the model number SI621, requires a DC 6V adapter, and uses four AA 1.5V batteries.
Setup
Powering the Device
Your Travel Soother 20 can be powered by either batteries or an AC adapter.
- Battery Installation: Open the battery compartment on the back of the unit. Insert four (4) AA 1.5V batteries, ensuring correct polarity (+/-). Close the compartment securely.
- AC Adapter Connection: Connect a DC 6V power adapter (not always included) to the DC IN jack on the back of the unit. Plug the adapter into a standard wall outlet.
Note: When both batteries and AC adapter are connected, the unit will primarily draw power from the AC adapter.
Setting the Time
- Press and hold the TIME SET button.
- While holding TIME SET, use the HOUR and MINUTE buttons to adjust the current time.
- Release the TIME SET button to confirm.
Operating Instructions
Radio Operation
- Press the RADIO button to turn on the radio.
- Press AM/FM to select the desired band.
- Use the TUNE +/- buttons to manually tune to a station, or press and hold to auto-scan for the next available station.
- To save a preset: Tune to the desired station, then press and hold a PRESET button (e.g., 1-5) until the display flashes.
- To recall a preset: Briefly press the corresponding PRESET button.
Alarm Clock Functions
- Setting the Alarm: Press and hold the ALARM SET button. While holding, use the HOUR and MINUTE buttons to set the alarm time. Release to confirm.
- Activating/Deactivating Alarm: Press the ALARM ON/OFF button to toggle the alarm. An alarm icon will appear on the display when active.
- Snooze Function: When the alarm sounds, press the SNOOZE button to temporarily silence it for a few minutes.
- Stopping the Alarm: Press any button other than SNOOZE to stop the alarm for the day. It will reactivate the next day if still enabled.
Sound Soother Functions
- Press the SOOTHER button to activate the sound soother.
- Press the SOOTHER button repeatedly to cycle through available sound options (e.g., Rain, Thunderstorm, Summer Night, City).
- Use the VOLUME +/- buttons to adjust the sound level.
- Press the SOOTHER button until the display shows 'OFF' to deactivate.
Maintenance
- Cleaning: Wipe the unit with a soft, dry cloth. Do not use abrasive cleaners or solvents.
- Battery Replacement: Replace all four AA batteries simultaneously when the display dims or the unit malfunctions on battery power. Do not mix old and new batteries.
- Storage: If storing the unit for an extended period, remove the batteries to prevent leakage.
Troubleshooting
| Problem | Solution |
|---|---|
| Unit does not power on. | Check battery installation and polarity. Ensure AC adapter is securely connected and the outlet is functional. |
| Poor radio reception. | Extend the antenna fully. Reposition the unit for better signal. Try tuning manually. |
| Alarm does not sound. | Ensure the alarm is activated (alarm icon visible). Verify alarm time is set correctly. Check volume level. |
| Sound soother not working. | Ensure the sound soother is turned on and a sound is selected. Check volume level. |
Specifications
- Model: SI621
- Power Input: DC 6V (adapter, not always included)
- Battery: 4x AA 1.5V (UM-3)
- Package Dimensions: 6.4 x 6.3 x 3.7 inches
- Item Weight: 15.7 ounces
- ASIN: B00013891I
- Date First Available: February 26, 2010
FCC Compliance Statement
THIS DEVICE COMPLIES WITH PART 15 OF THE FCC RULES. OPERATION IS SUBJECT TO THE FOLLOWING TWO CONDITIONS: (1) THIS DEVICE MAY NOT CAUSE HARMFUL INTERFERENCE, AND (2) THIS DEVICE MUST ACCEPT ANY INTERFERENCE RECEIVED, INCLUDING INTERFERENCE THAT MAY CAUSE UNDESIRED OPERATION.
Warranty and Support
For warranty information or technical support, please refer to the original product packaging or contact Sharper Image customer service. Keep your purchase receipt as proof of purchase.


