
Introduction
This manual provides detailed instructions for the proper setup, operation, and maintenance of your OLYMPUS Pearlcorder L400 Microcassette Recorder Kit. Please read this manual thoroughly before using the device to ensure optimal performance and longevity.
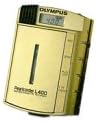
Image: The OLYMPUS Pearlcorder L400 Microcassette Recorder, a compact gold-colored device with an LCD display and control buttons.
Package Contents
Verify that all items are present in your OLYMPUS Pearlcorder L400 Kit:
- OLYMPUS Pearlcorder L400 Microcassette Recorder
- Leather Case
- Earphone
- 1 AAA Battery
- AC Cord (AC Adapter)
Setup
1. Battery Installation
- Locate the battery compartment cover on the back of the recorder.
- Slide the cover open.
- Insert one AAA battery, ensuring correct polarity (+ and - terminals).
- Close the battery compartment cover securely.
2. Powering with AC Adapter
- Connect the AC cord to the DC input jack on the recorder.
- Plug the other end of the AC cord into a standard electrical outlet.
- The recorder can operate directly from AC power or charge rechargeable batteries (if applicable, not included).
3. Microcassette Tape Insertion
- Open the cassette compartment door.
- Insert a microcassette tape with the open side facing the recorder's head.
- Gently push the tape until it clicks into place.
- Close the cassette compartment door.
Operating Instructions
Basic Controls
- Record (REC): Press to begin recording.
- Play (PLAY): Press to listen to recordings.
- Stop (STOP): Press to halt any operation.
- Rewind (REW): Press to rewind the tape.
- Fast Forward (FF): Press to fast forward the tape.
- Eject (EJECT): Slide or press to open the cassette compartment.
Recording
- Ensure a microcassette tape is inserted.
- Press the REC button. The recording indicator will illuminate.
- Speak clearly into the built-in microphone.
- To stop recording, press the STOP button.
Variable Control Voice Actuation (VCVA)
The VCVA feature allows for hands-free recording by automatically starting and stopping recording based on sound detection. This conserves tape and battery life.
- Locate the VCVA switch or setting on your device.
- Activate VCVA.
- Press the REC button. The recorder will now only record when sound is detected above a certain threshold and pause when silence occurs.
- To deactivate VCVA, switch it off or press STOP.
Dual Tape Speeds
The Pearlcorder L400 supports two tape speeds: 2.4 cm/sec and 1.2 cm/sec. The slower speed (1.2 cm/sec) doubles the recording time on a single tape, while the faster speed (2.4 cm/sec) offers higher fidelity.
- Select the desired tape speed using the speed switch (usually located on the side or bottom of the unit).
- The selected speed will be active for both recording and playback.
Playback
- Ensure a recorded microcassette tape is inserted.
- Use REW or FF to locate the desired starting point.
- Press the PLAY button.
- Adjust the volume using the volume control dial.
- To stop playback, press the STOP button.
- For private listening, connect the included earphone to the headphone jack.
LCD Display
The LCD display provides visual feedback on the recorder's status:
- Tape Direction: Indicates forward or reverse movement.
- Operation Mode: Shows current mode (e.g., REC, PLAY, STOP).
- Tape Counter: Displays the elapsed time or tape position.
Maintenance
Cleaning the Unit
- Wipe the exterior of the recorder with a soft, dry cloth.
- Do not use liquid cleaners or abrasive materials.
- Periodically clean the recording head and pinch roller with a cotton swab lightly dampened with isopropyl alcohol to ensure optimal sound quality.
Battery Care
- Remove the AAA battery if the recorder will not be used for an extended period to prevent leakage.
- Replace batteries when the power indicator dims or operation becomes inconsistent.
Tape Care
- Store microcassette tapes away from direct sunlight, high temperatures, and strong magnetic fields.
- Avoid touching the tape surface.
Troubleshooting
| Problem | Possible Cause | Solution |
|---|---|---|
| Recorder does not power on. | Dead or incorrectly inserted battery; AC adapter not connected. | Replace battery or ensure correct polarity. Connect AC adapter securely. |
| Poor recording or playback quality. | Dirty recording head; worn-out tape; low battery. | Clean the recording head. Try a new microcassette tape. Replace battery. |
| Tape does not move. | Tape jammed; battery low; mechanical issue. | Open compartment and re-insert tape. Replace battery. If issue persists, contact support. |
| VCVA not activating. | VCVA sensitivity too low; ambient noise too quiet. | Ensure VCVA is enabled. Speak closer to the microphone or increase volume. |
Specifications
- Model: OLYMPUS Pearlcorder L400
- Dimensions: Approximately 2.9 x 2.0 x 0.8 inches (7.4 x 6.4 x 1.3 cm)
- Weight: Approximately 3.2 ounces (90.7 grams) without battery
- Recording Medium: Microcassette Tape (e.g., XZ-90)
- Tape Speeds: 2.4 cm/sec and 1.2 cm/sec (up to 3 hours recording on XZ-90 tape at 1.2 cm/sec)
- Power Source: 1 x AAA Battery or AC Adapter (included)
- Battery Life: Approximately 3 hours (recording)
- Features:
- Variable Control Voice Actuation (VCVA)
- LCD Display (Tape direction, operation mode, tape counter)
- Built-in Microphone
- 3.5mm Headphone Jack
Warranty Information
OLYMPUS products are manufactured to high quality standards. This product is covered by a limited manufacturer's warranty. Please refer to the warranty card included with your purchase for specific terms, conditions, and duration. Retain your proof of purchase for warranty claims.
Support
For further assistance, technical support, or service inquiries, please visit the official Olympus website or contact Olympus customer service. Contact information can typically be found on the Olympus website or in the documentation provided with your product.
Online Resources: www.olympus-imaging.com (Please note: URL may vary by region and product line. Search for "Olympus support" for the most current information.)